Star Resonance, as an MMORPG, features many different classes. Most RPGs of this type have support classes, so what are the support roles in Star Resonance? How strong is the support class in Star Resonance? Currently, the game has only one support class called "Forest Speaker," and it's not hard to guess from the name that she is a healer. Below is a detailed introduction to how the Forest Speaker performs.

Skill Analysis
Each character can equip 3 basic skills, which are normal attack, special attack, and ultimate skill, plus four specialization skills, with the following options:
Vine Control: A normal attack, a mediocre transitional skill that doesn't need to be upgraded or advanced. It's mainly used for dealing damage while acquiring bud seeds.
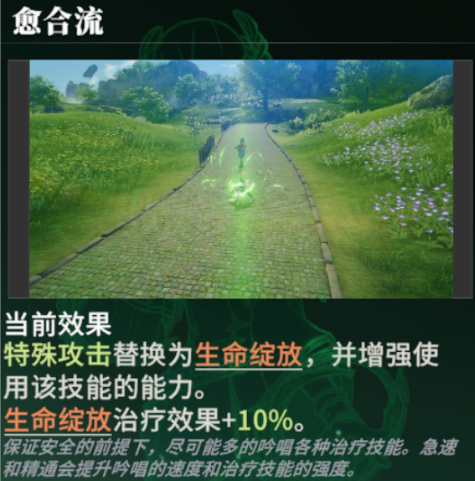
Wild Bloom: One of the core special attack skills, it deals medium-range, small-area damage and heals the teammate with the lowest HP. With buds, it gains a 20% performance boost, consuming up to two for a 40% increase. It is recommended to upgrade this first, and advance it when resources are sufficient. However, note that healing is only triggered when hitting an enemy, otherwise, it's ineffective if cast into empty space.
Hope Barrier: An ultimate skill, similar to a chi shield. It has a short cooldown, high healing, and provides significant damage reduction for a short time. This is one of the core skills for a healer and should be prioritized for upgrading, though it doesn't need to be advanced.
Unrestrained Seed: A key energy recovery skill, with a short cooldown, high multiplier, and the ability to charge twice. It is a must-have for the Punishment build (mentioned below) and should be prioritized for upgrading and then advancing. Although it takes up a skill slot, potentially compressing the space for healing skills, not bringing it would easily lead to an energy shortage, making it hard to heal. The skill has a high damage multiplier and can charge twice, almost like a fourth fixed skill. Like Wild Bloom, it only recovers energy upon hitting an enemy.
Nourish: While continuous healing may seem appealing, the actual amount of healing is quite low. It is not recommended to upgrade or advance this skill.
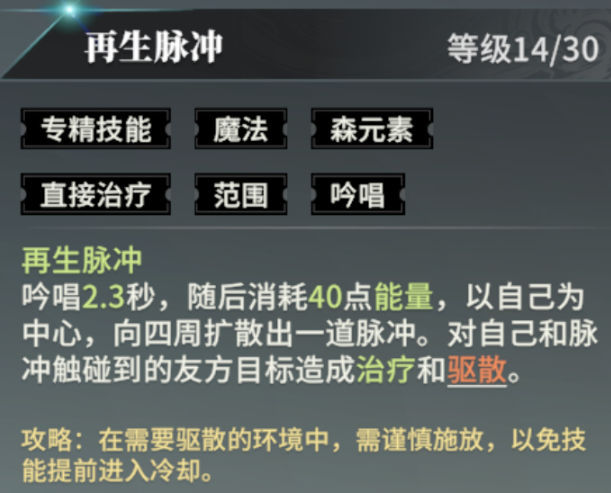
Regeneration Pulse: A core skill that must be equipped. Although it requires standing still to cast, and the healing effect only triggers once the shockwave hits a teammate, it carries some risk. However, it has high healing and a short cooldown, making it a reliable group healing method. It should be prioritized for upgrading, and the Healing build should prioritize advancing it.
Infusion: The logical core of the entire healer playstyle, with extremely high priority for the Punishment build. It not only recovers energy but also deals considerable damage. While the Healing build could give it up, losing Infusion means losing the potential to compete with Courage Wind Ring. At full rank, the multiplier reaches 1919%, with a cooldown of just 22 seconds, and the damage can be doubled with talents.
Wish of the Forest: Not as good as Regeneration Pulse, both in terms of cooldown and healing. If you choose this skill, you'll face a 4-second standstill and lower healing. The Healing build can upgrade it but it's not recommended to advance, and the Punishment build can completely ignore it.
Natural Protection: A better-performing shield skill, with instant casting and straightforward mechanics. The base multiplier is low (only 126%), but it reaches 315% at full rank. It should be brought based on the dungeon's needs, and is generally more practical than Wish of the Forest.
Blooming Charge: Similar to Nourish, it's somewhat redundant, but slightly better. It heals in a single instance without consuming energy and comes with a bit of control effect (such as dizziness), but bosses are immune to most abnormal states. The Punishment build can upgrade it but doesn't need to advance, and the Healing build can ignore it.
Accelerated Growth: Must be carried, and both upgrading and advancing should be maxed out.

Punishment Build Playstyle
The Punishment build is currently a strong playstyle. The energy recovery from Unrestrained Seed, the high damage from Infusion, and the frequent use of Wild Bloom perfectly fit the talent mechanism, with no waste. More importantly, this build's rotation is not based on randomness; it's smooth and highly efficient. No need for fancy positioning or critical hit reliance, just skill usage can produce high-multiplier output. It's not recommended to replace the ultimate, as even though it's an offensive healer, the 60% damage reduction at critical moments is extremely important. Don't forget your primary role as a healer.
Recommended skill combination: Unrestrained Seed + Infusion + Accelerated Growth + (Regeneration Pulse / Blooming Charge / Natural Protection at full rank); Operation cycle: Infusion → Unrestrained → Wild → Wild → Unrestrained; Skills can be interspersed with carry skills, and Accelerated Growth or Natural Protection can be released in advance at the start. Release Blooming Charge as needed. Always keep 40 energy points ready for emergency healing with Regeneration Pulse. Versatile
Healing Build Playstyle
The Healing build focuses on extreme healing, sacrificing almost all offensive capabilities. Due to the energy mechanism, it must retain Unrestrained Seed, occupying a valuable skill slot. Although the healing output is very high, the current version's environment doesn't require such excessive healing. Most classes' damage doesn't need that much healing, and bosses often one-shot, making resurrection beans more cost-effective. Grass Field requires standing still to cast, demanding high operational and positional skills, and most boss large-scale attacks like "Death Sentence" and "Steel Moon Ring" cannot be taken head-on. This makes the Healing build's fault tolerance relatively low. It's not recommended to replace the ultimate, as the 60% damage reduction is still crucial.
Recommended skill combination: Accelerated Growth + Regeneration Pulse + Unrestrained Seed / Nourish / Blooming Charge / Wish of the Forest / Natural Protection (at full rank); Operational method: Use Nourish if you bring it, use Protection if you bring it, watch the timing to heal teammates, and controlling energy is more important than pursuing a rotation. Mastering the Healing build can even forego Unrestrained Seed, focusing on energy distribution. Overall, the Healing build's healing output is excessive, and most of the time, it feels like "window shopping," leaning towards emergency rescue.

The above is a detailed introduction to the support class in Star Resonance. As of now, the Punishment build is stronger, capable of both dealing damage and healing, while the Healing build is left with only healing. When forming a team, if the group lacks the output from the Forest Speaker, the team's overall output pressure will increase, thus, the Punishment build is more recommended.