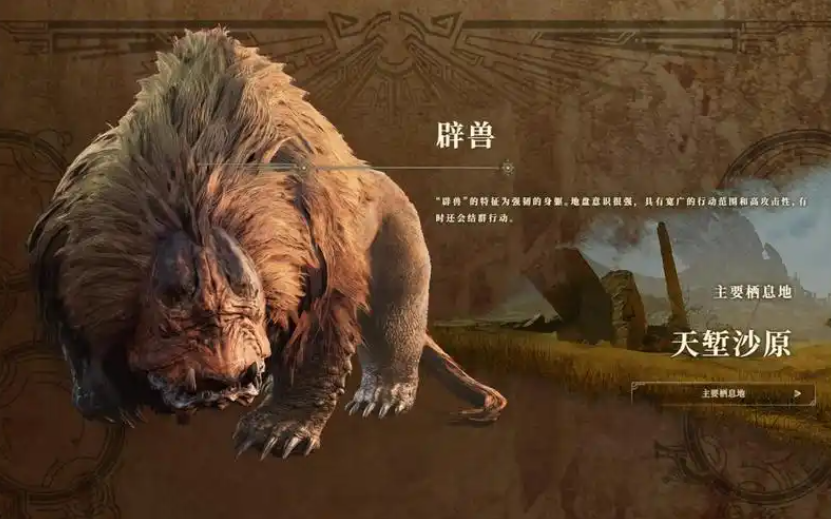
The PC version of "Monster Hunter Wilds" is about to be released. Today, we will briefly introduce the moves of Bishou and some handling techniques and key points in actual combat. So, how do you fight Bishou in Monster Hunter Wilds? Initially, many players might have thought that Bishou was a small animal, but it turns out to be the king of the Skyridge Sands. Combined with the numerical settings in the demo, this makes the challenge quite difficult.
【biubiu Accelerator】Latest Version Download
》》》》》#biubiu Accelerator#《《《《《
First, let's showcase its skills, which are among the most in this beta test, and its output and flexibility are also quite explosive. Under the same 5 purple conditions, Bishou is much harder to deal with than Kirin.

Forward Bite: May come in 2 or more consecutive attacks.
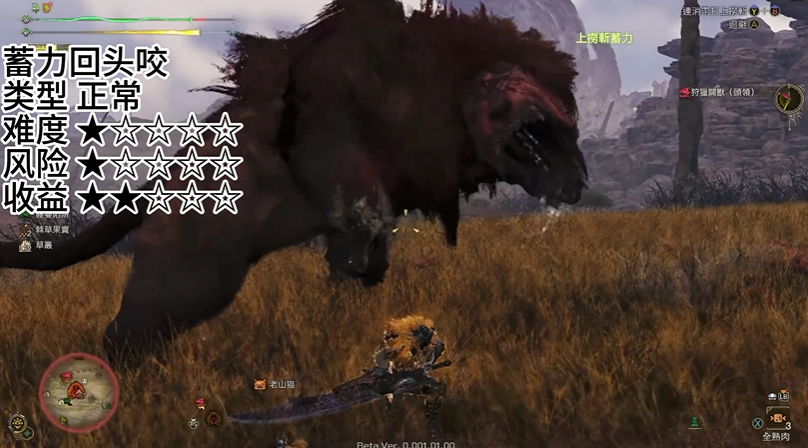
Charged Turnaround Bite: The startup is obvious, but the recovery is very short.
Charged Ground S-shaped Bite: A nerve-wracking move that can only be executed by memorizing the timing. It's easy to lose position if you get hit, so it's not suitable for counterattacks.
Single Hand Swipe: A grazing attack with extremely short startup and recovery, not recommended for counterattacks.
Single Hand Outward Scratch: Also a grazing attack with extremely short startup and recovery, not recommended for counterattacks.
Spinning Swipe Upright: The startup is obvious, and the recovery is long, making it very suitable for counterattacks, then follow up with half a combo.
Upright Single Hand Smash: May come in two consecutive hits. In Super Burst mode, after the two consecutive hits, it may chain into a head shake and an upright pounce. In Super Burst mode, each hit of this combo increases the number of hits. This is possibly because hammers and horns have unconditional super armor, allowing for two counterattack judgments; while great swords and charge blades can only trigger one counterattack judgment at the beginning of the combo.
Head Shake Upright Pounce: This move can either be used independently or as a chained move after the double smash. Therefore, instead of focusing on dealing with the preceding double attack, it's better to concentrate on watching for this move to gain a greater response benefit.
Head Shake Upright Pounce Burst Mode Earth Splitter: In Super Burst mode, if the added shell deflection means failing to hit the body, it unfortunately misses a knockdown opportunity. Since the shell's attack range is larger than the body's hitbox, precisely controlling the distance can effectively avoid such situations.
Upright Single Hand Vibration Scratch: If a deflection occurs and it may chain into a floor slam or a turn, it is recommended not to use a counterattack strategy to avoid unnecessary risks.
Floor Slam Turn: Compared to the ultimate skill, the difference in this move mainly lies in the preparatory action and the combination of moves. Although it has a counterattack judgment (while the ultimate skill cannot be judged but has a parry effect), for safety, it is still not recommended to use a counterattack strategy.
Backstep Forward Pounce Turn: This move includes a pounce and a turn, both with attack judgments. If only defensive measures are taken, there's a risk of being hit by the third back attack. If choosing to counterattack, precise control of distance and direction is needed to avoid losing position. Additionally, this move may chain into an upright walk followed by a downward attack, requiring preparation in advance.
Upright Walk Downward Attack: This move can either be used independently or as a chained move after the backstep forward pounce turn. In Super Burst mode, it will chain into the big move "Double Hand Floor Slam" (which cannot be defended against, even with strong defense). However, during the action, its abdomen will expose a weak point, making it more suitable to focus on attacking the weak point.
Counterattack Turnaround Bite: When the wound is broken, there's a certain probability of a follow-up attack. Due to the short startup, it may be too late to use a counterattack, so a more flexible response is needed.
Counterattack Upright Body Below Bite: When the wound is broken, there's a certain probability of a tracking attack, targeting the hunter who broke the wound. As the move has a longer startup and recovery, it is recommended to use a counterattack strategy to maximize the damage output.
Riding Struggle Upright Back Shake: This move has almost no startup, and the damage is exceptionally high, requiring extra caution.
Riding Struggle Big Butt Sit: This move has an extremely subtle startup, making identification and response challenging, requiring more focused and skilled reaction ability.
Jump Off High Platform: An extremely long jump, generally just need to pay attention to dodging to avoid being hit.
Jump Onto High Platform: Only triggers when the height is sufficient, and it's also not easy to be hit.
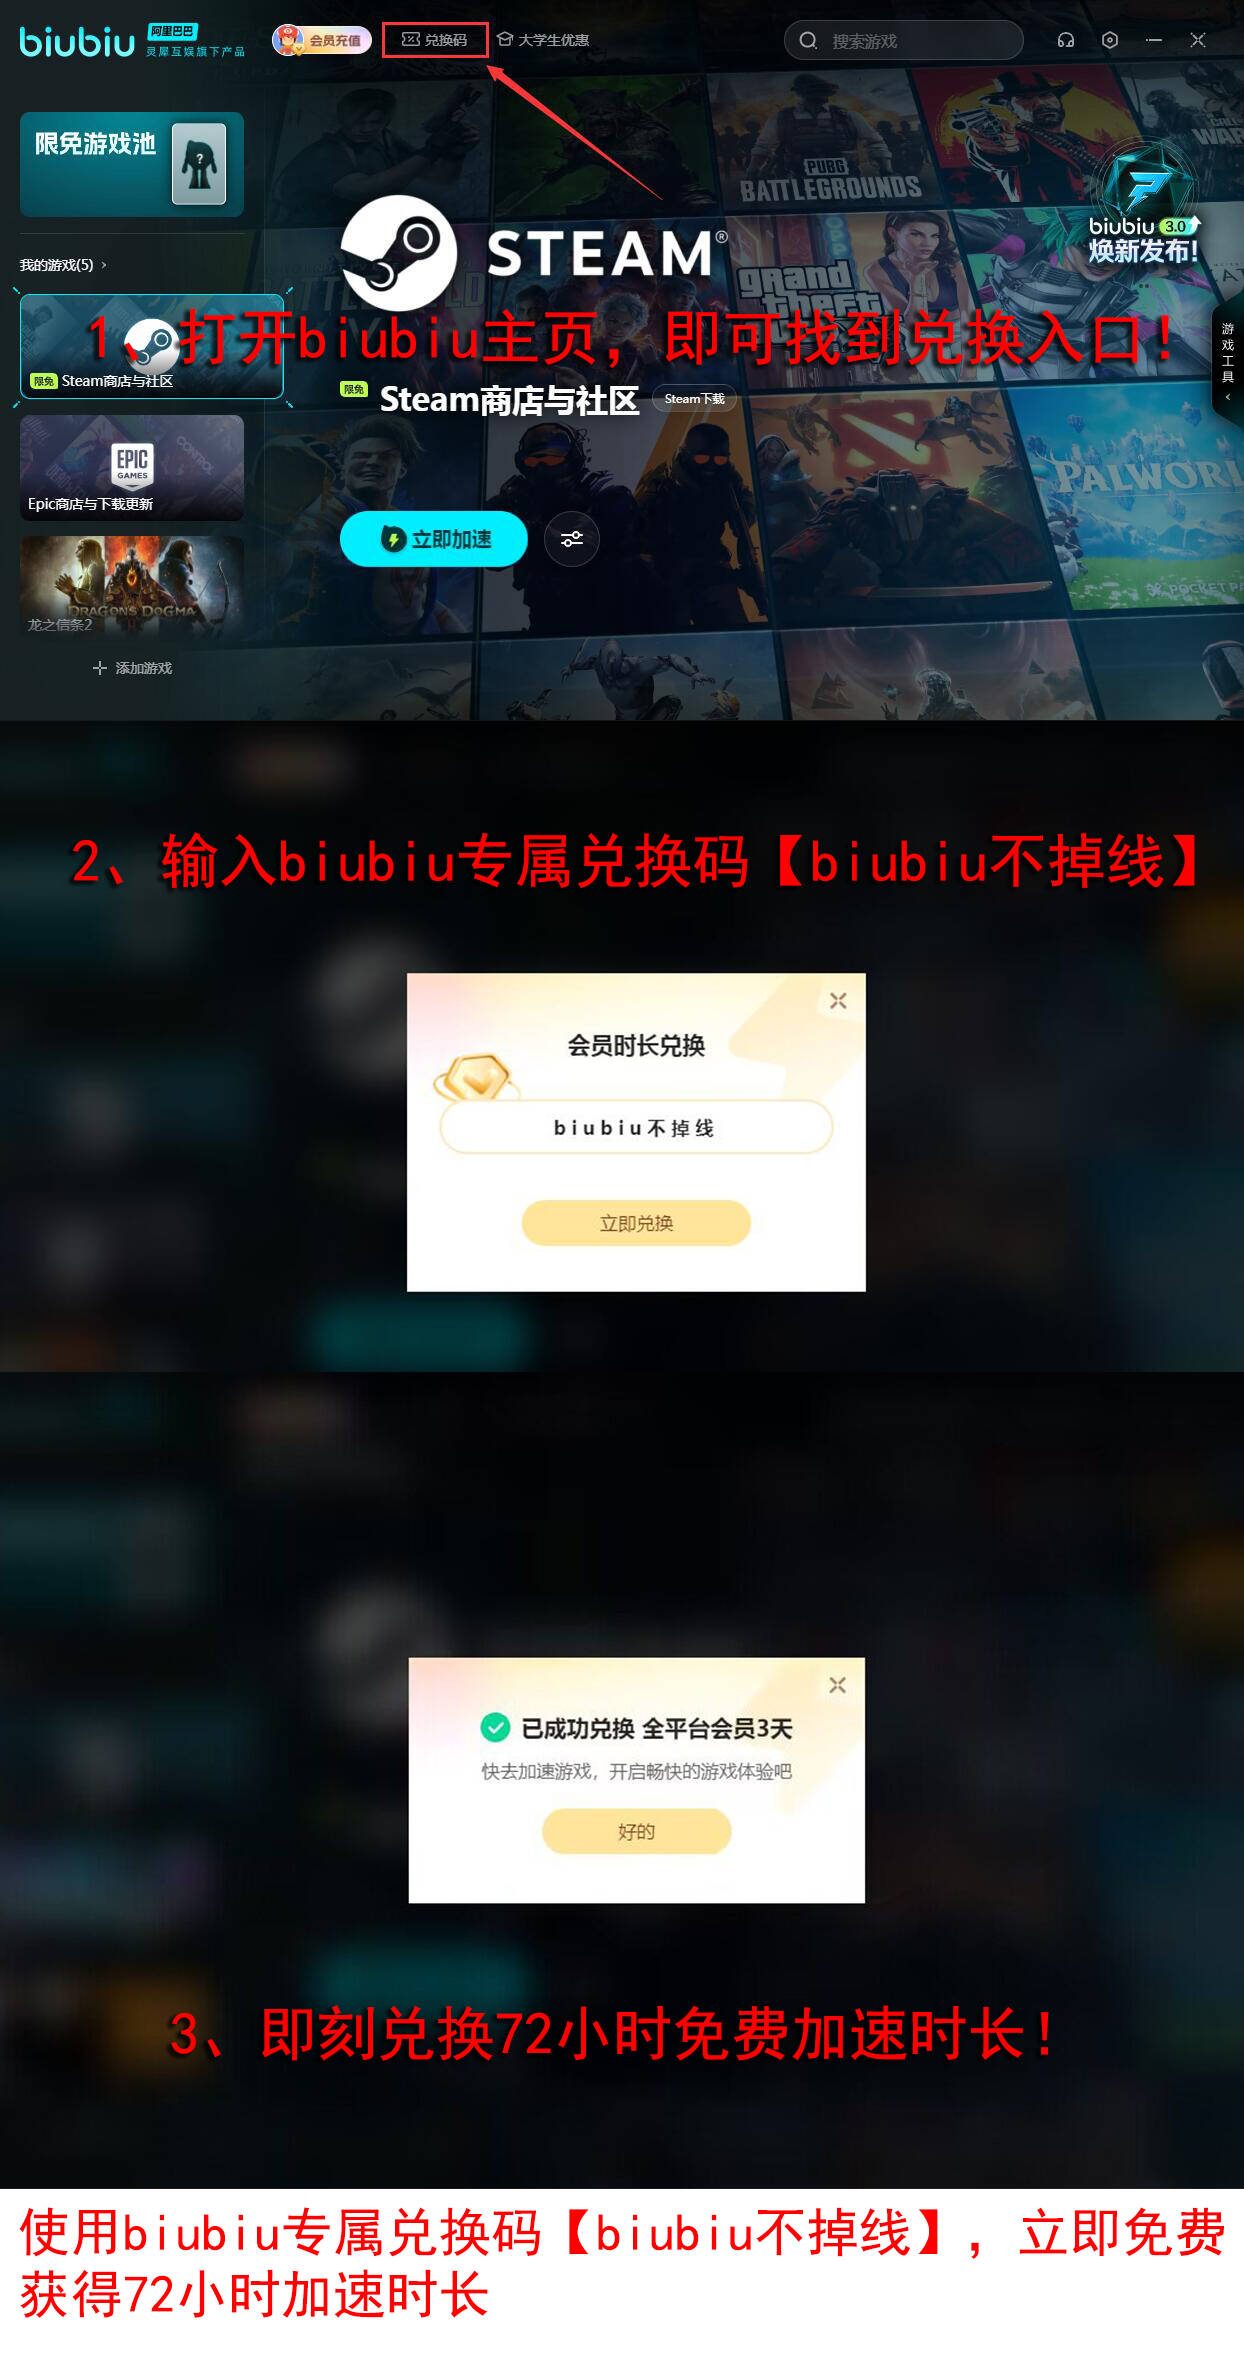
After seeing the above moves, everyone should have a general understanding. It indeed requires a high level of concentration to fight against it. Moreover, "Monster Hunter Wilds" requires a constant internet connection to play, and it is recommended to use the biubiu accelerator. As an established brand, it provides stable acceleration and low game latency. Enter 【biubiu no disconnection】 in the redemption code area to receive a 3-day free trial card. And if it's your first registration, you can activate an additional 3 hours, totaling up to 75 hours.
During the period from February 7-17, biubiu offers a limited-time free service for "Monster Hunter: Wilds." During the same period, you can also participate in the lottery event held in the app, where you have the chance to win the game itself, physical merchandise, and up to 365 days of free service duration. Stable online connections ensure no disconnections, helping you enjoy hunting.
The frequency of small bites followed by heavy smashes is relatively high, and they can be used in two consecutive hits or two consecutive smashes. At this time, you can choose to dodge one and ignore the other, or easily dodge the second. Two consecutive shots may not allow enough time to react, but with red sharpness, you can measure the distance and enter the blind spot, then use Dragon Ascension and Unrivaled Slash.
The detailed explanation of Bishou's skills and fighting strategies in Monster Hunter Wilds is now complete. For moves like charged heavy smashes, which have a long recovery time, you can open another layer of sharpness after a draw, or use Dragon Ascension and Unrivaled Slash. The first attack of the ground bite might be a feint, so you need to pay attention to the timing during a draw. In the final phase, the moves will change, a 180-degree tracking floor slam is truly a divine move, it cannot be blocked, and the damage is extremely high, getting hit directly results in an instant kill, requiring extra caution in handling.