Nida Harb 3: Champions' Strife
Game Introduction


Hot Strategy
Star Trace Resonance Sword and Shield Goblin Strategy Star Trace Resonance Goblin Nest Clearing Techniques
In Star Resonance, in addition to the regular gameplay, there is also a dungeon mode. In this bedroom, you will encounter some powerful bosses. This time, we will take a look at the strategy for the Sword and Shield Goblin in Star Resonance. In the dungeon, players will come across a level called the Goblin Nest. If you want to master the techniques to clear this level, keep reading.
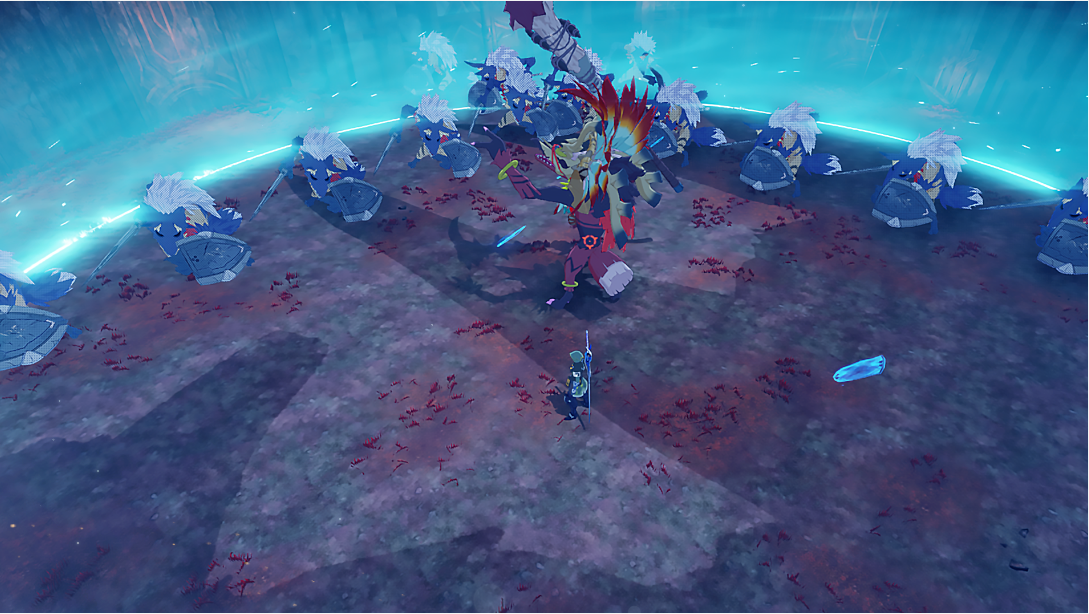
The Goblin Nest is an extremely challenging dungeon level. During the battle, it not only requires individual character abilities but also the coordination of the entire team. This monster can summon more minions and add shields to itself, so the whole team needs to be very cautious during the game. When the character's health drops by 1/5, it will directly enter the Sword and Shield Goblin mechanism.
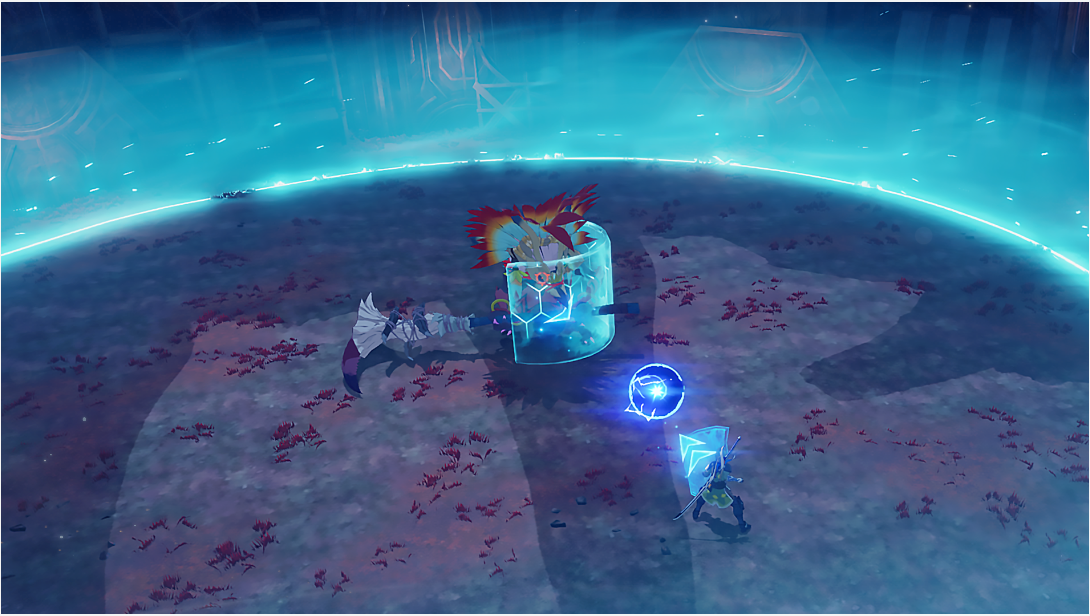
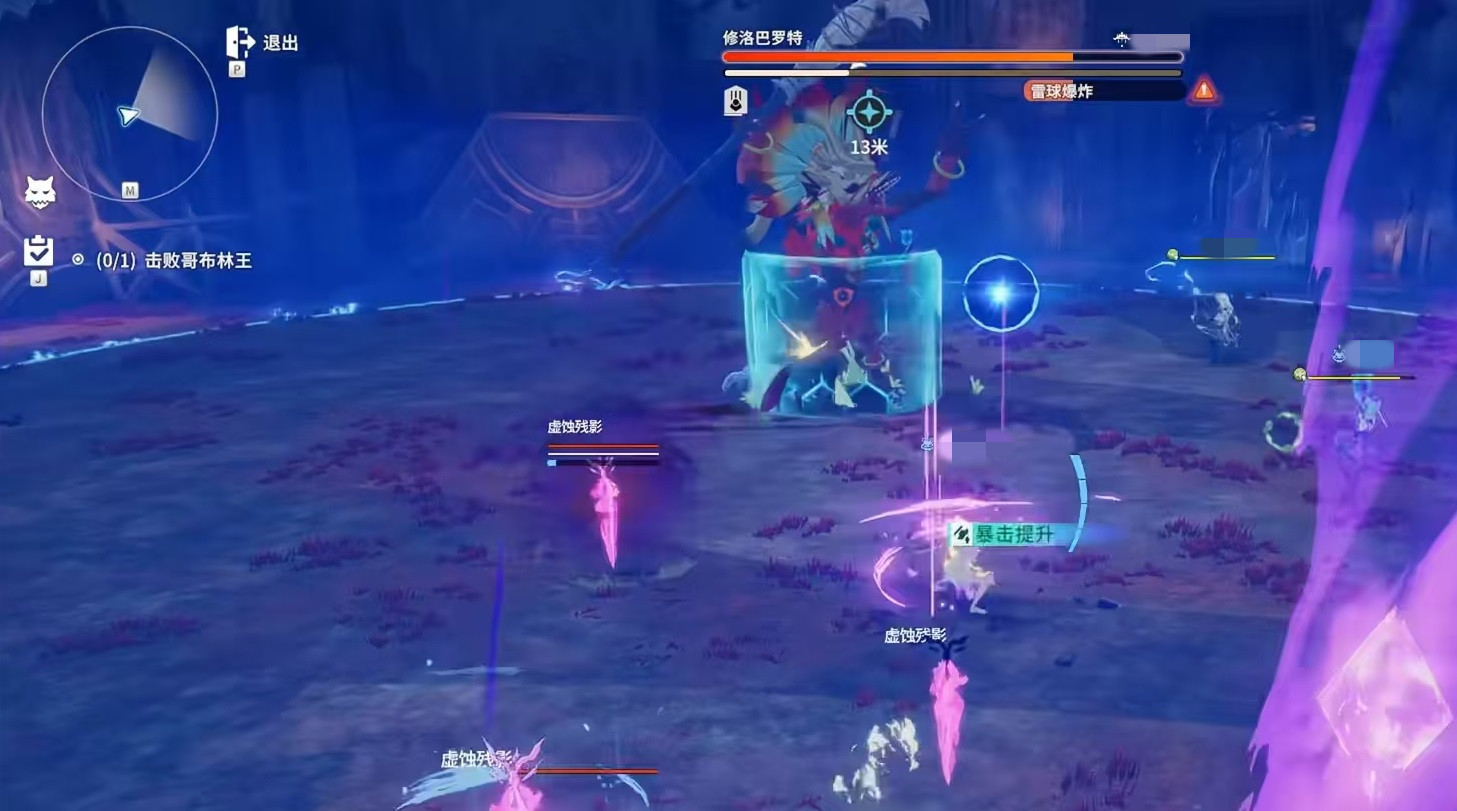
At this point, the player needs to control the character to immediately leave the center of the field. The tank in the team can prioritize attacking the Sword and Shield Goblin. After defeating the opponent, they can proceed to break the shield. At this time, other members can wait on the sidelines. If there are other shields dropped on the field, the healer should immediately go to pick them up. Then, in the game, a bouncing energy ball will be set up. Once the conditions are met, the boss will enter a weakened state, making the fight much easier.
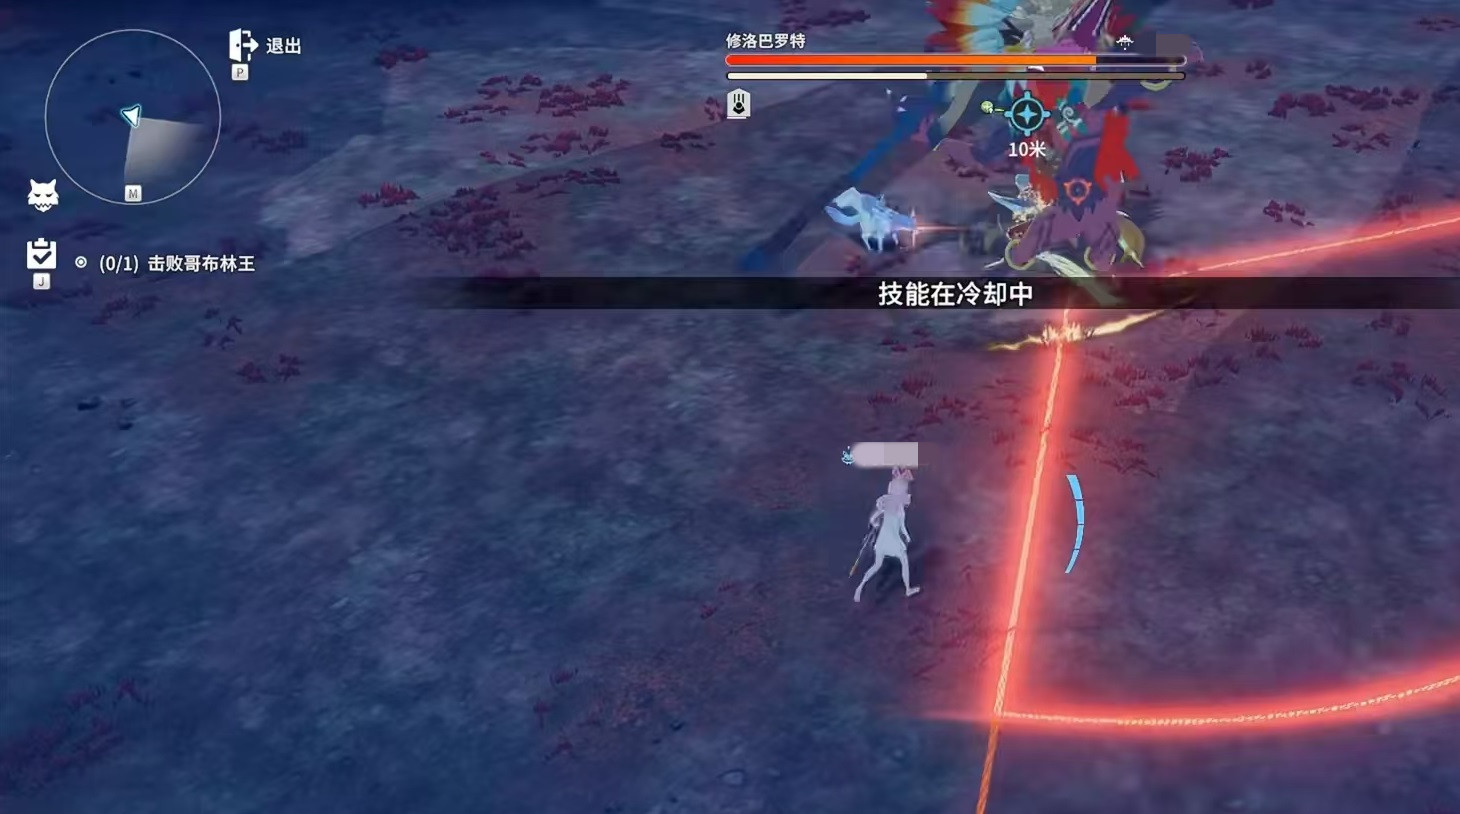
However, if the requirements are not met, the character will initiate a full-screen attack, causing all members on the field to suffer damage. Essentially, the boss will randomly lock onto a character with protective abilities and attack in a spinning manner. To counter this, two shielded targets need to be positioned together, forming a triangle with the boss. This way, the energy ball can be bounced directly onto the boss. After the attack is completed, the character will become extremely weak, making the subsequent battle much easier.
The above shares the strategy for the Sword and Shield Goblin in Star Resonance. To successfully combat the goblin, follow the methods mentioned above to control the character and coordinate the output and positioning. This dungeon level is very difficult, and players need to challenge it multiple times with their team members. Through practice, the team can develop better output capabilities and quickly defeat the goblin. Those who need to can try these strategies in the game and see if they can successfully defeat the goblin.
How is Silver and Crimson Hatty? A Look at the Effects of Silver and Crimson Hatty Characters
In the currently popular game world of Silver and Crimson, various characters each have their own unique features, and the performance of Hati in Silver and Crimson is also a highly concerned issue. For many players who have not yet participated in the game test, their understanding of these characters may be relatively limited. Given that this character has a relatively high quality and everyone will have the opportunity to use it later, today I will delve into how Hati performs in Silver and Crimson.
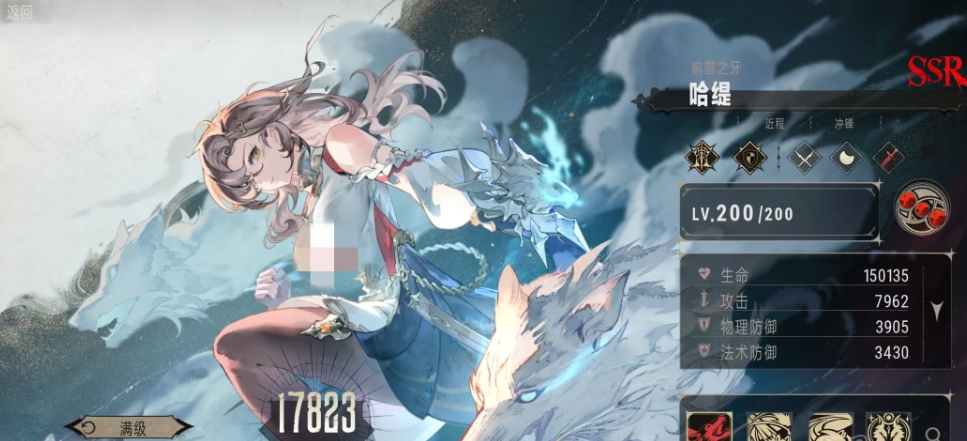
As an SSR quality character, Hati's performance in the game is quite good. Let's first look at Hati's basic attributes. Hati belongs to the Kingdom faction and is a medium-sized character. In terms of combat style, he excels in blitz tactics, able to cleverly avoid the protection of the enemy's front line and directly launch fierce attacks on the enemy's back row. In terms of specific skills, Hati's basic attack is Tooth Fist. When he initiates this attack, it can cause physical damage up to 135% of his attack power to the main target. Such damage output is quite considerable among characters of the same level.
Moreover, Hati possesses a very unique characteristic called Alien Blood Self-Healing. When his current health first drops below 40%, he triggers this magical skill, immediately restoring 8% of his maximum health. This is a great chance for a counterattack when he is at a disadvantage in intense battles. Not only does he recover health, but Hati also gains the Thirst state, which is permanently active. That means, once triggered, it will accompany Hati throughout subsequent battles. Under the influence of the Thirst state, Hati gains a 30% lifesteal effect.
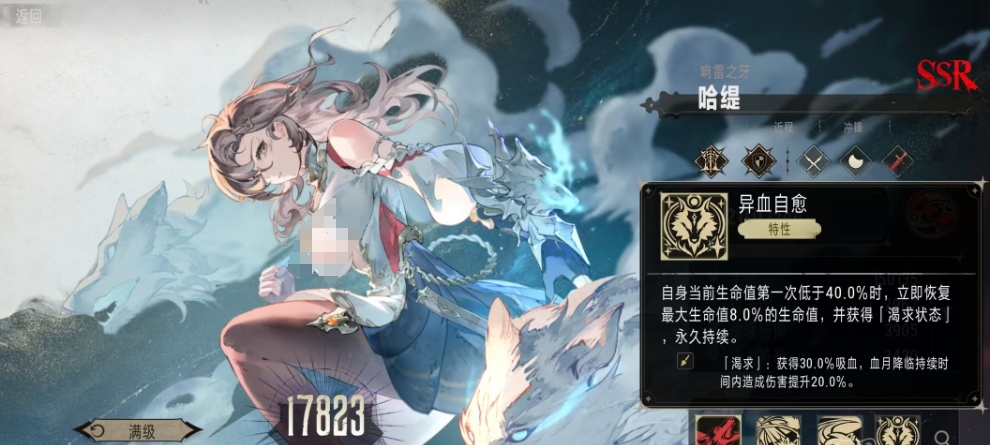
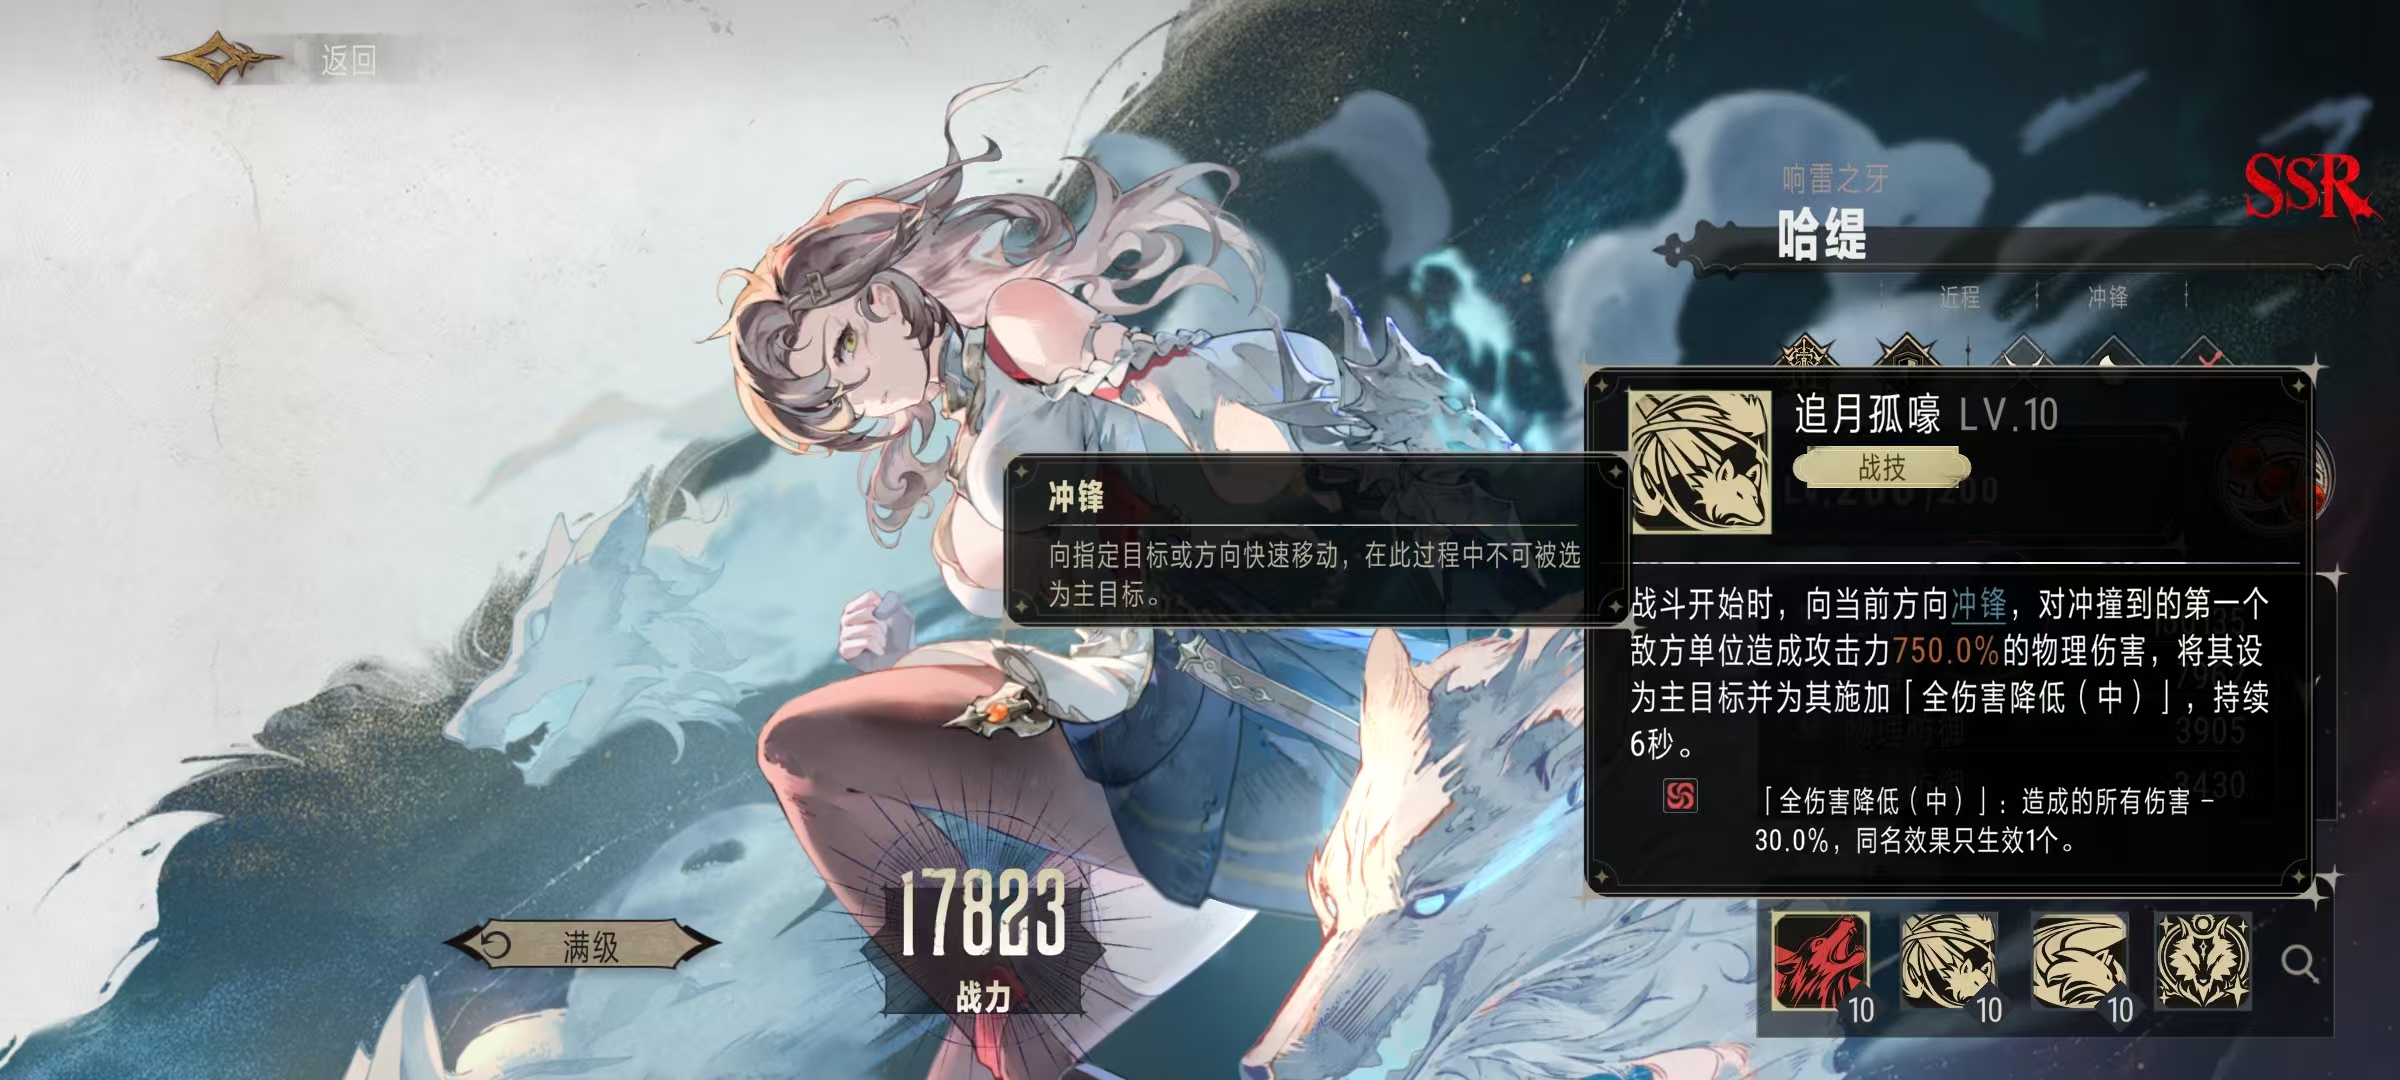
In addition, Hati has another powerful effect called Blood Moon Descent. During the duration of Blood Moon Descent, the damage he deals to enemies increases by 20%. Therefore, as an SSR quality character, Hati has sufficient base stats. When Hati's health drops to a critical level after being attacked by the enemy in battle, there is actually not much danger because his high lifesteal ability allows him to completely recover the lost health through his own output. Thus, his performance in terms of sustainability is very outstanding. Now, let's talk about Hati's combat skill, called Lone Howl Chasing the Moon. At the start of the battle, he will directly charge in the current direction. During this charge, he is in a special state where he cannot be targeted, which also enhances his survivability during the charging phase.
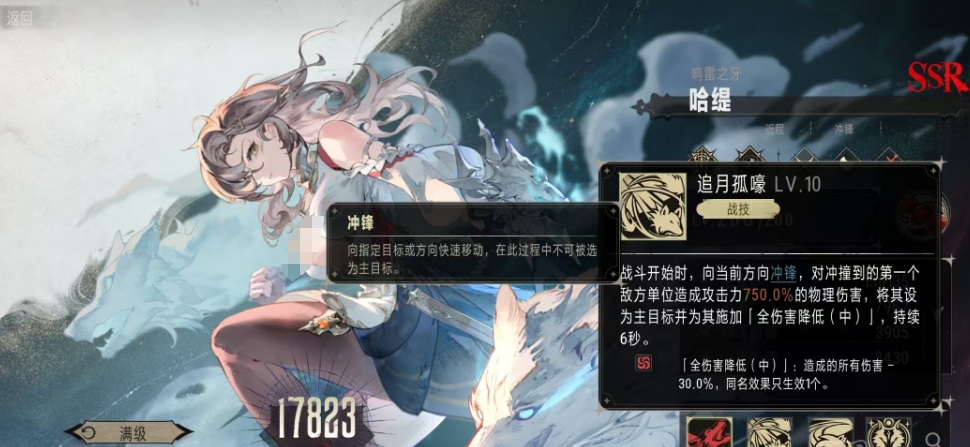
When he collides with the first enemy unit, he will deal significant physical damage and add a total damage reduction effect, reducing the target's damage by 30% for up to 6 seconds. This skill plays a crucial role in battle, not only dealing massive damage to a single enemy target but also protecting himself and his teammates by reducing the enemy's damage.
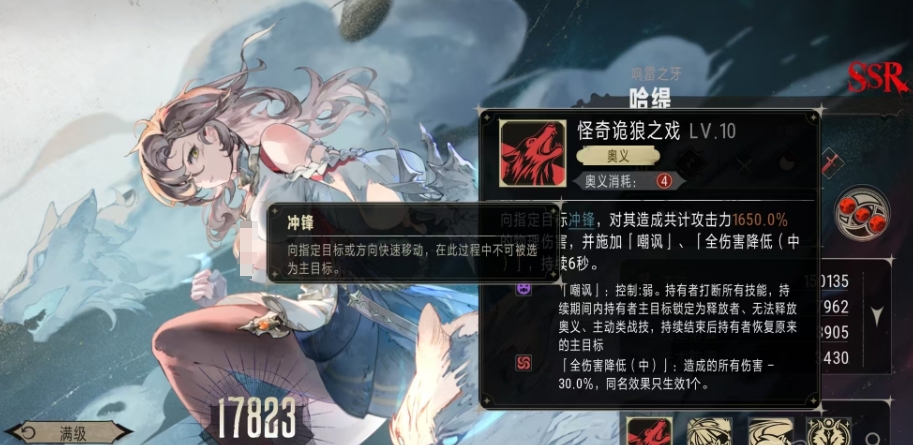
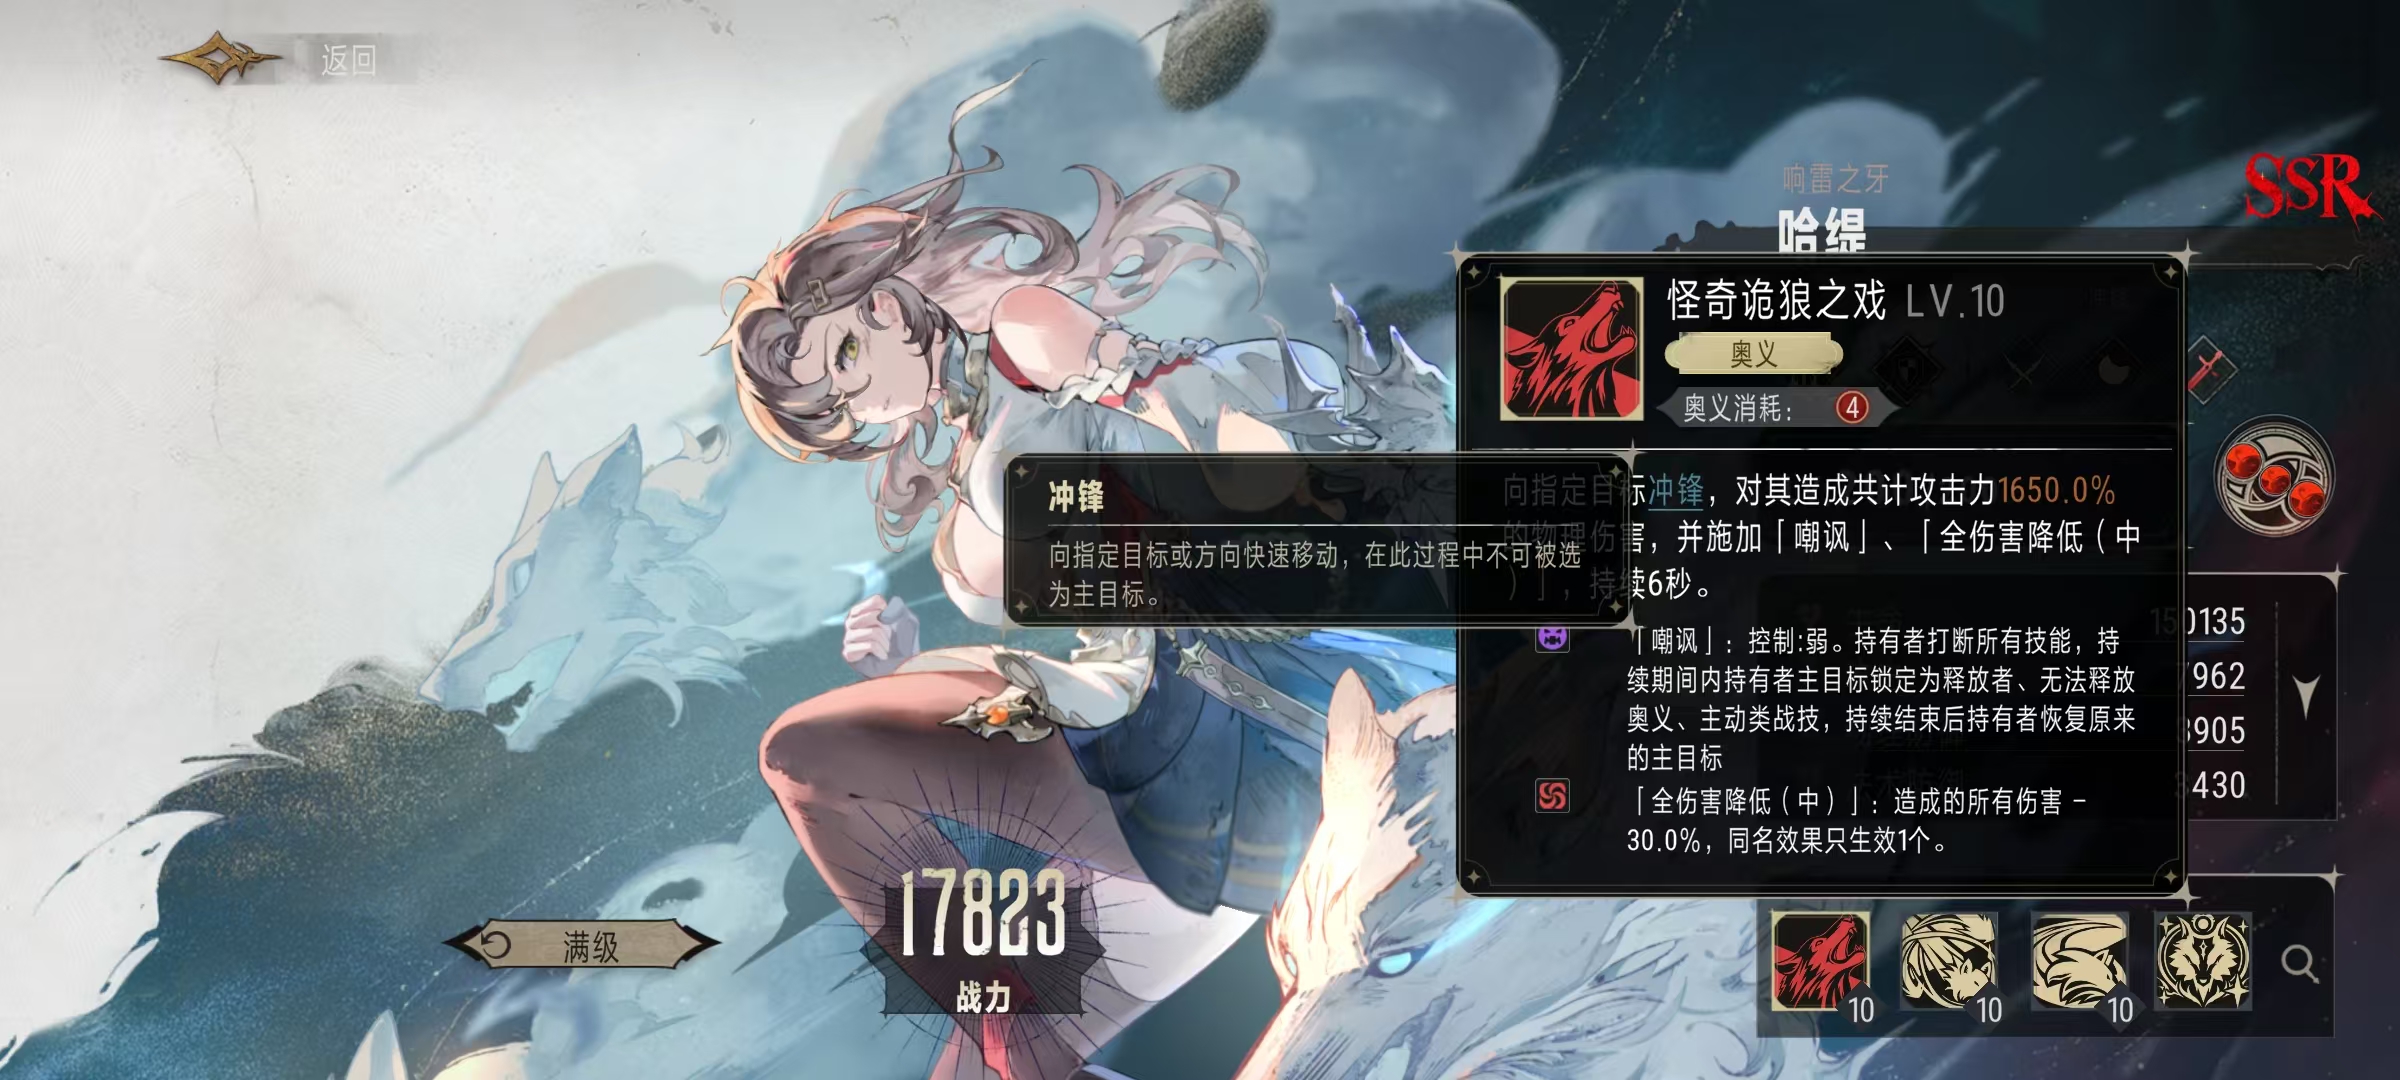
Hati's ultimate skill involves charging towards a designated target, dealing physical damage up to 1650% of his attack power. Such a high damage output is simply a nightmare for the enemy's backline squishies. Moreover, this skill comes with a taunt effect and a total damage reduction effect, with the same duration as mentioned earlier. However, it should be noted that during the taunt period, Hati cannot release his ultimate or active skills, and the total damage reduction effect reduces all damage dealt by the opponent by 30%.
This concludes the introduction on how Hati performs in Silver and Crimson. From the above analysis of Hati's skills, you should have a clear idea of the range of his single-target damage output among all the game characters. He can be considered a very strong presence in team output, and his skills are highly targeted.
Analysis of the Strength and Skills of the Covenant Between Silver and Crimson Hatty
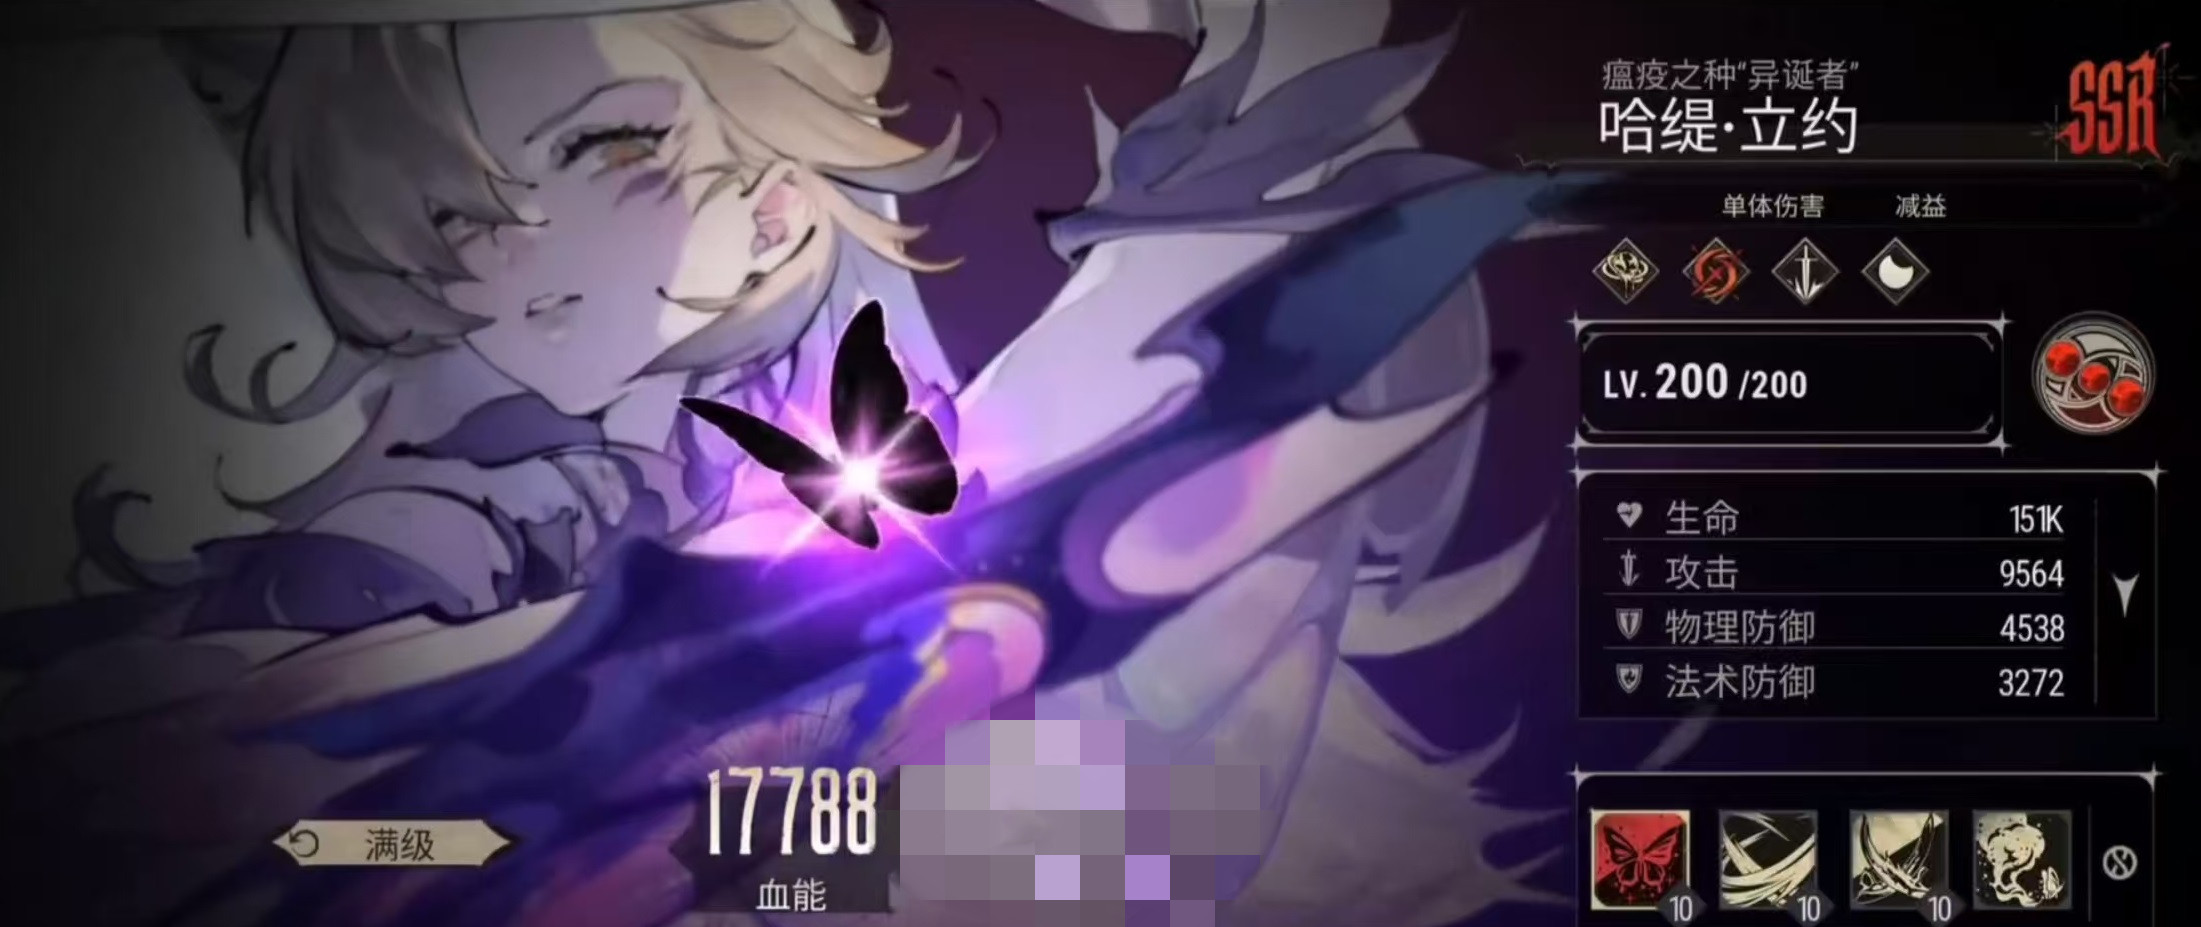
Because there are still many characters with high name repetition in Silver and Crimson, many players mistakenly believe that Hati and Hati Lijue are the same character. However, in the game, they are actually two different character cards. How strong is Hati Lijue in Silver and Crimson? This character excels in single-target damage, making him a core member of many lineups. If your team lacks such a character, the following introduction can help you get to know him better.
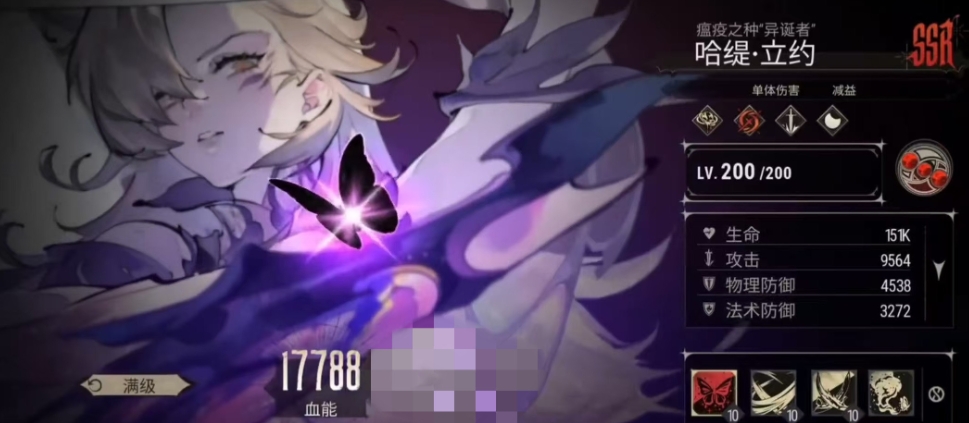
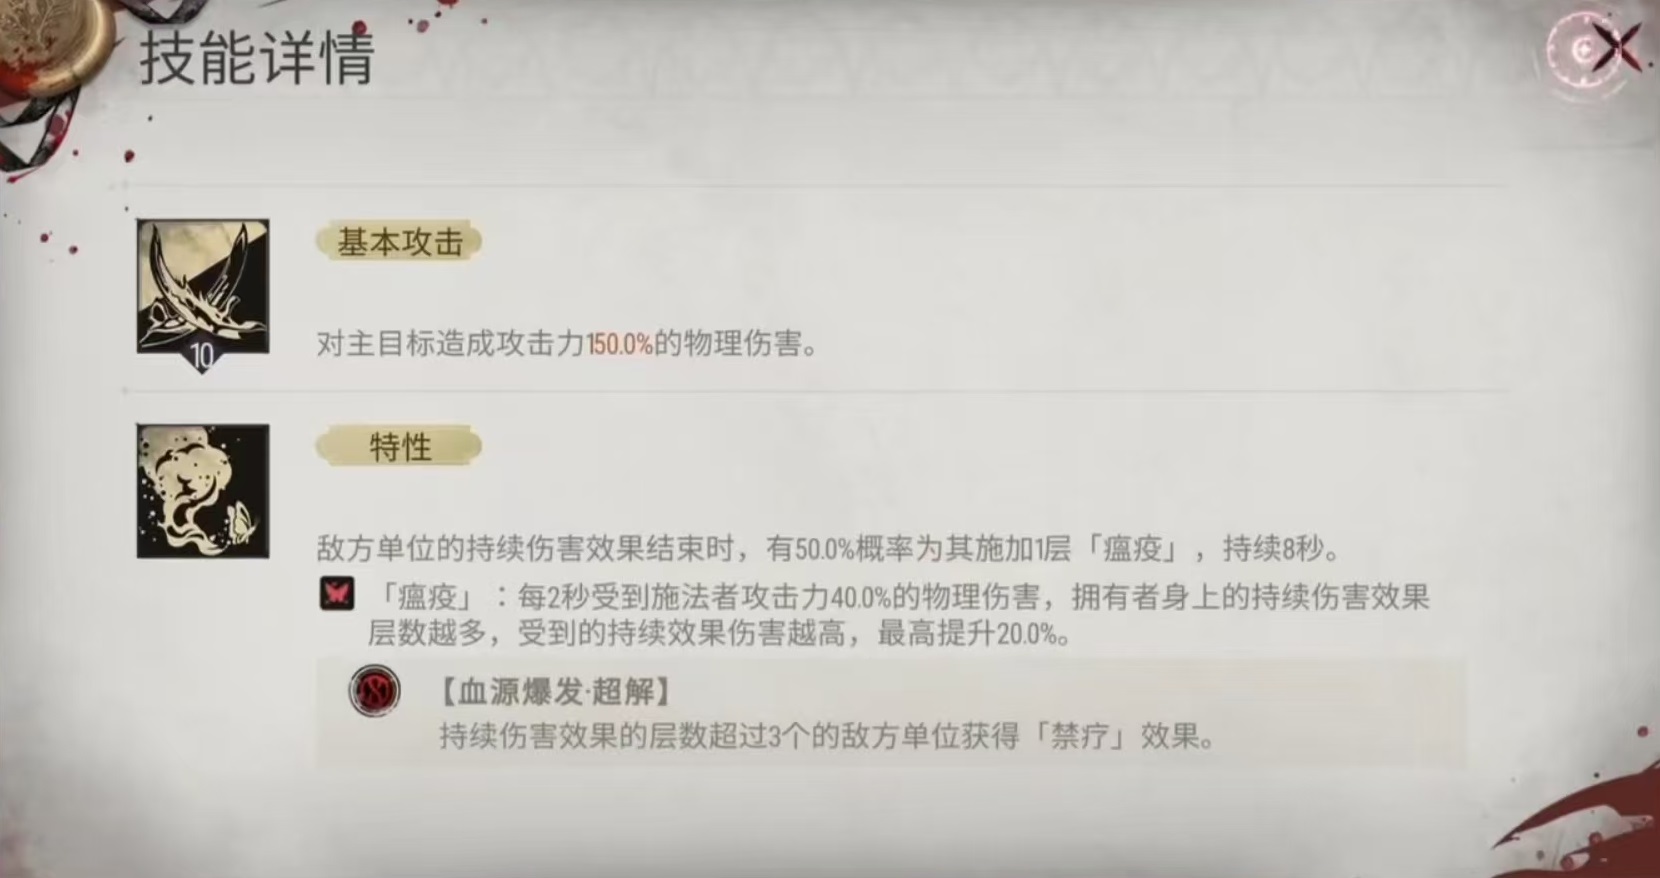
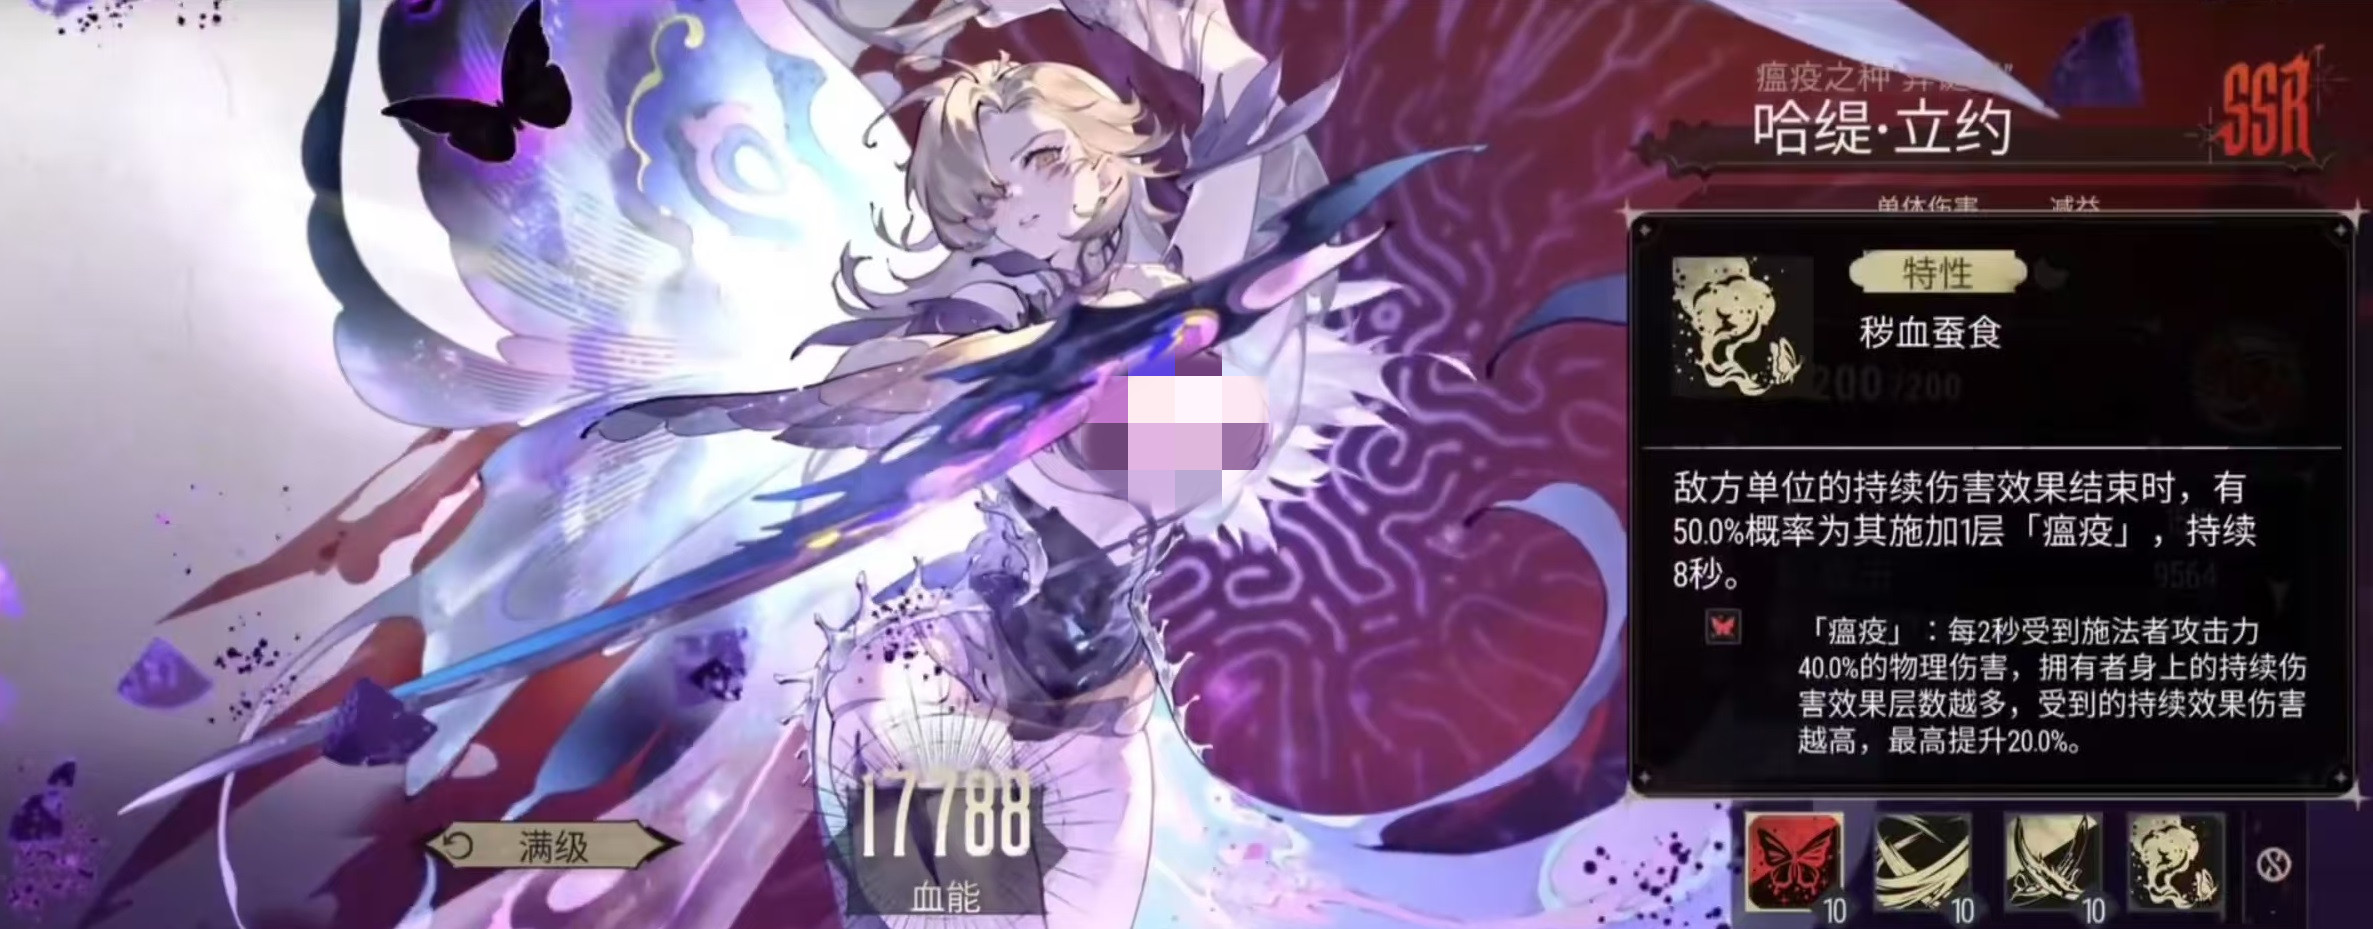
Hati Lijue, having reached the SSR rating, has a significant advantage in level advancement, capable of being upgraded to 200 levels. This means he has more room for attribute growth, becoming stronger as his level increases. In terms of basic attacks, Hati Lijue can deal 150% of his attack power as physical damage to the primary target, which is quite notable among similar characters. His traits further enhance his combat effectiveness.
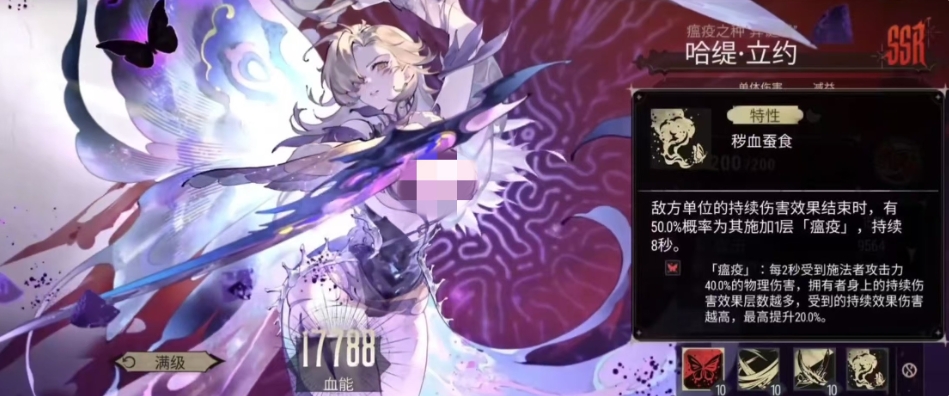
Hati Lijue's trait is that when an enemy unit's continuous damage effect ends, there is a 50% chance to inflict a Plague on them, which lasts for 8 seconds. Don't underestimate these 8 seconds; during this time, units affected by Plague will suffer 40% of the caster's attack power as physical damage every 2 seconds. This means that over the 8 seconds, they will be damaged multiple times, and the more layers of continuous damage effects the target has, the higher the damage they will receive.
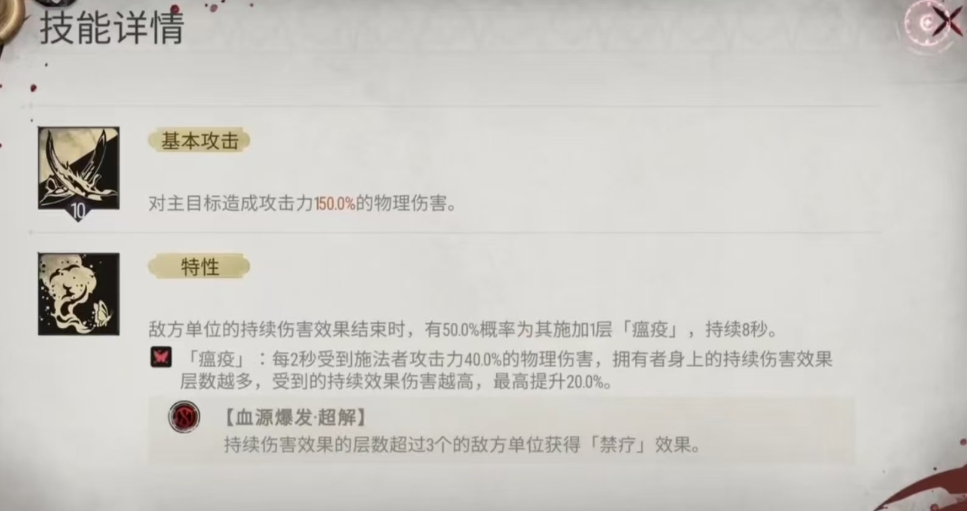
Especially for enemy units with more than three layers of continuous damage effects, Hati Lijue can also apply a healing ban effect, directly impacting their subsequent recovery, greatly limiting their ability to regain health. As long as the continuous damage effect on the enemy ends, whether it's bleeding or other continuous damage, this effect can be triggered, enhancing Hati Lijue's output and disruption capabilities in battle. In comparison, this trait currently has a higher chance of being utilized in team strategies.
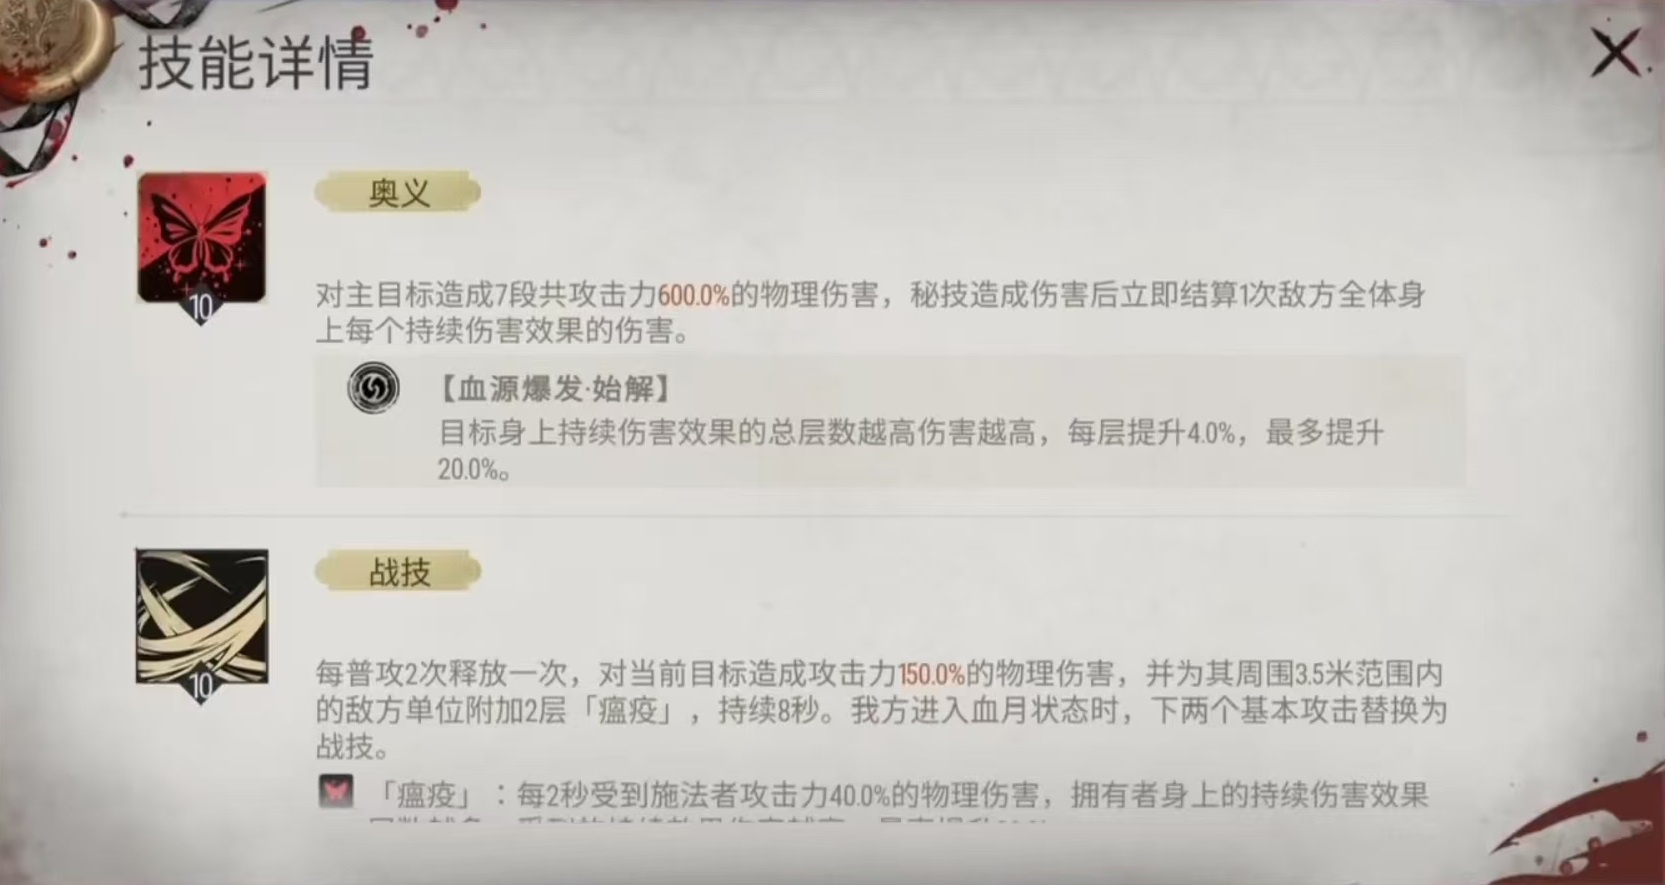
Next, let's look at Hati Lijue's combat skill, which can be used after every two normal attacks. When released, it deals 150% of his attack power as physical damage to the current target, with a range of 3.5. Enemies within this range will also be inflicted with two layers of Plague, lasting for 8 seconds. It's worth noting that when the team enters Blood Moon state, even normal attacks will enhance the effect and values of the combat skill, and the negative status of Plague can stack, allowing Hati Lijue to inflict high continuous damage.
Finally, his Ultimate Skill, which is his powerful burst method. The Ultimate Skill deals 7 hits to the main target, totaling 600% of his attack power as physical damage. Such a high damage ratio is quite impressive among many characters in the game. Moreover, this skill has an important effect: it immediately settles each continuous damage effect on the enemy, playing a key role in pinpoint bursts. That is, if the enemy target has any continuous damage effects, these effects will be instantly settled, causing additional damage, and the higher the total number of continuous damage effect layers on the target, the greater the final damage.

After reading the detailed introduction of Hati Lijue, you should have a clear understanding of how Hati Lijue performs in Silver and Crimson. These skill traits provide Hati Lijue with a lot of flexibility in lineup combinations. If you team up with allies who can apply continuous damage effects, the output from a single burst will definitely be a significant number, as continuous damage accumulates over time.
How to Clear the Star Trace Resonance Goblin Nest: Strategies for the Star Trace Resonance Goblin Nest
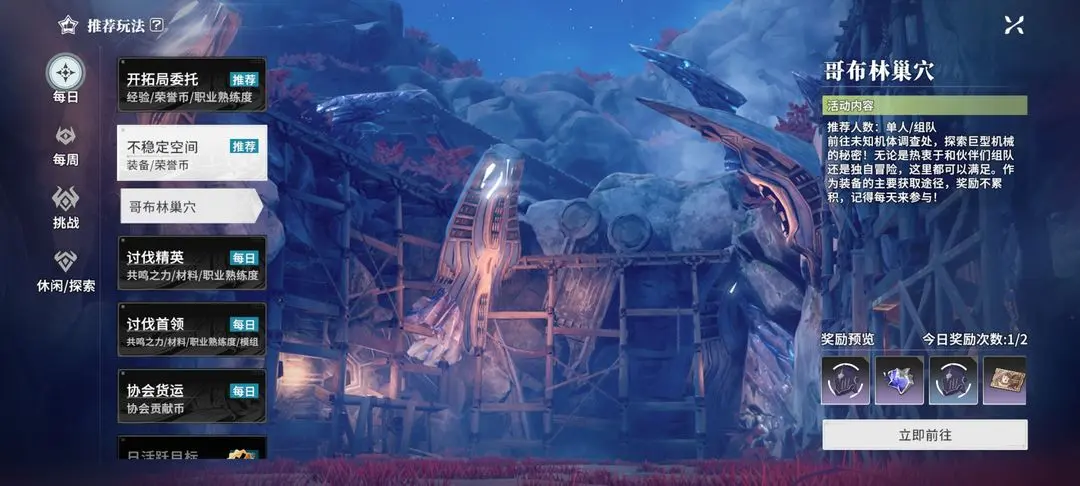
How to clear the Goblin Nest in Stellar Resonance? The Goblin Nest is a dungeon gameplay within the Unstable Space, and it's the main way to acquire game equipment. In this gameplay, many players generally find the boss fights quite challenging. This is mainly due to a lack of understanding of the mechanics, especially in the harder modes. This article will focus on explaining the strategies and techniques for this gameplay.
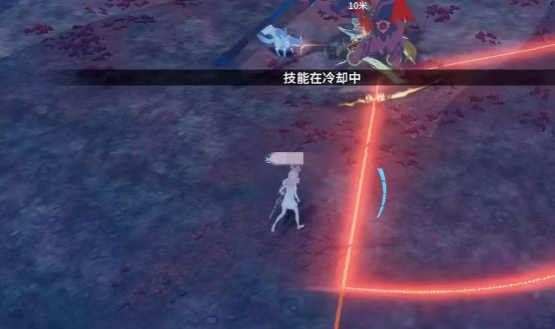
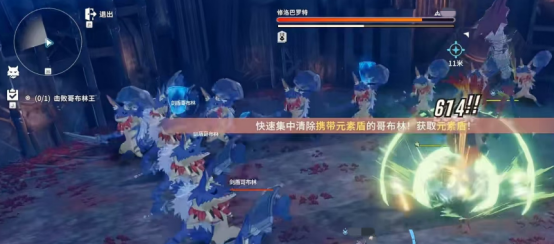
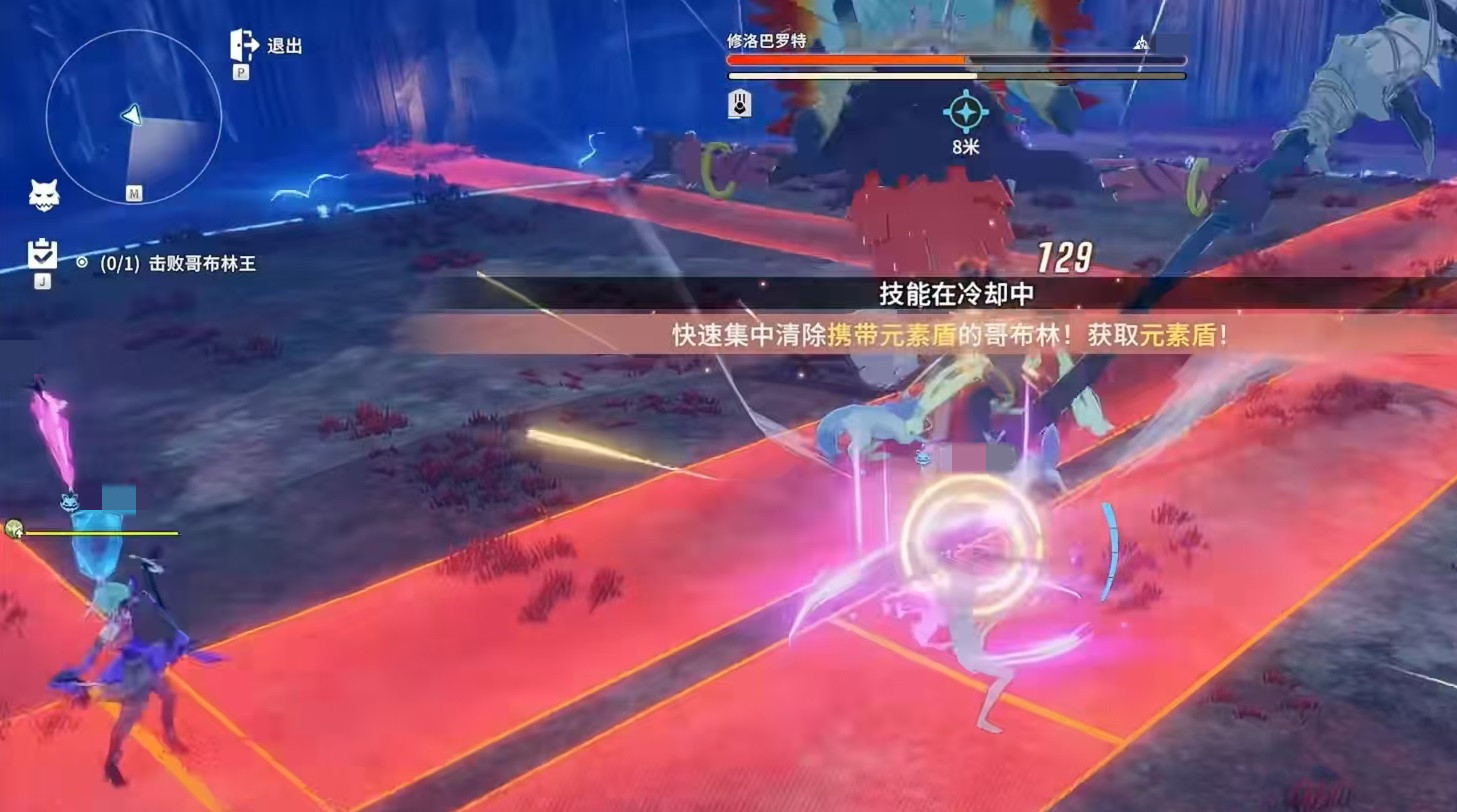
Note that the Forest Goblins here can heal all minor monsters and also give themselves a shield, so they need to be prioritized for elimination. The Fire Goblins have high damage, and one misstep can lead to a team wipe. The boss's mechanics are relatively simpler. After the battle starts, you can first take advantage of the Void Erosion buff, then proceed with normal attacks. When the boss's health drops to one-fifth, it enters the Sword and Shield Goblins phase.
At this point, the entire team should move to the side of the arena, prioritizing the elimination of the Sword and Shield Goblins. It's best if the healer picks up the first dropped shield, as it provides protection. You can wait for this mechanism to end, which also prepares for subsequent phases. Later, there will be bouncing energy balls. If the condition is not met, the boss will unleash an area-wide attack; if the condition is met, the boss will enter a weakened state.
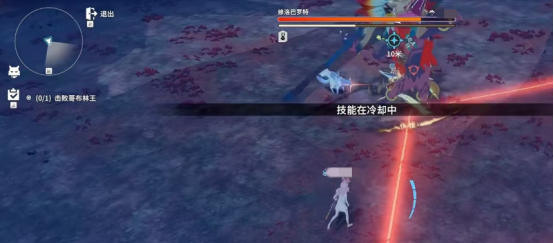
After this attack, you can continue with normal attacks, focusing all your firepower. Subsequently, the map will be divided into multiple areas, making it easier to dodge the attacks by moving positions promptly. After this mechanism ends, you can sustain the output for a while. Once the boss's health is halved, repeating cross hurricanes will appear, along with red warnings on the ground.

When this attack occurs, players can adopt a crisscross positioning, two horizontally and two vertically, to effectively dodge. The subsequent attack patterns may repeat, and as long as you follow the corresponding mechanisms, there won't be other attack forms. If the boss enters a frenzy, it will launch horizontal and vertical slashes followed by an area-wide attack. Therefore, it's crucial to quickly deal damage and avoid letting the boss reach this state.
The strategies for clearing the Goblin Nest in Stellar Resonance have been shared. In summary, when challenging this gameplay, as long as you understand the boss's attack patterns at each stage, you can develop corresponding countermeasures, allowing you to handle the battle more freely and efficiently.
What are the skills of Ying Bu in Code Name: Kill? A look at Ying Bu's card skills in the Code Name: Kill mobile game.
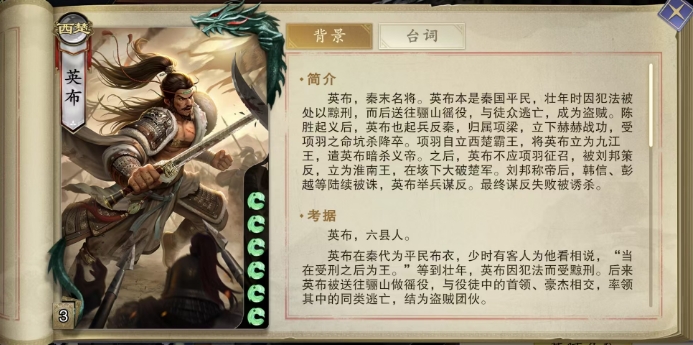
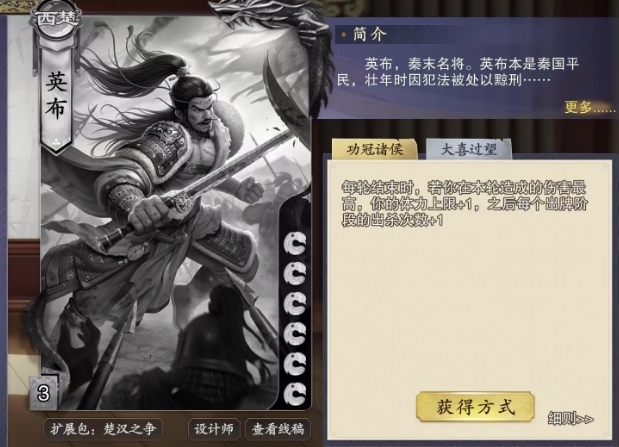
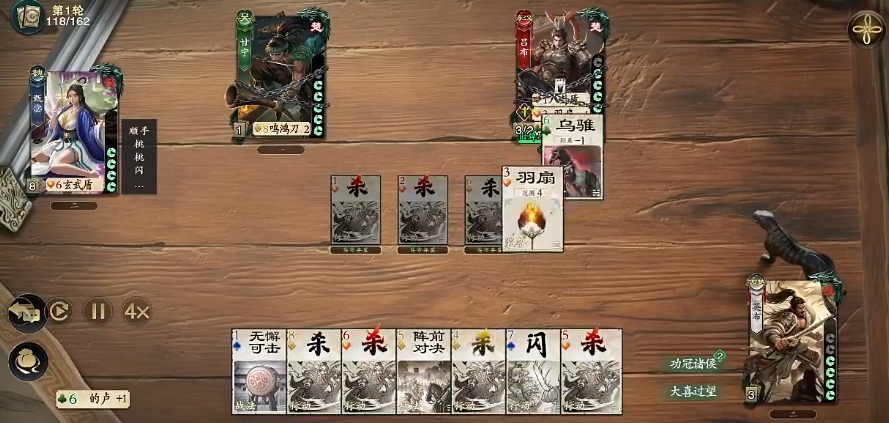
Ying Bu, a renowned general from the end of the Qin dynasty, also demonstrates extraordinary strength on the battlefield of Daihao Sha. In terms of basic attributes, he initially has 6 health points, which is the foundation for his survival in battle. However, what truly makes him invincible on the battlefield are his skills. Currently, each general's skill effects and usage have multiple functionalities.
Ying Bu's first skill is called "Gong Guan Zhu Hou," and its effect can be described as terrifying. At the end of each round, the game automatically calculates the total damage dealt by all characters during that round. If Ying Bu deals the most damage in that round, his maximum health will increase by 1 point. This means that as the battle progresses, Ying Bu's durability increases, allowing him to withstand more damage without being knocked out. But the increase in maximum health is not all; whenever his maximum health increases, the number of attacks he can make in each action phase also increases by 1.
"Gong Guan Zhu Hou" is a very powerful effect because attacking is one of the most direct ways to deal damage in the game. More attack opportunities mean Ying Bu can inflict more damage on enemies in a single round. It's important to note that the condition for triggering this skill is based on the total damage dealt in the current round; as long as Ying Bu's damage is among the highest (including tied for first place), the effect can be triggered. The trigger condition only considers the total damage of the round, regardless of specific stages or timing within the round.
Another crucial point to remember is that at the beginning of each new round, the recorded damage values for this skill are reset. This means no matter how much damage Ying Bu dealt in the previous round, everything starts over at the start of a new round, and he needs to work hard again to trigger the skill's effect. Additionally, when Ying Bu's maximum health increases, it does not immediately restore his health; it merely allows him to endure more damage. To regain health, other methods must be used.
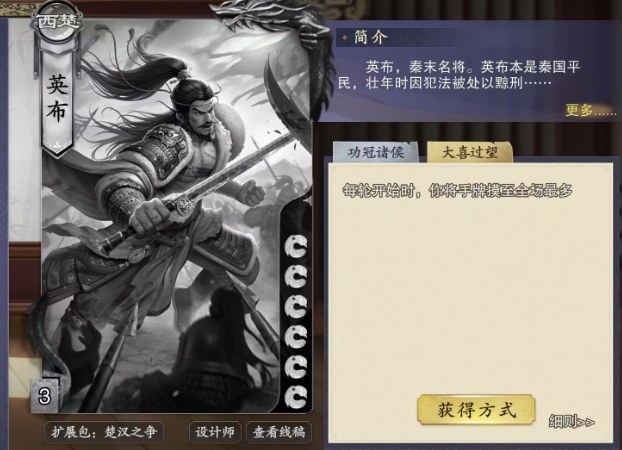
The second skill, "Da Xi Guo Wang," is another core ability of Ying Bu, activating at the beginning of each round. Its effect is to draw cards until the player has the most cards in hand, with the calculation taking place before the first player's turn begins. Thus, at the start of a new round, you get a chance to replenish your hand through this skill. However, if the player already has the most cards in hand, the skill will not take effect, and no additional cards can be drawn.
In typical matches, Ying Bu often faces an awkward situation where he lacks both cards and damage. Although his skill mechanism is powerful, it is difficult to achieve stable and satisfactory results in actual play, leading players to generally avoid using Ying Bu. After all, in a game where strategy and strength reign supreme, instability often implies risk and uncertainty. Nevertheless, there is always a flip side: Ying Bu can actually be paired with Zhen Ji to form a formidable team.
Zhen Ji's pseudo-high hand limit and card-drawing mechanism can serve Ying Bu's skill system well. Through this combination, drawing five extra cards per round can match Sun Ce's benefits, and more cards will give Ying Bu higher offensive power, thereby enhancing his survivability and combat effectiveness on the battlefield. However, this lineup is not without limitations. Firstly, it is very vulnerable to generals like Lu Xun who have the ability to destroy hand cards. Once hand cards are destroyed, Ying Bu's skills will be greatly affected, possibly even leading to a predicament.
Secondly, in early-stage confrontations, this lineup may be at a disadvantage since the quantity and quality of hand cards are critical at this stage, and the Ying Bu-Zhen Ji combination might not be sufficient to handle all challenges. Even so, if there are no better alternatives, this lineup is still worth trying. Finally, it should be noted that if victory rate is a priority, it is not recommended to purchase Ying Bu as a general.
This concludes the introduction to Ying Bu's skills in Daihao Sha. In fact, the performance of this general heavily depends on the color and quantity of the hand cards. If luck is not on his side, and he doesn't get any spades, then considering various factors, he may not be very useful.
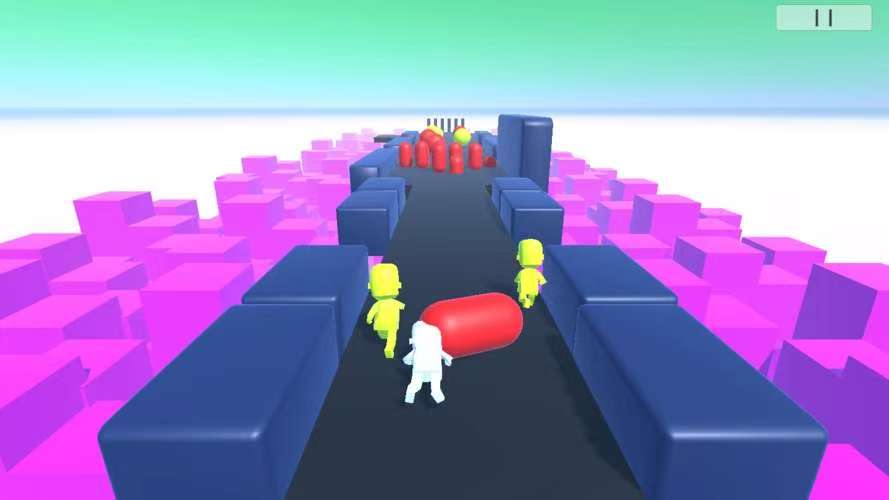
Hip Hop Run Public Test Time Sharing When Will Hip Hop Run Be Launched
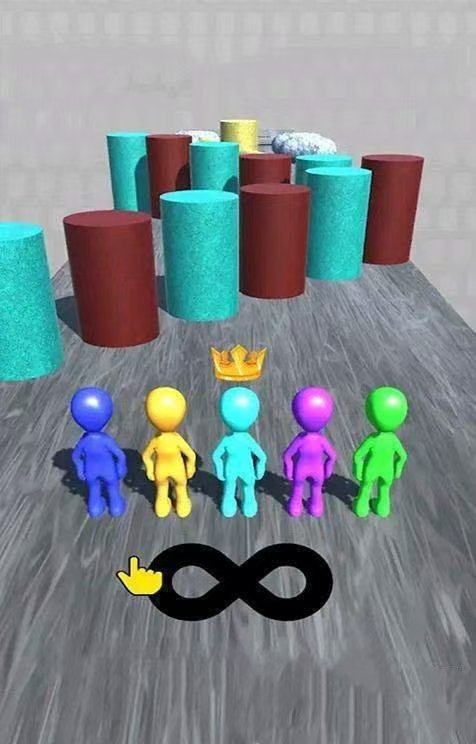
There is no clear announcement yet regarding the public beta time for Hip Hop Race, and many people might be very interested in this game. This game mainly features a stickman action parkour game with a very simple art style, which is quite appealing to players who enjoy parkour. So today, I will introduce some related content of this game in detail, which can also help everyone to better understand it. If you want to know about the public beta time, you can go to the 9Game APP to download and make a reservation, so that you can get the latest information as soon as possible.
[Hip Hop Race] Latest Version Reservation/Download
》》》》》#Hip Hop Race#《《《《《
In this game, the main objective is to avoid traps and obstacles in the scene, in order to surpass other players. The visuals of the game are also very fresh, and victory can be achieved just by operating well. For different levels, players can have different heroes and difficulties, making the game very challenging. Therefore, at the start of the game, players need to attack quickly and pay attention to the obstacles ahead and dodge them. If enemies are found, players can also set up obstacles, which can effectively stop the enemy's advance.

At this point, players need to develop different strategies to deal with various levels and traps set by enemies. This really tests the player's strategic skills and their ability to analyze different levels, allowing everyone to respond more effectively. The game also provides a feature to randomly match other players, which helps everyone to engage in free duels.

In this game, there are many characters and experiences for players to choose from, making it suitable for players of all ages. Whether it's the gameplay or the operation, it is very simple. If you are interested in parkour, playing this game will be very smooth.
If you want to learn more about this game, you can also download the 9Game APP to make a reservation, where you can find more game guides and official content. In terms of both gameplay and operation, this game is very attractive for players to play.
How about the contract between Yin and Hatile? What skills does Hatile have?
Today, the editor is here to analyze a very strong character in Silver and Crimson, Hattilyo. This is a character who excels in single-target damage and is also the core of many lineups. Let's take a look at how Hattilyo performs in Silver and Crimson. Since this character has reached the SSR rating, it can be leveled up to 200. So, what are its characteristics in terms of damage, and what are its skills? Let's find out below.
Hattilyo's basic attack deals 150% of their attack power as physical damage to the primary target. The feature is that when an enemy unit's continuous damage effect ends, there is a 50% chance to inflict one layer of Plague on them, lasting for 8 seconds. Units with Plague will suffer 40% of the caster's attack power as physical damage every two seconds. The more layers of continuous damage effects on the unit, the higher the continuous damage they receive. For enemy units with more than three layers of continuous damage effects, it can also make them unable to be healed, affecting subsequent healing.
Here, as long as the continuous damage effect on the enemy ends, there is a chance to trigger, such as bleeding or other continuous damage. The combat skill can be used once after every two normal attacks, dealing 150% of the attack power as physical damage to the current target, and adding two layers of Plague to all enemy units within a 3.5-meter radius, lasting for 8 seconds. When our side enters the Blood Moon state, the next two basic attacks will be replaced by the combat skill. The added Plague has exactly the same effect as mentioned above, so Hattilyo can bring a high amount of continuous damage on their own.
Finally, there is the Ultimate Skill, which deals 7 hits of damage, totaling 600% of the attack power as physical damage to the primary target. It also immediately settles each continuous damage effect on the enemy, serving as a point burst. The more total layers of continuous damage effects on the target, the higher the damage. Therefore, when coordinating the lineup, if you can pair with teammates that have a lot of continuous damage effects, the output from a single burst will definitely be quite significant.
After reading the introduction, everyone should now understand how Hattilyo performs in Silver and Crimson. The game places great emphasis on lineup coordination. After understanding the skill effects, you can proceed with the lineup coordination. If you can truly utilize these effects, the damage dealt will definitely satisfy everyone.
How is Silver and Crimson Hati? Analysis of Hati's Skill Effects
Today, let's analyze Yinf and Fei Hati. Since many players don't have much understanding of these characters in the game and haven't participated in the tests, I will introduce some of the more powerful characters to everyone. As an SSR quality character, Hati is outstanding in terms of attributes and skill effects, so after you get to know him, you'll understand how to use him.
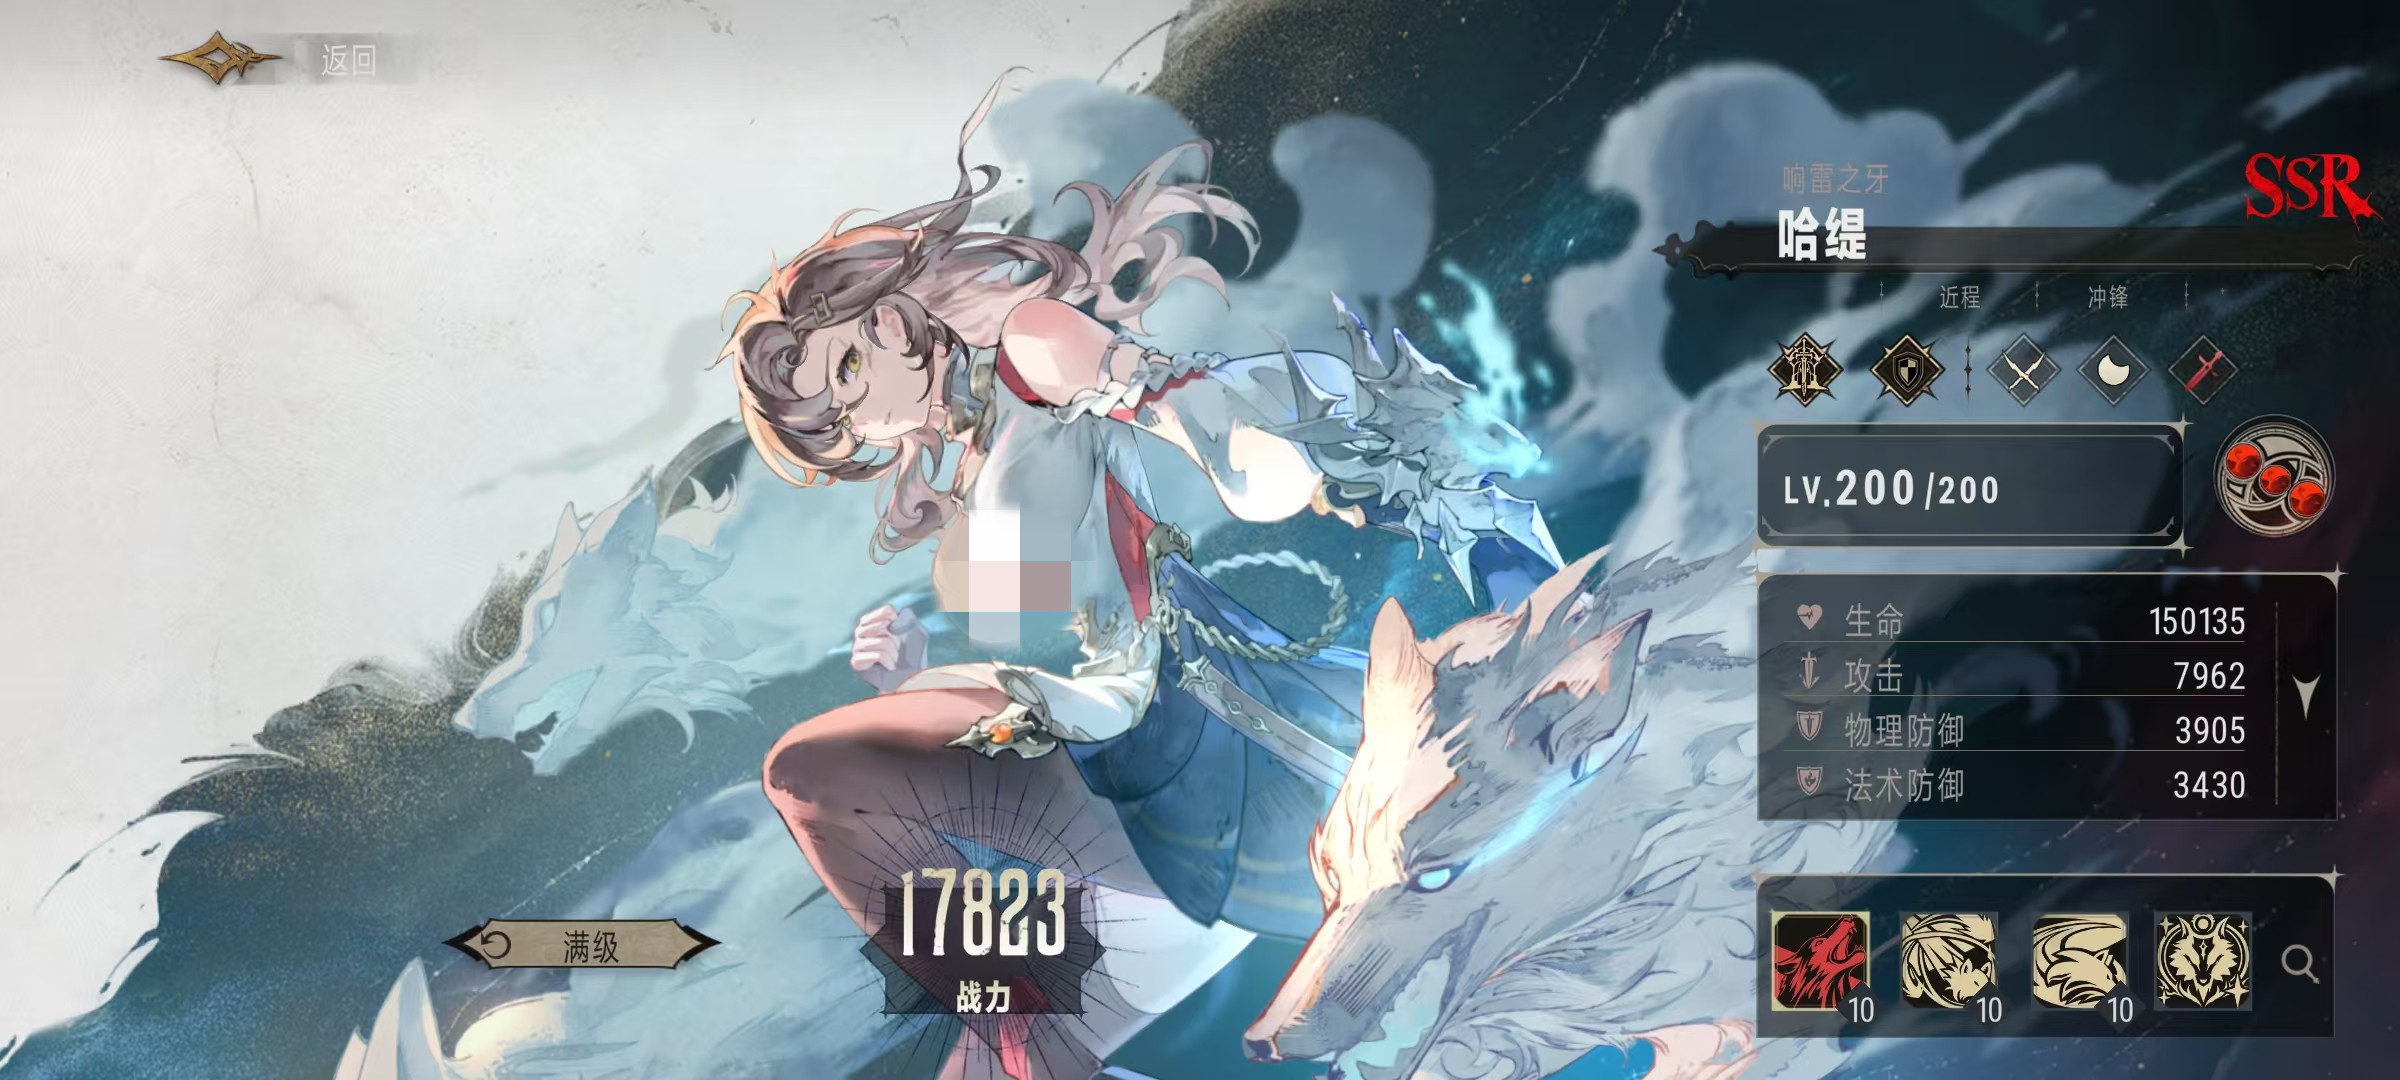
Firstly, in terms of basic attributes, Hati belongs to the Kingdom faction as a medium-sized character. He excels at flanking to avoid enemy front-line protection and directly targeting the backline, making him a close-range charging type with a crescent moon phase. His basic attack, Fang Punch, deals 135% of his attack power as physical damage to the primary target. One of his traits is Alien Blood Self-Healing; when his current HP first drops below 40%, he immediately recovers 8% of his maximum HP and gains the Thirst state. This state lasts permanently, under which he gains 30% lifesteal, and during the Blood Moon Descent, the damage dealt increases by 20%.

Therefore, being attacked until nearly dead is not scary, as the high lifesteal can fully replenish his HP through his own attacks, making his sustainability quite good. His combat skill is Lone Howl of the Chasing Moon; at the start of battle, he charges in the current direction, becoming untargetable as the main target during the charge, dealing heavy physical damage to the first enemy unit he collides with. It also sets this unit as the primary target, applying a total damage reduction effect, reducing the damage it deals by 30% for 6 seconds.
The ultimate skill effect is to charge at a designated target, dealing up to 1650% of his attack power as physical damage, and adding taunt and total damage reduction effects, lasting for 6 seconds. After being taunted, the opponent will be forced to attack and cannot release their ultimate or active skills, with all damage they deal reduced by 30%. Such a powerful ultimate can completely achieve the goal of instantly killing the fragile backline, and even if it doesn't, the opponent will be severely weakened and controlled by the taunt.
Now, you should have a clear understanding of Yinf and Fei Hati. Among all game characters, Hati has one of the strongest single-target output capabilities, and is very directional. As long as he can find the right target to charge, he can quickly reduce the enemy numbers.
How to Win in the Goblin Nest of Stellar Resonance and Tips for Clearing It
Stellar Resonance is crafted with a unique 2D art style, presenting a popular MMORPG mobile game to players. In the incredibly fantastical otherworld, players will embark on an exhilarating adventure, needing to team up with friends to collectively resist powerful enemies. How to attack the Goblin Nest in Stellar Resonance? This is a question that many players are particularly concerned about. In the Goblin Nest, various challenges are often encountered, and it's easy to be defeated by the boss, which is actually due to not correctly understanding the specific mechanisms. Next, let's learn about the specific attacking methods with the editor.
The Goblin Nest is a dungeon with a relatively high challenge difficulty. There are different mechanisms here, and each mechanism has a correct way to counter. Players should choose a reasonable method of countering based on the specific mechanism. Among them, the Forest Goblins and Fire Goblins have particularly high damage, especially during team battles, where they can be easily used, resulting in a very high victory rate, but attention must also be focused.
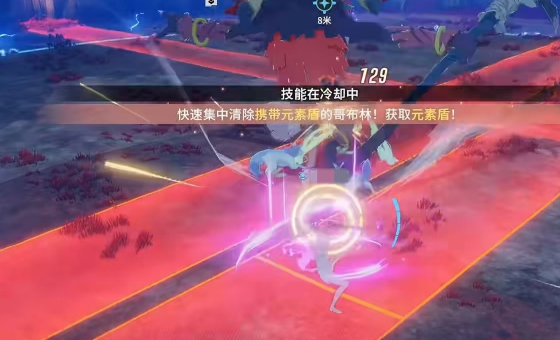
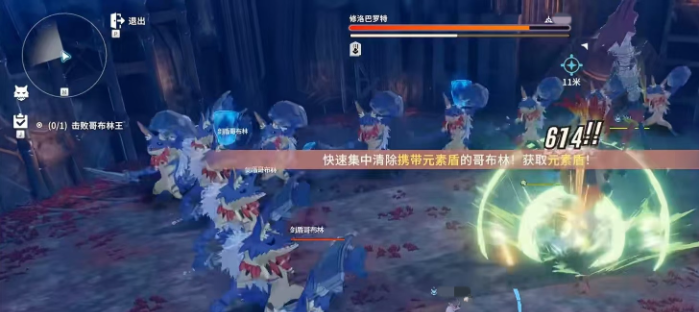
A key point to introduce is the Sword and Shield Goblin mechanism, which has a relatively high attack difficulty. Players need to constantly observe the health value of the big boss, and pay attention to changes in the health value. If it continues to drop, then all players need to work together to eliminate the mechanism. After eliminating it, a powerful shield will drop for players to pick up, and once successfully picked up, it can provide the player with higher energy.
In this mechanism, many big bosses will be seen, and these big bosses have particularly strong attack and defense capabilities. For new players, defeating them is not an easy task, and it is also a powerful mission challenge. Especially when attacking the big boss, it is necessary to summon the storm field to release even more powerful damage and cohesion. When the big boss is in the casting phase, players need to immediately stop it to prevent all players from being damaged.
After reading this, many players should have a good understanding of the attacking techniques for the Goblin Nest in Stellar Resonance. To succeed in this mechanism, it is necessary to cooperate and closely collaborate with all players, which can increase the success rate and make the attack much easier to complete.
How to Clear the Goblin Nest in Star Trace Resonance: A Guide to the Goblin Nest Strategy
Many players encounter various problems when running the Goblin Nest, especially in battles with bosses, which is actually due to not understanding the mechanics. Today, I will introduce in detail how to clear the Star Trace Resonance Goblin Nest. Generally, the difficulties encountered by everyone are under the extreme difficulty state of the Goblin Nest, as only then can it pose a certain challenge to the players. So, I will introduce this difficulty.
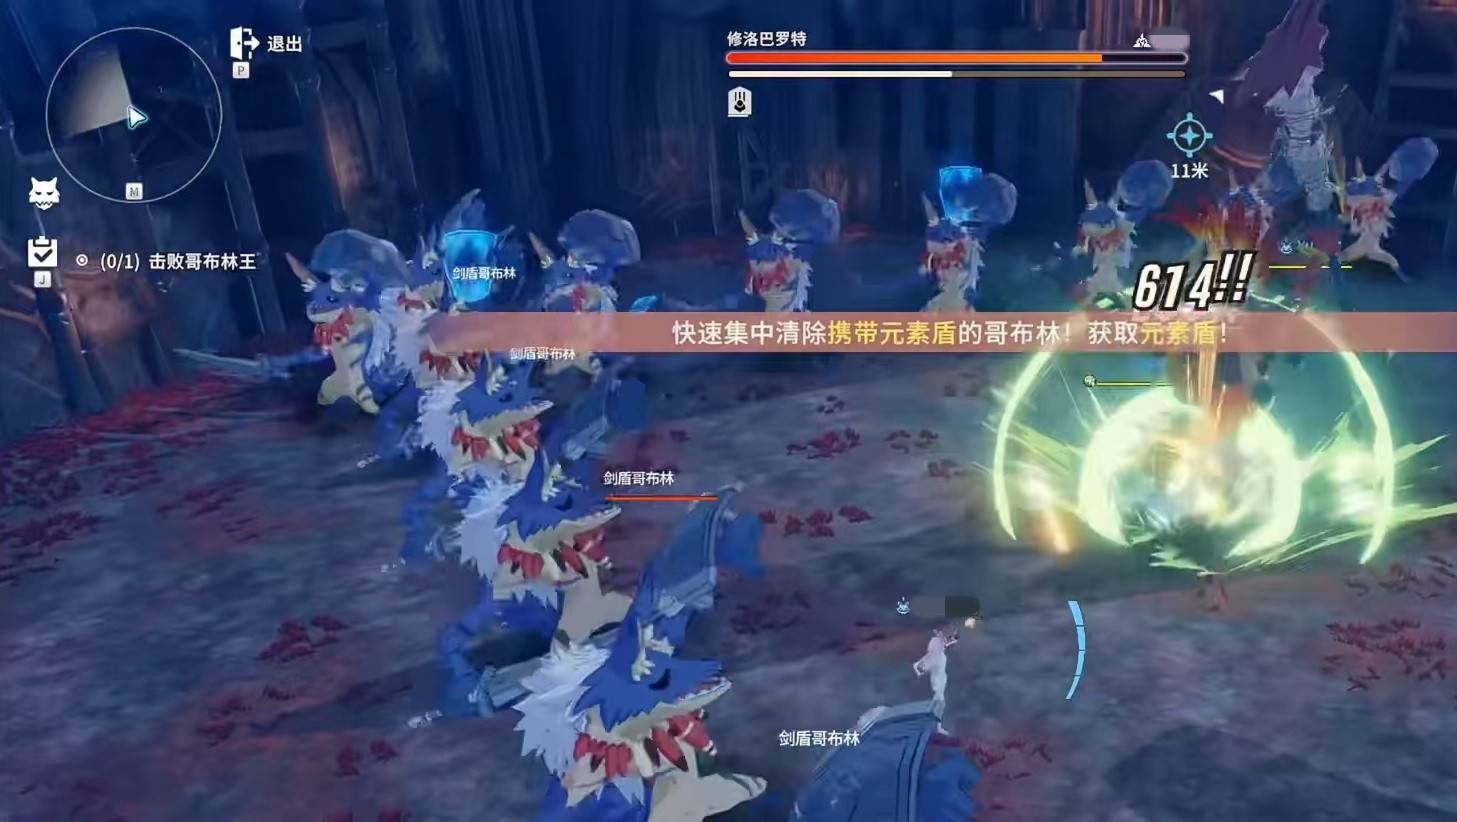
At this difficulty, the entire Goblin Nest dungeon's difficulty will increase dramatically, requiring not only high DPS but also a certain level of coordination among all players. This is because the Forest Goblins here can heal all the small monsters and even add shields to themselves, so they need to be dealt with first. The Fire Goblins' damage is extremely terrifying, easily leading to a team wipe if not careful. The boss's mechanics, relatively speaking, are simpler. After the start, activate the Void Erosion buff once, followed by the normal output routine. When the boss's health drops by about 1/5, the Sword and Shield Goblin mechanism will begin.
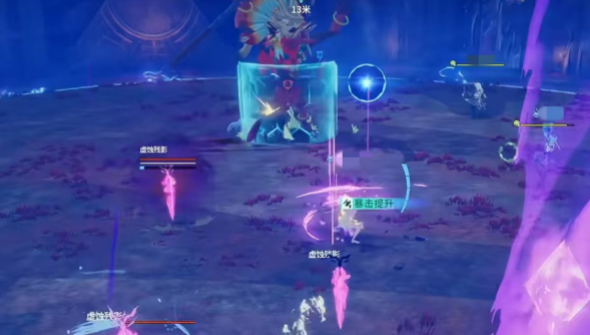
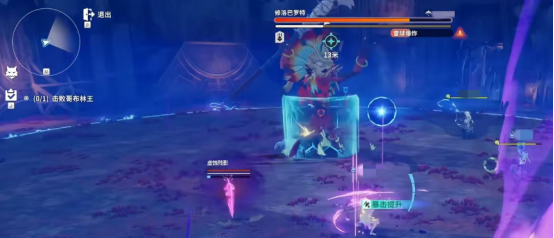
After entering the Sword and Shield Goblin mechanism, the whole team should immediately run to the edge of the field, prioritizing killing one Sword and Shield Goblin for the tank in the team. This way, the tank can directly pick up the shield, and after picking up the shield, everyone stands at the edge of the field waiting for the mechanism to end. Healers should pay attention to promptly picking up another shield that falls on the field. These two objectives of picking up shields are in preparation for the subsequent mechanisms. Next, there is an important Bouncing Energy Ball mechanism; if the conditions are not met, the boss will perform a full-screen attack. If the conditions are met, the boss will enter a weakened state. Specifically, the boss will randomly lock onto a shielded target and continuously rotate towards it while generating a protective barrier in front. At this time, the two shielded targets need to form a triangle with the boss, working together to bounce the ball onto the boss, thus meeting the requirement. Be careful not to bounce the ball onto the shield next to the boss or the wall.
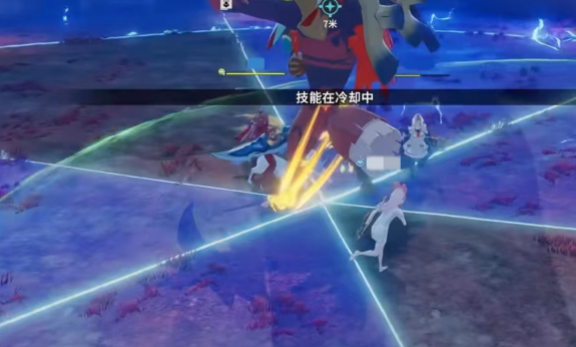
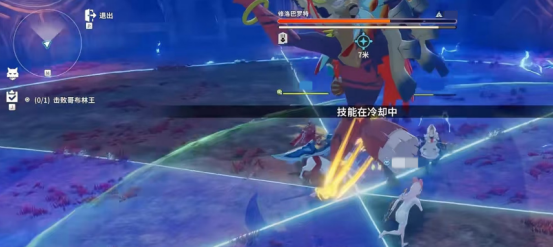
After the Bouncing Energy Ball mechanism ends, there is a period of normal output, lasting approximately 30 seconds, during which you must go all out. Another thing is that the entire map will be divided into multiple areas, which are relatively easy to avoid. Stand where the boss is, and move positions in time. Do not be greedy for output, as being hit will result in very high damage, and being hit several times will lead to a team wipe. After the Pizza Mechanism ends, continue outputting for a while, and when the boss's health drops below half, intersecting hurricanes will appear, with red prompts on the ground.
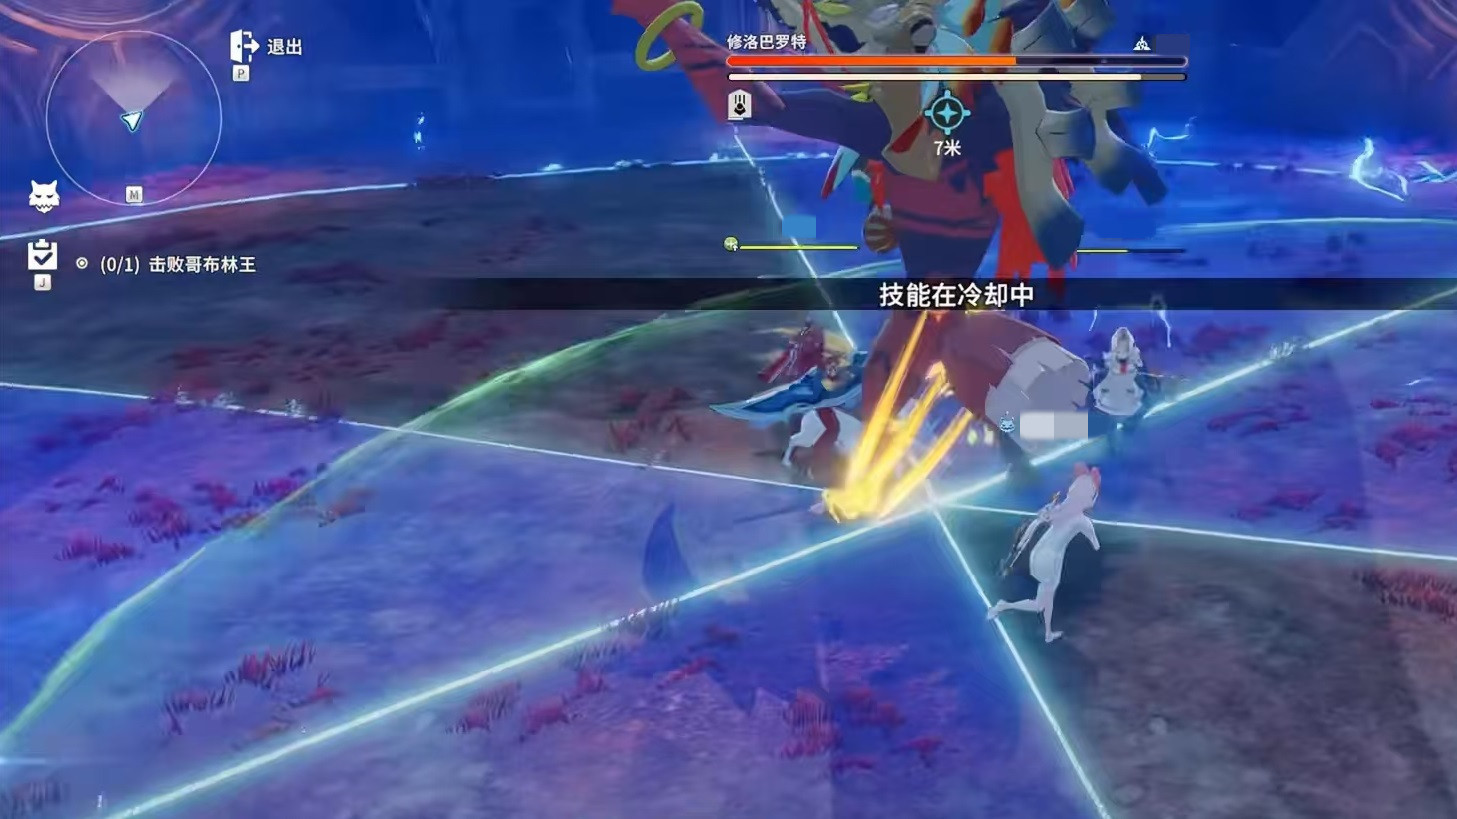
Here, two players should stand horizontally, and two players vertically, not standing too close, using a cross-positioning to avoid. No matter what mechanism appears next, follow the methods described above, as no new situations will arise. Finally, note that if the boss goes berserk, it will perform horizontal and vertical slashes, followed by a full-screen attack, which can be avoided using invincibility frames. If the output is slow, there is a high probability of dragging the fight until the boss goes berserk. If the output is strong, this problem won't occur.
After reading today's guide, everyone should now know how to clear the Star Trace Resonance Goblin Nest. As can be seen from the above introduction, there are high requirements for the positioning, output, and awareness of all team members. It takes several practice runs to form a mature team, so try to find friends you usually play with to join the battle.
Recommend


Strategy
How to Play the Vigilante Hero in Romance of the Three Kingdoms Fantasy Continent 2: Ballad of the Warlord - Strategy Guide for Playing the Vigilante Hero in Three Fantasies 2: Ballad of the Warlord
What is the action order for "The Ballad of the Warhawk" in Fantasy Three Kingdoms 2? A strategy guide for the action order in The Ballad of the Warhawk in Fantasy Three Kingdoms 2
How is Viola in Black Beacon? Analysis of Viola's Strength in Black Beacon
When will the mobile game "Douluo Continent Soul Hunting World" be released? Introduction to the public testing time of "Douluo Continent Soul Hunting World" mobile game.
When will Dragon Stone War be released? Overview of Dragon Stone War public testing time
How to Play Modern Warships Horizon Detailed Explanation of Modern Warships Horizon Configuration