
Dododex: ARK Survival Evolved
Game Introduction


Hot Strategy
Ark Survival Evolved Account Purchase Channels Sharing Where to Buy Ark Survival Evolved Game Accounts
Today, I will share with you the channels for purchasing ARK: Survival Evolved accounts. As more and more gamers tend to buy popular game accounts directly, this approach can help them easily skip some basic and simple tasks. At the same time, by purchasing these accounts, players can enjoy a more cost-effective gaming experience. This way, players do not need to invest too much money in in-game purchases, and they can obtain high-value accounts at a lower total cost, thereby experiencing richer and more diverse game content. Therefore, if player friends also have the intention to buy some popular game accounts recently, they can directly choose to use the TradingCat App.

[TradingCat] Latest Version Download
>>>>>#TradingCat#<<<<<<
In the dinosaur-themed sandbox survival game "ARK: Survival Evolved," players need to gather, hunt, and craft various ways to obtain food and resources to deal with threats and challenges from all kinds of natural creatures. This game can provide a richer survival experience. Additionally, it offers a large number of melee and ranged weapons, which can effectively enhance the player's combat attributes, giving everyone more advantages in battle. Therefore, collecting these resources in the game is very important. By directly purchasing accounts that contain these popular combat elements, players can save more effort and directly experience richer combat content. So, for interested users, Android players can directly click the button above to download the official version of TradingCat, and iOS Apple users can go to the TradingCat official website to experience it.

The TradingCat software provides a permanent compensation after-sales service, which is an advantage that cannot be ignored. Under this after-sales guarantee mechanism, users do not need to worry about any after-sales issues with the game accounts they purchase being unaddressed. Therefore, as long as players encounter any risk issues during the use of their accounts, they can directly contact the platform's customer service for problem resolution. The platform's customer service will provide corresponding solutions or compensation based on the actual situation of the player's account, to protect the player's actual rights and interests as much as possible. This service model not only provides users with a sense of security but also greatly enhances user trust in the platform. Users can trade game accounts on the TradingCat platform with greater peace of mind, knowing that there is a strong after-sales team supporting them if any issues arise.

In addition, when players are purchasing commodity accounts, the operation is very convenient. Players only need to enter the name of the game item they want to buy in the search box on the homepage, and they can quickly find and browse items in batches. Usually, the corresponding game will offer a rich selection of items, and players can compare and select horizontally in the search results to help themselves find more cost-effective account items, thus effectively reducing expenses. In addition, players can also achieve more efficient screening through combined filtering, such as combining price and release time factors, to find the desired account items faster.

In summary, in the TradingCat trading channel, users' problems can be handled and resolved more efficiently. At the same time, users can also use the smart search function to quickly find the corresponding account items, achieving effective connections between buyers and sellers. Therefore, for interested users, it is recommended to download and use this software as soon as possible to enjoy a convenient trading experience.
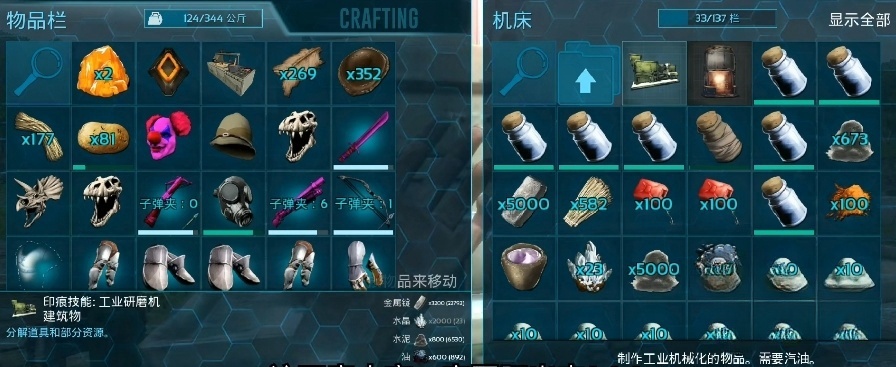
Ark Ultimate Mobile Polymer Acquisition Guide Where to Find Polymers in Ark Survival Evolved Mobile
Today, I want to share with you the guide on how to obtain polymers in Ark: Survival Evolved Ultimate Mobile. In Ark: Survival Evolved Ultimate Mobile, polymer is an extremely important resource that spans from basic survival to advanced technology production at various stages. Whether it's crafting powerful equipment, building efficient tools, or synthesizing certain key items, polymer plays an indispensable role.

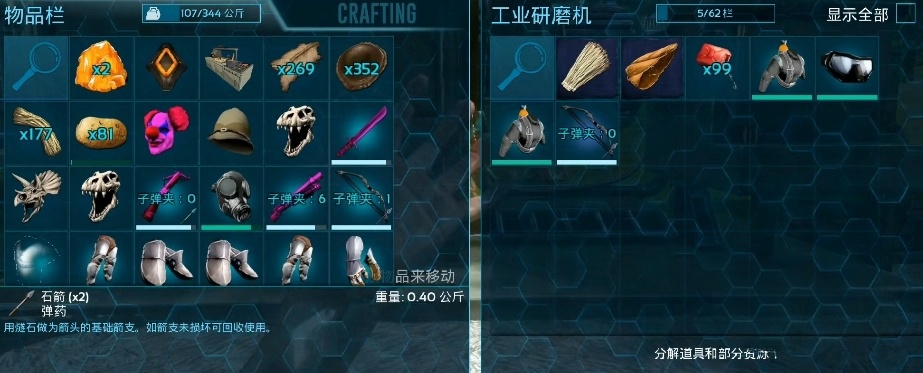
The most direct method to obtain polymers is by hunting specific creatures and collecting organic polymers from their corpses. In Ark: Survival Evolved Ultimate Mobile, organic polymer is a natural resource that, although it cannot be stored long-term, can directly replace traditional synthetic polymers. Among them, penguins and mantises are the main target creatures. Penguins are found in cold snowy regions, and it is recommended to use high-damage weapons like crossbows or rifles to kill them quickly and collect the resources. Using a metal scythe can greatly improve collection efficiency.

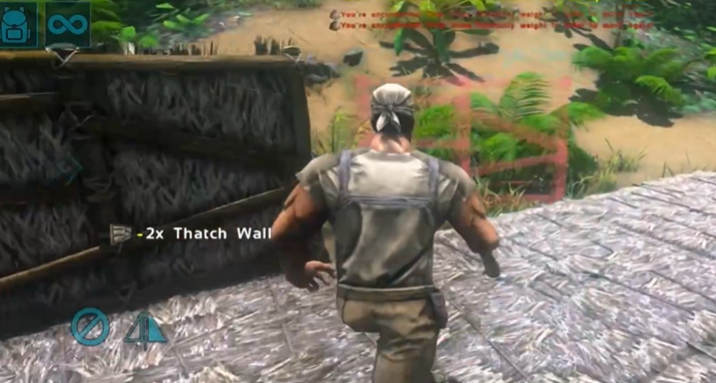
In addition to hunting creatures, organic polymers can also be obtained by deconstructing items. This method suits players who have excess resources or equipment. By crafting specific items using organic polymers and then deconstructing them, you can recover some of the polymers. For example, when crafting certain equipment or tools, prioritize recipes containing organic polymers; subsequent deconstruction not only recovers part of the materials but also provides flexible options for players in case of resource shortages. Although this method is less efficient than direct collection, it serves as an effective supplementary means when there are no target creatures or it's inconvenient to go out.
The use of polymers is not limited to equipment crafting; they can also be used in feed recipe synthesis. For example, when making Allosaurus feed, fibers and purple berries are required, and polymers can serve as direct substitutes for these base materials. This substitutability makes polymers a key means of saving resources in certain situations. Players can enhance item synthesis efficiency by reasonably allocating the usage ratio of polymers and other materials.
Polymers are widely applied in the manufacturing of tech equipment and construction. From advanced weapons and armor to automated devices and high-tech buildings, polymers are essential core materials. As players upgrade their tech levels, they will gradually require large amounts of polymers to support synthesis needs. For example, when crafting high-quality assault rifles or high-tech armor, the demand for polymers significantly increases. To meet this stage's resource needs, it is recommended that players plan fixed collection routes or regularly hunt target creatures to ensure a continuous and stable supply of polymers.
Polymers in Ark: Survival Evolved Ultimate Mobile are not only an important part of resource collection but also the core pillar of player technological advancement and equipment enhancement. By obtaining organic polymers through hunting penguins and mantises and flexibly utilizing deconstruction and substitution mechanisms, players can maximize resource utilization efficiency and provide reliable support for exploration and combat.
How to open the console in Ark: Survival Evolved Mobile
Today, I want to share with you how to open the console in Ark: Ultimate Mobile Edition. In Ark: Ultimate Mobile Edition, opening the console provides players with a powerful tool that not only allows for adjusting game parameters but also quickly executing various commands for debugging, managing servers, and enhancing the gaming experience. Whether it's rapid resource acquisition in single-player mode or server management in multiplayer, it's essential to know how to correctly open and use the console.

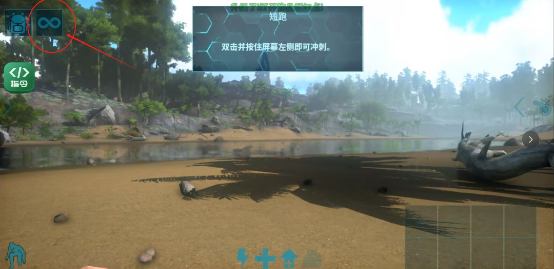
In the mobile version, the method to open the console varies depending on the game version and operating environment. If you are using a cracked version, opening the console is relatively simple. After entering the game, an "O" symbol will appear in the top-left corner of the interface. Clicking this symbol directly activates the console function. In this mode, players can input various commands, such as activating "God Mode," which makes the character invincible. This is very useful for exploring dangerous areas or testing gameplay mechanics. Players can also use codes to generate resources, tame creatures, or quickly adjust weather conditions, providing a more free and flexible gaming experience.
For servers running through official tools, opening the console requires more complex settings. One method is to modify the configuration file. First, open the "config.yml" file in the server directory using a text editor and search for the "openToConsole" field. Change its value to "true," save and close the file. After restarting the server, click the "More" button in the game interface to activate the console. This method is suitable for private servers created by players, allowing administrators to manage resources or adjust game rules more directly within the game.
Another more flexible method is to enable the console via startup parameters. When starting the server, run the command-line interface of the Ark server tool and input the corresponding startup parameter, such as "-console." After startup, the console will automatically pop up in a new window. This method not only allows for using console commands within the game but also enables real-time adjustment of server settings from an external window, such as modifying player limits, adjusting day-night cycles, or enabling PvP mode.
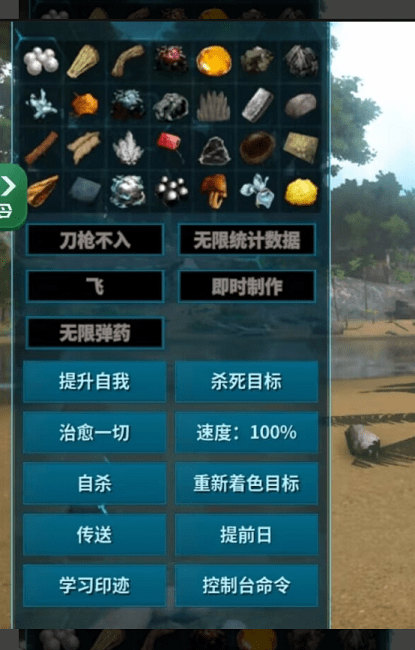
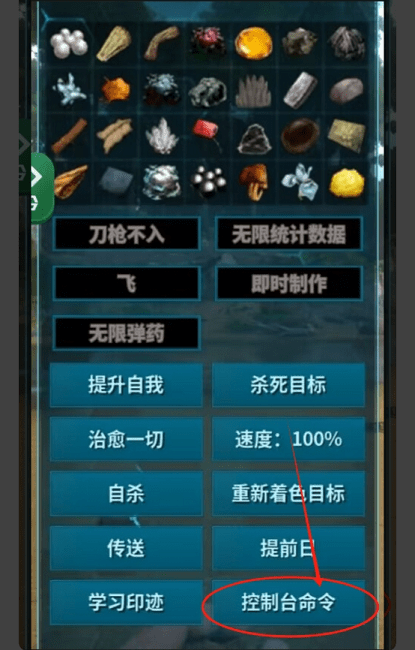
After opening the console, you can execute multiple functions by entering commands. For example, typing "/help" will list all available commands, helping players quickly understand the purpose of each command. Common commands include "/giveitemnum" for generating specified quantities of items, "/tamespeedmultiplier" for adjusting taming speed, and "/stop" to directly stop the server. These commands are crucial for optimizing the gaming experience and managing servers. Note that some commands may require administrative privileges, so ensure proper permission settings before using the console.

Through the console, players can quickly adjust game progress, such as instantly generating rare items or directly modifying character attributes, making it easier to experience the core content of the game. Additionally, the console serves as a platform for creation and experimentation, allowing players to simulate various extreme scenarios, such as generating large numbers of hostile creatures to test defense mechanisms or rapidly switching weather to observe environmental changes' impact on creatures.
How to make cactus soup in Ark Survival Evolved mobile
Today, I want to share with you the guide for making Cactus Soup in Ark: Survival Evolved Ultimate Mobile Edition. In the game, Cactus Soup is an extremely practical dish, especially indispensable in hot desert terrain. It not only provides players with a large amount of hydration but also effectively reduces water consumption and enhances environmental adaptability, making it a powerful auxiliary tool for exploring harsh environments.
The starting point for making Cactus Soup is collecting basic materials, which requires preparing a bag of water, the core foundation for all cooking. In the desert map of the game, water resources are relatively scarce, so it is recommended that players carry enough water bags or canteens and replenish at oases or water sources. Without water, preparation cannot proceed, especially in high-temperature environments where water consumption increases significantly. Therefore, preparing water sources in advance is the first step in making Cactus Soup.
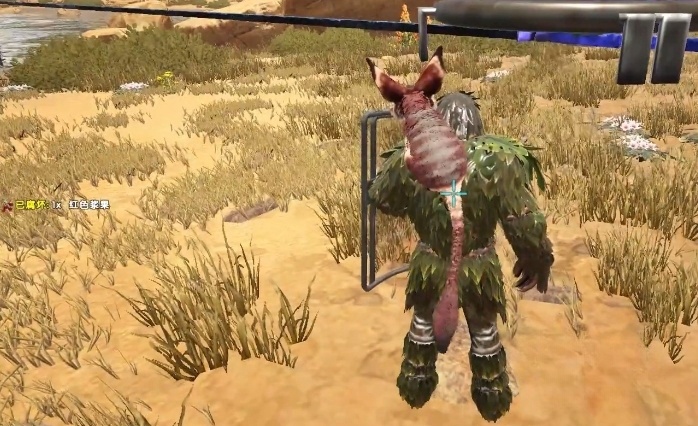
Next is berry collection. Cactus Soup requires 10 blue berries and 10 yellow berries, which can be easily obtained by harvesting bushes. When collecting berries, it is recommended to use creatures with high harvesting efficiency, such as Triceratops or Velociraptors, to quickly gather sufficient quantities. Additionally, 10 carrots are needed; carrots are planted crops, so players need to build farmland at their base, plant carrot seeds through an irrigation system, and wait for them to mature. If planting conditions are unavailable, try finding wild farmland on the map, though this requires some luck and exploration time.
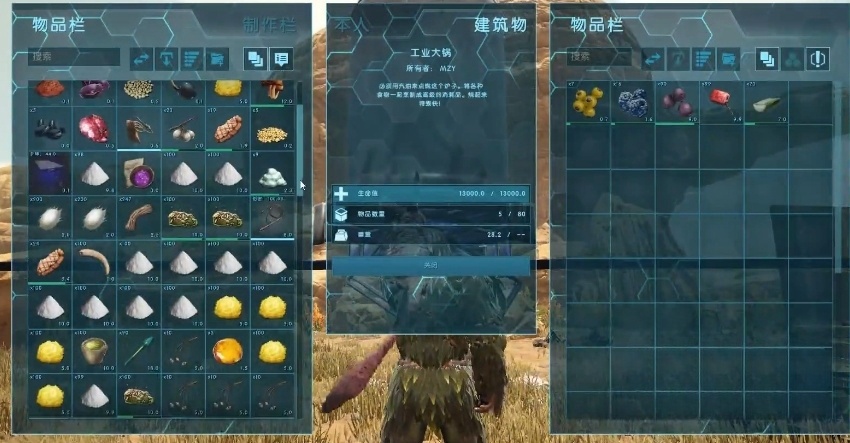
The most critical material is cactus juice, requiring 30 units. Cactus juice can only be obtained by chopping cacti, which are distributed in desert environments, such as valleys or plains. When harvesting cacti, it is recommended to use tools like metal sickles or axes to improve efficiency. During the process of chopping cacti, be wary of lurking predators like Rock Drakes or Mantises, whose attacks may interrupt your harvesting rhythm. Therefore, it is best to bring a strong mount for protection. Once all materials are prepared, players need to cook in a cooking pot.
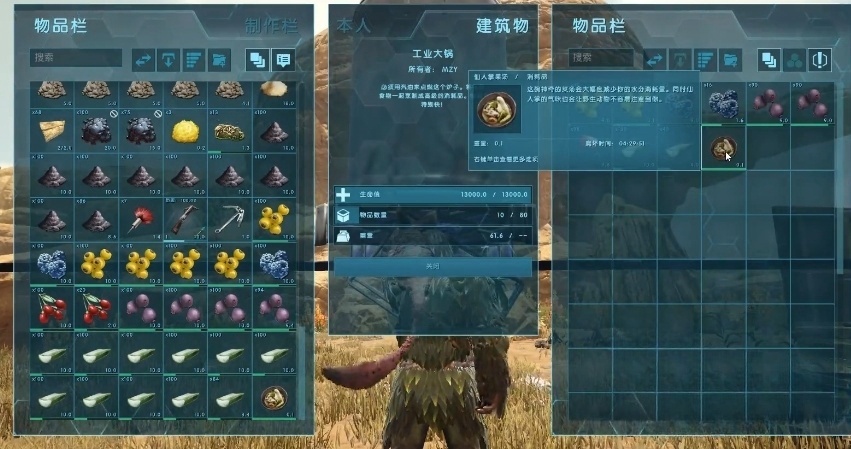
Place one bag of water, 10 blue berries, 10 yellow berries, 10 carrots, 2 jasmine berries, and 30 units of cactus juice into the cooking pot, and ignite the fuel (such as wood or thatch) to start cooking. Note that the cooking pot consumes fuel quickly, so prepare plenty of fuel to avoid failure due to extinguishing mid-cooking.
After completion, the Cactus Soup will appear in your inventory. This dish has significant effects: consuming it immediately restores 100 points of hydration and reduces water consumption by 50% for 10 minutes. Additionally, it provides 60 points of heat insulation, helping players explore hot areas for extended periods. More crucially, Cactus Soup can shorten the maximum detection distance for enemies to 12 meters, which is important for stealth or avoiding danger.
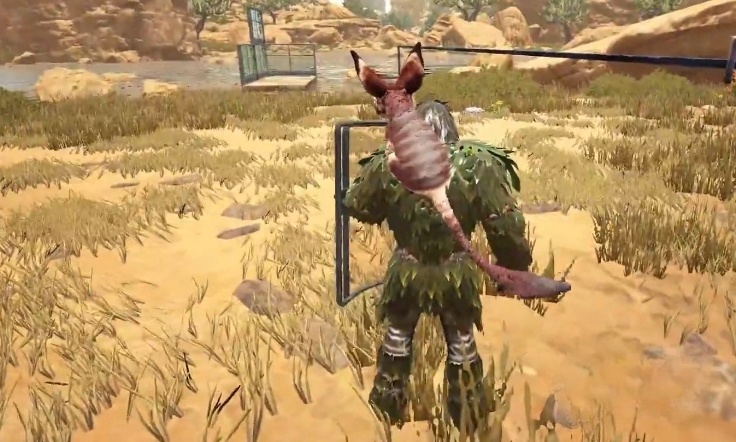
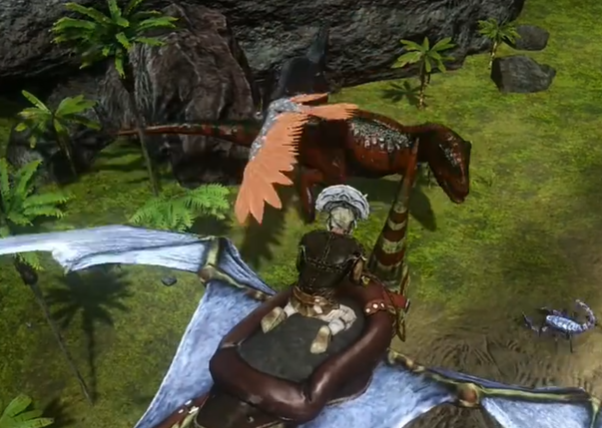
How to tame a flying dragon in Ark Ultimate Mobile Edition: Ark Survival Evolved mobile flying dragon taming guide
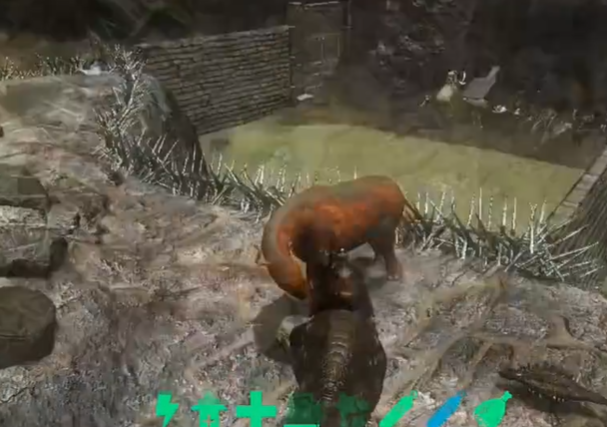
Today, I want to share with you how to tame a flying dragon in ARK: Survival Evolved Mobile. Taming a flying dragon is a dream for many players in ARK: Survival Evolved Mobile. As one of the most intimidating aerial dominators in the game, the flying dragon not only has extremely high mobility but can also unleash powerful elemental attacks. Taming a flying dragon is no easy task; it requires precise operations from the player as well as thorough preparation and meticulous strategy.
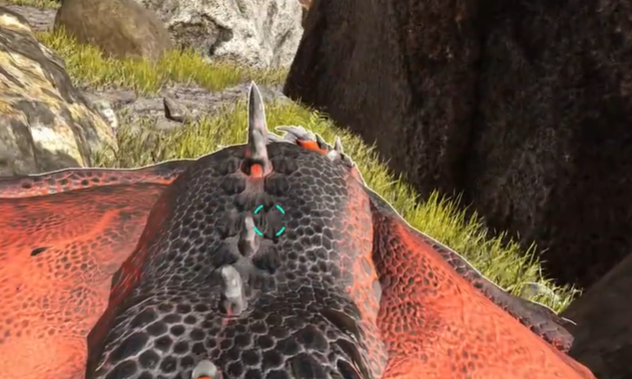
Before starting the taming process, players need to prepare thoroughly. The core of taming a flying dragon lies in obtaining a baby dragon, so the first step is to prepare a fast and durable mount, such as a pterodactyl with increased movement speed or a fast land creature. These mounts can help you quickly escape from the pursuit of the flying dragon and avoid fatal attacks at critical moments. Additionally, players should carry enough heat-resistant or cold-resistant equipment to survive in lava zones or cold areas. Prepare high-quality bows, tranquilizer arrows, tranquilizer darts, and plenty of recovery items to prevent sudden life-threatening situations in the dragon's nest.

Flying dragon nests are typically located in high mountains, canyons, or lava zones, such as Flame Volcano or Frost Mountains. These areas are not only treacherous but also filled with other high-level predators. When approaching the nest, players need to stay highly alert and try to act during the day for better visibility. Flying dragon nests usually spawn flying dragon eggs, and retrieving these eggs is a crucial step in taming a flying dragon. However, picking up an egg will trigger the hostility of nearby adult dragons, which will quickly chase the player with their extremely fast flight speed. At this moment, players need to rely on the speed and agility of their mounts to quickly escape the danger zone.

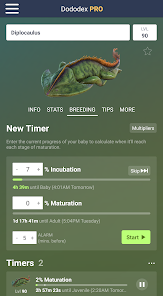
After successfully bringing back the flying dragon egg, the next step is to hatch the baby dragon. Flying dragon eggs are extremely sensitive to temperature, and players need to build incubation equipment, such as a fire pit or air conditioner, to ensure the egg hatches within an appropriate temperature range. After hatching, the baby dragon will not be immediately tamed. Players need to prepare the baby dragon's favorite food—dragon milk, which can only be obtained from a mother dragon. For this, players need to return to the dragon habitat, use a bow or tranquilizer dart to knock out a mother dragon, and collect dragon milk from her. This process is full of danger, and it is recommended to act as a team to ensure efficiency and safety.

The feeding stage of the baby dragon is the final step in the taming process. Players need to continuously provide dragon milk to the baby dragon while paying attention to its hunger levels and health condition. Raising a dragon takes time, and ensuring the baby dragon's safety during this period is crucial. It is recommended to place the baby dragon in a well-defended base to avoid attacks from predators. Once the dragon grows into a fully mature form, players can ride it and soar through the sky, experiencing unparalleled flight freedom and combat power.
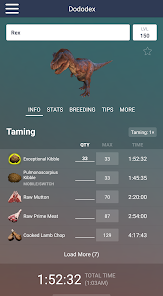
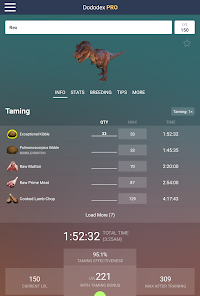
Ark Survival Evolved Mobile Tyrannosaurus Rex Taming Guide: How to Tame a Tyrannosaurus Rex in Ark Survival Evolved Mobile
Today, I want to share with you the Tyrannosaurus Rex taming guide for Ark Ultimate Mobile. In "Ark: Survival Evolved" Ultimate Mobile, taming the T-Rex is many players' ultimate goal. As the most intimidating apex predator on land, the T-Rex not only boasts powerful attack and durability but can also become a reliable companion for exploration and combat. However, its high anesthesia resistance of 1550 points and ferocious predatory nature make the taming process challenging.
The best place to find a T-Rex is usually in mountainous or grassland areas on the map. These places have abundant food, and T-Rex activity is frequent, but it also means that other dangerous creatures may be lurking around. After spotting the target, choose an open and relatively safe area for setup. It is recommended to build a temporary trap using four to five high walls. The spacing between the fences should be narrow enough to prevent the T-Rex from escaping or posing a threat to the player. Once the trap is set up, lure the T-Rex into the enclosure with ranged attacks. Bows or slings are common tools, but more efficient options are tranq arrows or tranq darts.
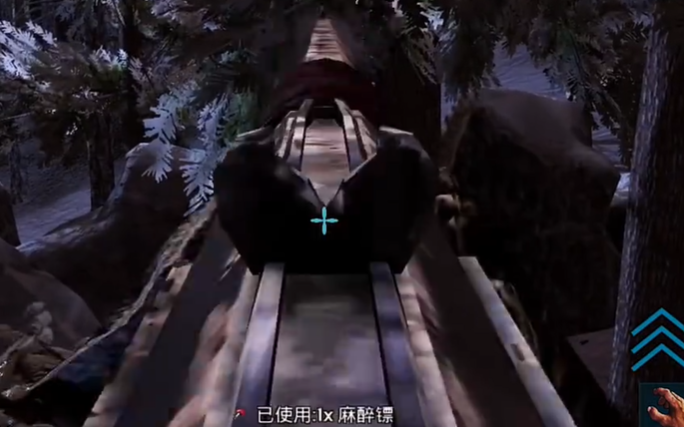
Once the T-Rex is trapped, the core step in taming is to reduce its consciousness. Players need to continuously use tranq weapons to aim at the T-Rex's head or neck, as these areas provide the best tranq effect. Note that the T-Rex has a large attack range, so even when confined, players should maintain a safe distance to avoid being killed by a mistake. It is recommended to carry a large number of tranq arrows or poison darts and prepare backup weapons for unexpected situations. Throughout the process, closely monitor the T-Rex's tranq value to ensure it does not wake up due to the anesthesia wearing off.
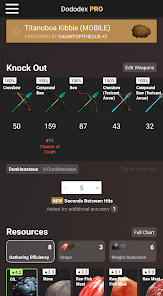
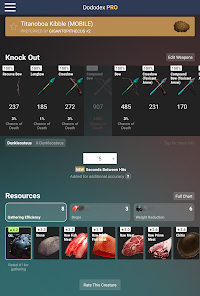
After the T-Rex loses consciousness, the taming phase officially begins. The T-Rex requires a significant amount of feed, and the best choice is premium kibble made from giant scorpion eggs, which greatly increases taming efficiency and reduces time. If giant scorpion eggs are unavailable, premium raw meat, raw fish meat, or regular raw meat can be used as substitutes, though the taming speed will be slower. Additionally, to prevent the T-Rex from waking up, players need to continuously add tranq potions or black berries to keep it dazed. It is recommended to prepare hundreds of units of tranq potions in advance to handle the long taming cycle.
During the taming process, the T-Rex's hunger value will gradually decrease. Only feeding it while it is hungry will increase the taming progress. Therefore, players need to be patient and attentive to the surrounding environment's safety. Once tamed, players can immediately equip the T-Rex with a saddle to unlock its powerful combat abilities. The T-Rex can not only fight against most hostile creatures but also serve as a resource transport vehicle, with its 500 carrying capacity helping players transport large amounts of supplies.
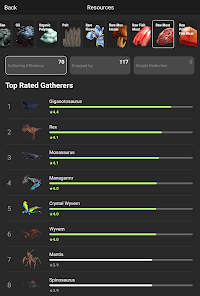
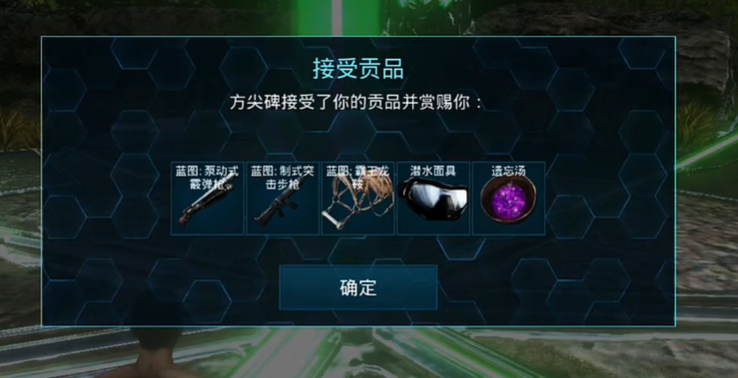
Ark Survival Evolved Mobile Black Pearl Acquisition Guide: Where to Find Black Pearls in Ark Survival Evolved Mobile
Today, I want to share with you a guide on how to obtain Black Pearls in Ark Ultimate Mobile. In Ark Ultimate Mobile, Black Pearls are a rare and crucial resource, playing an indispensable role in crafting high-tier tech equipment, Tek Suits, and certain artifacts. There are various ways to obtain Black Pearls, but their rarity and difficulty make them one of the goals that players must carefully plan for.

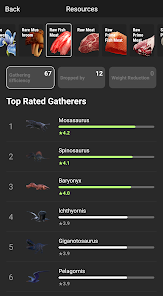
Killing specific deep-sea creatures is one of the main methods to obtain Black Pearls. Some powerful marine creatures not only dominate the deep sea regions but are also important sources of Black Pearls. For example, Elite Megalodon is a high-yield source of Black Pearls, yielding about 100 Black Pearls per kill. However, due to its strong attack power and high health, killing an Elite Megalodon requires players to bring high-level aquatic dinosaurs (such as Mosasaurus or Megalodon) and be well-prepared.

Giant Squid is another stable source of Black Pearls, dropping 20-30 Black Pearls per kill. However, the Giant Squid's capture skill makes it a highly threatening enemy. Players are advised to use sharks or Mosasaurus to distract it before attacking. Additionally, smaller marine creatures like Horseshoe Crabs and Ammonites have a chance to drop Black Pearls, but in small quantities, no more than 2, making them suitable as supplementary sources.

Scattered throughout the deep-sea region are black pearl veins, which are usually hidden in underwater caves, near coral reefs, or in deeper terrain depressions. Players can gather these using diving gear. To improve efficiency, it is recommended to carry ample oxygen tanks or use underwater vehicles such as Water Dragons or submarines for better mobility in the deep sea. Some maps also contain shipwreck ruins and underwater ruins, where chests often hide Black Pearls. Exploring these areas not only helps accumulate resources but also reveals hidden map details.

For players who own the Extinction map, Gacha is a highly potential Black Pearl production tool. Gacha is a unique creature that generates different resources after eating. By feeding it specific foods, players can adjust its resource output to Black Pearls. Although taming Gacha incurs some cost, its continuous production capability makes it an efficient choice for stable Black Pearl acquisition. Additionally, players can obtain Black Pearls through dungeon challenges. Chests in dungeons have a chance to contain Black Pearl rewards, but dungeon challenges require adequate equipment and skills, so preparation is advised.

Whether by killing marine creatures, exploring underwater ruins, or utilizing the abilities of special creatures like Gacha, obtaining Black Pearls requires time and strategy. Mastering these methods not only helps players meet the demands of tech equipment but also allows them to navigate the deep-sea world with ease, becoming a master of deep-sea exploration in Ark.
Ark Ultimate Mobile Edition daytime commands Ark Survival Evolved mobile daytime commands share
Today, I want to share with you the daytime commands for Ark: Ultimate Mobile. In Ark: Ultimate Mobile, mastering time not only allows players to better plan survival strategies but also helps in dealing with complex environmental challenges. Daytime offers ample light and high visibility, making it the best time for resource gathering, construction planning, and taming creatures.

Adjusting the time to daytime via console commands can provide a more efficient gaming experience, especially when nighttime dangers increase. This feature becomes particularly important. To quickly adjust the game time to daytime, players need to enter the console and input the command. First, press the console key on the screen (usually the "TAP" key) to enter the command input interface. Then, enter the following command: SetTimeOfDay 09:00. This command sets the game time directly to 9:00 AM, starting a new day. The morning sun shines over the land, dispelling the darkness of night, and the environment becomes vibrant again. Whether gathering resources, building bases, or hunting dinosaurs, daytime activities are much more efficient than at night. For players who need to explore for extended periods or complete complex tasks, adjusting to daytime can significantly reduce the risk of getting lost or encountering dangerous creatures.
In addition to time adjustment commands, there are a series of auxiliary commands that can further enhance survival efficiency. For example, after entering the console, typing EnableCheats activates cheat mode, which is the basis for all command operations. If players want to ensure their safety while adjusting the time, they can use the God command to enable invincibility mode, making them immune to attacks from hostile creatures. Additionally, the InfiniteStats command restores and locks the player's hunger, fatigue, and health values, allowing players to focus on resource acquisition and task execution without worrying about basic survival issues.
The daytime time adjustment command is also crucial when taming dinosaurs. Many creatures have clearer activity ranges during the day, and the increased visibility makes the capturing and taming process smoother. For example, when searching for powerful creatures like Velociraptors or Tyrannosaurus rex, sunlight helps players observe the terrain and creature distribution more clearly, avoiding unexpected ambushes. For new players, the daytime environment is also more conducive to familiarizing themselves with the game map and surrounding ecosystem, laying the foundation for future adventures.
The time adjustment function in the game not only changes the current day-night cycle but can also be combined with other commands to expand gameplay. For example, using the TeleportToLocation command to teleport players to specific locations, coupled with daytime time adjustment, can make exploring unknown areas safer. If encountering strong enemies during exploration, using FreezeTarget to freeze targets or DamageTarget to quickly eliminate threats can help players effectively deal with emergencies. The Fly and Ghost commands provide flying and wall-passing abilities respectively, combining with daytime scenarios to more efficiently complete construction planning or resource gathering.
In the vast world of Ark: Ultimate Mobile, mastering time not only provides more initiative for survival but also allows players to freely experience different dimensions of the game. By using the SetTimeOfDay 09:00 command, players can easily adjust to daytime, enjoying the convenience and safety brought by bright environments.
Recommend


Strategy

How to Play the Vigilante Hero in Romance of the Three Kingdoms Fantasy Continent 2: Ballad of the Warlord - Strategy Guide for Playing the Vigilante Hero in Three Fantasies 2: Ballad of the Warlord
What is the action order for "The Ballad of the Warhawk" in Fantasy Three Kingdoms 2? A strategy guide for the action order in The Ballad of the Warhawk in Fantasy Three Kingdoms 2
How is Viola in Black Beacon? Analysis of Viola's Strength in Black Beacon
When will the mobile game "Douluo Continent Soul Hunting World" be released? Introduction to the public testing time of "Douluo Continent Soul Hunting World" mobile game.
When will Dragon Stone War be released? Overview of Dragon Stone War public testing time
How to Play Modern Warships Horizon Detailed Explanation of Modern Warships Horizon Configuration