
Whiteout Survival
Game Introduction


Hot Strategy
How to pass the Polar Adventure Little Red Riding Hood in the Escape Room Survival Series 1 Guide for Little Red Riding Hood in the Escape Room Survival Series 1
The Escape Room Survival Series 1: Polar Adventure Little Red Riding Hood's story is a relatively difficult level to complete, with a rather complex storyline and numerous clues. This makes many people get stuck at this stage for a long time, leading to a situation where they can't progress. To help everyone complete the Little Red Riding Hood story level and move on to the next one, today we bring you a guide for Little Red Riding Hood. After reading it, everything will be clear.

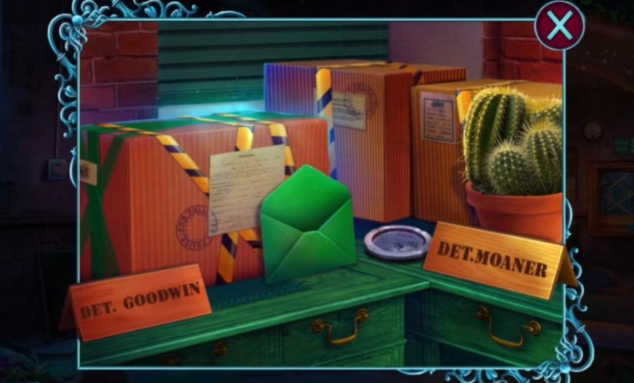
The story begins, in the first scene, you will have a conversation with an NPC, an old lady. During the dialogue, you can obtain a letter. After getting it, you will receive a bag of currency that needs to be taken along. After setting off, you will encounter a male NPC who needs to be given some of the currency so he can drive the car for you. Then, you will arrive at the next scene.
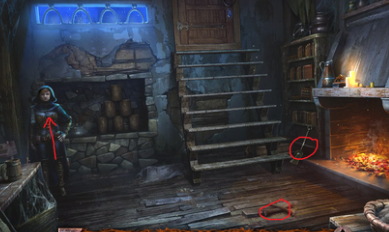
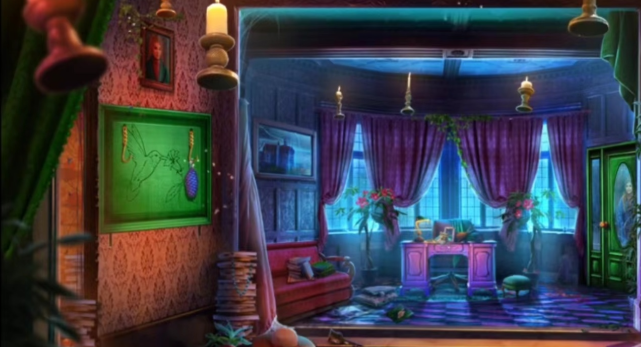
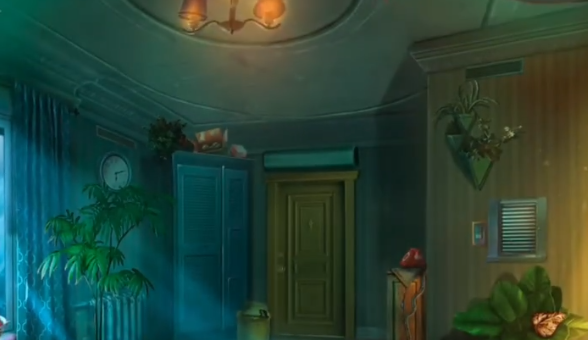
After entering this scene, you need to click on the mailbox. Through the mailbox, you can learn that you have arrived at a street called Little Red Riding Hood. Enter the house by clicking on its door. Here, you will meet a detective and need to converse with him. During the conversation, an attack occurs. After the attack, you need to search for clues inside the room.

When searching, click wherever it lights up. After completing this and collecting all the clues, go outside. You will see the detective confronting the attacker from before. You need to go up and help by using a staff to fight. After the battle, you will get a clue about a photograph.
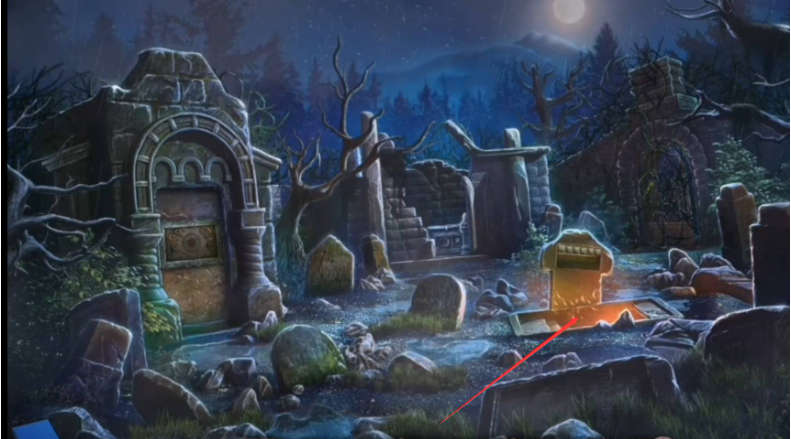
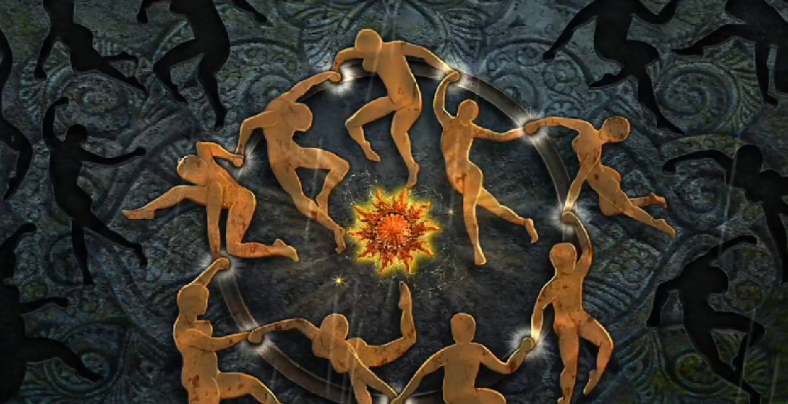
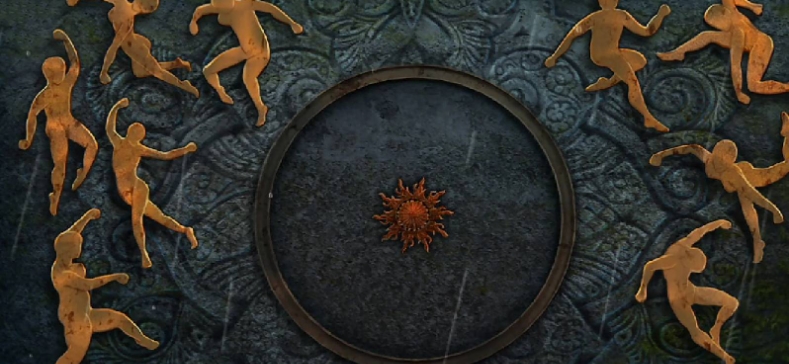
With the clue, follow the instructions to the riverside. There, you will see a pile of burning goods. Use the item shown in the picture to put out the fire. Inside, there is a half-burned letter. After obtaining it, use the fishing rod to retrieve the floating objects in the water. Combining the burned letter with these items, you can get the final clue. Follow the clue to the designated location to solve the puzzle, and you will find the character in the photo.
Above is the complete guide on how to pass the Escape Room Survival Series 1: Polar Adventure Little Red Riding Hood. After reading the introduction, everyone should now understand how to proceed through the Little Red Riding Hood plot. Once you know how to do it, you can follow the steps outlined in the text to proceed.
How to play the beginner level of Escape Room Survival Series 1: Polar Adventure Guide for Escape Room Survival Series 1: Polar Adventure
How to play the Polar Adventure in the Escape Room Survival Series 1? This is the most frequently asked question by players who have just started playing the game. To make the gaming experience smoother, today we will share some useful tips and strategies for beginners. In this guide, we will teach new players how to get started quickly. After reading the guide, everyone will know how to play as a beginner.

For beginners to understand the game, it's necessary to first figure out its gameplay. Simply put, this is a game rich in puzzle elements. During the process, you need to find clues within the scenes, then use these clues to enter the next scene, repeating this cycle until you complete the game.
This is the essence of the gameplay, which is all about finding clues. Once you understand this, you can start the game and begin searching for clues. When it comes to finding clues, the game does not provide specific hints; only the short introductory animations offer a little guidance. This means that finding clues almost entirely relies on the player's own reasoning.
For new players, this can indeed be quite challenging. Therefore, it's recommended that in the early stages, instead of trying too hard to reason, you should simply tap around the screen. By tapping everywhere, you are bound to find clues. So, at the beginning, don't get stuck—just start tapping.
Doing so will at least prevent you from getting stuck. Once you can do this, gradually adapt to the clue-finding mechanism in the game, following the introductory animations to find clues. This is the initial setup for new players when they first start the game. Remember, don't get stuck on one clue for too long.
The above is the complete introduction on how to play the Polar Adventure in the Escape Room Survival Series 1 for beginners. The gameplay and related tips have been shared in the article. After understanding how to play, you can follow the instructions in the article to start the game.
How to Pass Chapter 6 of the Polar Adventure in the Escape Room Survival Series 1: Guide for Chapter 6 of Escape Room Survival Series 1
In Chapter 6 of the Polar Adventure in the Escape Room Survival Series 1, we need to continue our escape. During this time, not only do we need to collect various items, but also solve puzzles. Many players get stuck here. So, how to pass Chapter 6? The guide below shares the entire process of passing through, helping everyone to successfully complete the level and continue with the next adventure. Don't miss this article if you don't know how to proceed yet.

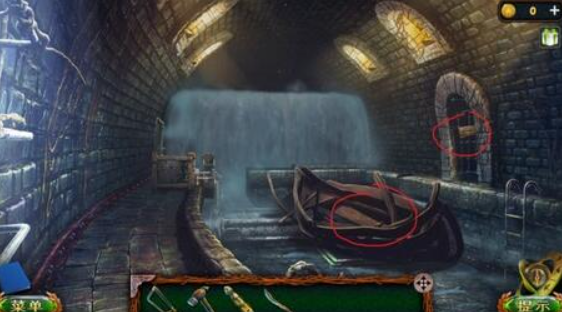
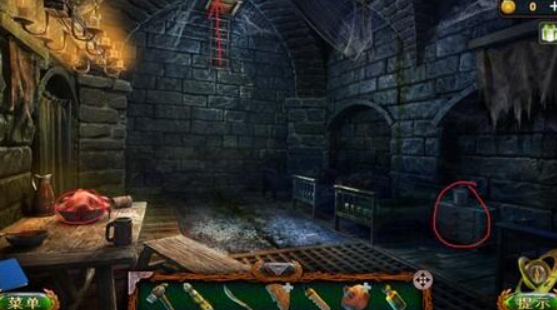
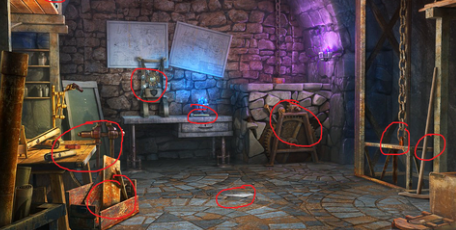
In the previous chapter, we jumped onto a boat. In this chapter, we first find the passage key by removing the wooden boards on the boat. After sawing off the right fence door, enter the tunnel, use the fire starter to burn the spider web at the left cave entrance, and clear the debris to get half of a wheel and an iron pipe. Use the iron pipe to clean the sewer, and from the garbage, you can get a glass cutter. Move forward to a room, pick up the puzzle pieces on the table, and use the pieces to unlock the door directly opposite. After entering, first talk to the female leader behind the curtain, then look at the book on the right to get a map.
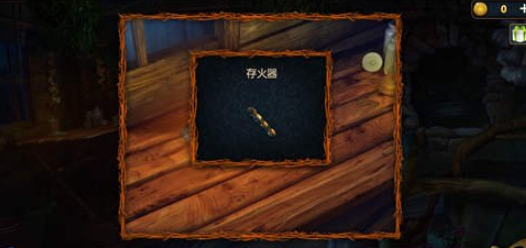
Put the fuel on the right side of the workbench into your own lantern and light it. Exit the room and open the left room. Inside the room, there is a glass jar in the cabinet on the right. Take the glass jar, cut it open with the glass cutter, and place it in the lantern. Put it on the right cabinet, open the drawer, and take the belt and key. Then, take the apple from the table on the left. Use the key to open the door on the right and enter. After entering, first click on the box, pick up the other half of the wheel, combine the two halves of the wheel with the belt to get the complete wheel, and install it on the cart. Then, take a wooden stick from the side, sharpen it with the knife, and insert it into the wheel.
Take the jack on the right, click on the small cart, and start playing the stacking boxes game. After completing it, climb to the top, use the jack to prop open the top, and reach the windowsill. On the windowsill, move the flower pot aside to see the password hidden behind it. Use this password to open the wooden box on the right floor, and get a chisel and nails.
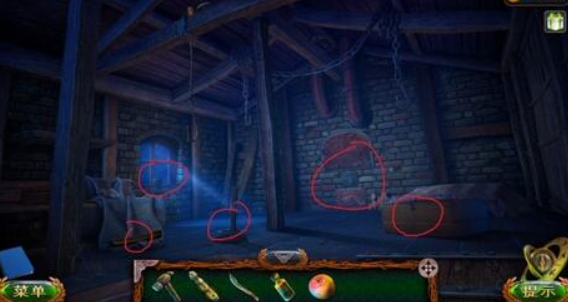
You can get two stool legs from the cloth on the left and under the stove, respectively. Use the stool legs to fix the stool, and then use the nails and hammer to get the tin can and iron wheel. Use the iron wheel on the stove to get ashes. Use the tin can to hold the ashes and get the ash can. Return to the hall where the female leader is, click on the pillow on the bed to move it aside, and get the face-changing potion. Pour the potion into the basin, get the key to the cabinet, and go to the wardrobe on the right to complete the costume mini-game. Here, choosing the 4th set will complete the change, unlocking the next chapter.
The above is the guide for Chapter 6 of the Polar Adventure in the Escape Room Survival Series 1. The above text describes the entire process of passing this chapter. As long as you follow along, you can easily pass through and begin the next adventure. For those who haven't passed yet, hurry up and try it in the game.
Escape Room Survival Series 1: Polar Adventure Chapter 4 Walkthrough Guide for Chapter 4 of Escape Room Survival Series 1
How to pass the fourth chapter of the Polar Adventure in the Escape Room Survival Series 1, the fourth level is actually a continuation of the third chapter, with many parts being quite similar. Here, you also need to use props to穿梭于现实与过去之间,过去和现实都有需要完成的任务。下面就分享一下本关的一些具体的流程,还没通关的朋友们一起看看详细的通关步骤吧。
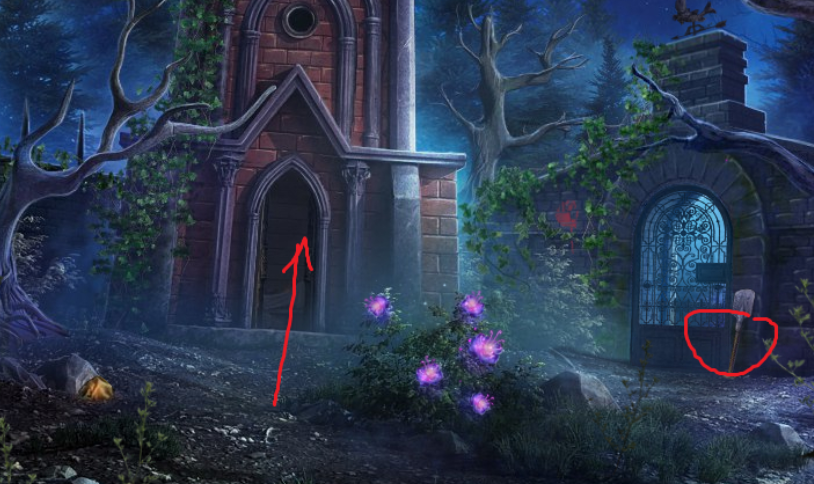
First, go back to the past and see the reading log in the corpse's hand. Use the broken sword to cut the rope, get the iron anvil stamp from the bird's nest, pull out the spear to obtain the spear, use the spear to pry up the statue's head, and get the long stick and shield. Then put the paper with the poisonous mark into the box to get the other part of the sword. Get the magnet from the dried hand under the gate, install the 3 magnets, and enter the door to get the hatchet from the soldier's corpse.

After going out, use the hatchet to clear the bird's nest, then get the pine branch. Use the broken sword to cut part of the rope, combine the wooden stick, rope, and pine branch to make a broom. Then go back inside the ruins, use the broom to sweep the wall behind the soldier to get the hammer stamp. Install the hammer stamp and the iron anvil stamp on the left door of the ruins, and enter for the hidden object game.
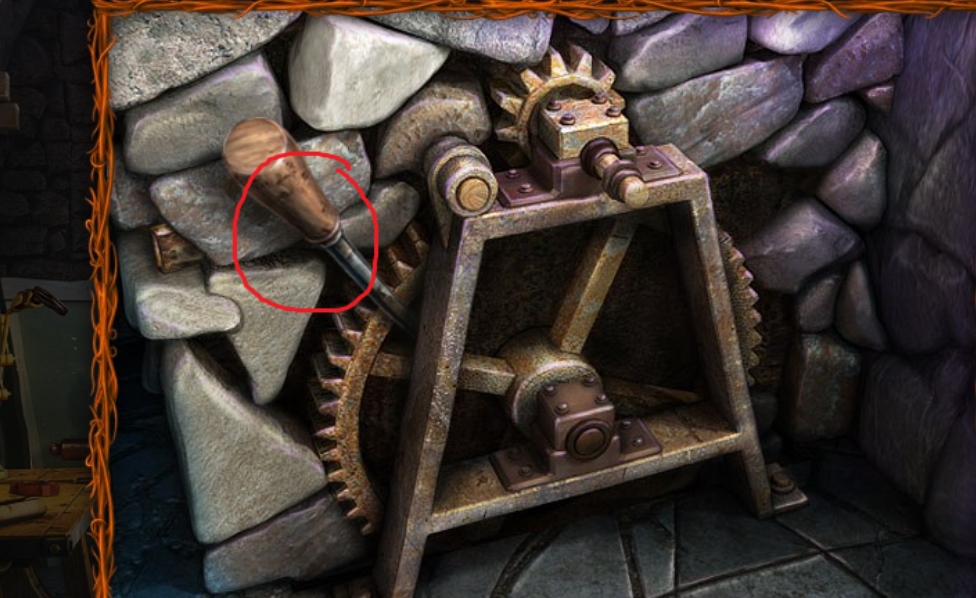
There are stone fragments on the platform to the left, which can be placed on the right pillar to complete the puzzle. There is an iron rod below the right stone pillar that can open the blocked water outlet. Then get the bucket, use it to collect water, pour the water from the bucket into the brazier to get the knob. Insert the knob into the pillar to get the square key, which can unlock the platform on the left, and then get the hammer handle.
The middle wooden box contains part of a ladder, which can be used with the chain ladder. You can get the hammer handle and key above. Use this item on the middle wooden box; the internal mechanism requires two hammer handles to get the master blacksmith's hammer. Place the hammer in the hands of the decapitated figure in the courtyard, place the sword fragment and the broken sword on the anvil, use the fire holder, and obtain the Sword of Justice. Go back to the past, talk to the witch in her hut to get the coin, put the sword in the pot to get the poisoned sword, then go to the goddess statue, put the coin in the door, and complete the puzzle. Finally, use the poisoned sword to pierce Cassandra's heart.
The specific steps to pass the fourth chapter of the Polar Adventure in the Escape Room Survival Series 1 have been shared with friends. By following the above steps, the fourth chapter can be successfully completed. The fourth level is more complex than the previous one, requiring several switches between scenes, but once you know the specific steps, passing through is relatively easy.
How to pass Chapter 8 of the Polar Adventure in the Escape Room Survival Series 1 Guide for Chapter 8 of the Escape Room Survival Series 1
In Chapter 8 of the Polar Adventure in the Escape Room Survival Series 1, we continue our journey to escape from the castle. As long as this chapter is successfully passed, the main storyline can be considered successfully completed. Of course, as the last chapter, it definitely has a certain level of difficulty. Many players get stuck here, not knowing how to proceed. To help everyone pass smoothly, the following guide will explain the overall process for reference.

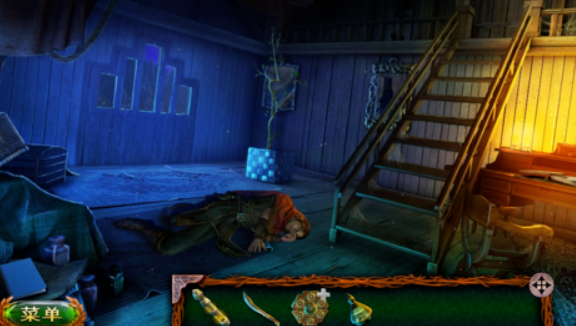
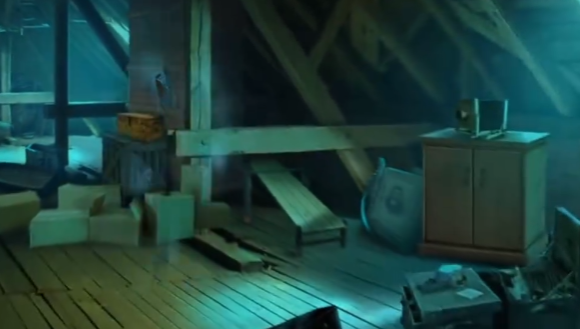
At the beginning, click on Marlon to find the key, then go to the outer hall and use it on the door. Go upstairs to the bedroom, take the screw hook from the cabinet, and obtain the tin plate from the bed. Remember to smash the painting on the wall with a hammer to get the glider blueprint. After obtaining it, enter the attic, use the screw hook on the middle wooden board to get the mooncake, and put the mooncake and tin plate into the device on the right.
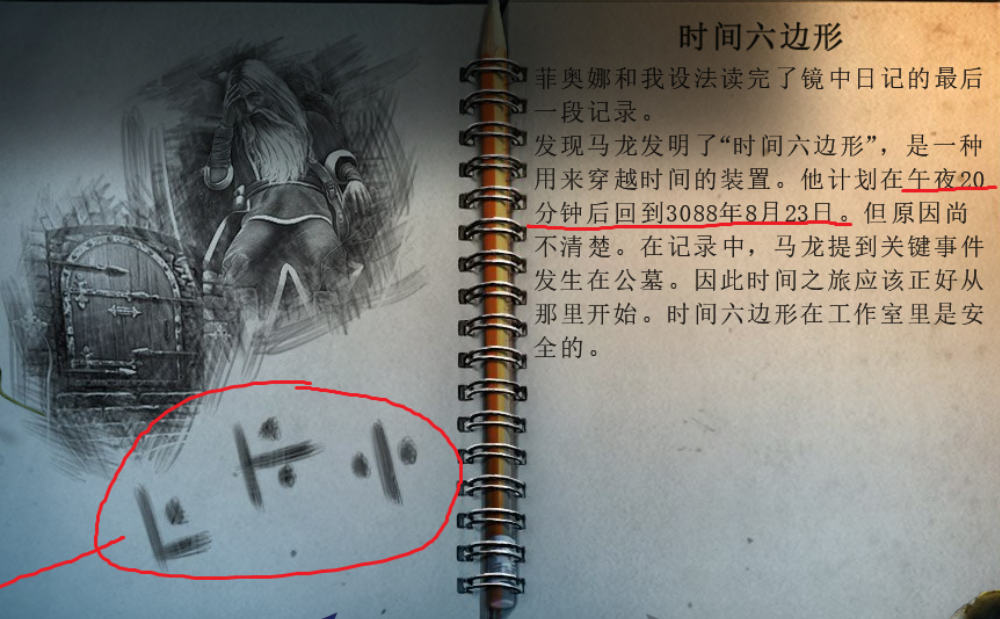
Use the blueprint on the glider, then return to Marlon's bedroom, open the red ticket cabinet in front of the bed to get the hexagonal timepiece and safety belt. Go to the rooftop and use the safety belt on the glider, which will carry us away from the castle and into the next scene, the tomb. Enter the tomb and place the components inside the coffin to get the potion. Then, put the ashes into the hexagonal timepiece to travel back in time. After watching a plot in the past, get the badge from Marlon, and take the spell rune from the desk. Place the badge in the book and use it, then head to the second floor to start the hidden object mini-game.
After completing the game, use the key on the top password dial to get the potion and the painting. Use the painting on the feather on the left table to get the feather. Put the book back on the shelf, rearrange it, and get another feather. Place the feathers into the stand and add the potion. Return to where Marlon is lying down, use the Sword of Justice to cut the book behind the flower pot, and get the branch. Place the feather on the branch to get the magic wand.
Use the magic wand on Marlon to restore him and watch the plot. Finally, give the potion and the Sword of Justice to Marlon, light the candles on the stone tablet, and dig out the tree hole on the left to get the long-handled ladle. Go to the tomb water pool to scoop water, and use the water on the flower bushes to watch the final plot, ending the game.
The above is the guide for Chapter 8 of the Polar Adventure in the Escape Room Survival Series 1. As the last chapter of the main storyline, there are many small props that need attention and usage. Although it has a certain level of difficulty, as long as everyone follows the process shared in the above guide, I believe they can all pass smoothly.
Escape Room Survival Series 1 Arctic Adventure Maze Walkthrough Escape Room Survival Series 1 Maze Guide
When it comes to the maze process in the Escape Room Survival Series 1 Arctic Adventure, many players want to understand this process. After all, as a puzzle game, its process is relatively complex. It's quite difficult for newcomers who haven't played much of puzzle games, so it's necessary to learn about it. Therefore, in order to let everyone understand the maze process, the following will bring you a guide on the maze. After reading, you will have a clear understanding.

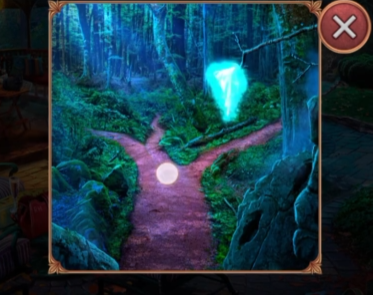
In the game, the maze is the first level. Once you enter this level, you need to first talk with the little girl. Through the conversation, you can learn that the magician was captured by the witch. Afterwards, you need to go to the cemetery to rescue Marlon. At this point, Spider-Man will come in. After he enters, the player needs to interact with the wooden door in the scene, pick up props, and then kill Spider-Man to save the little girl.
After completion, you will arrive at the cemetery. Upon arriving here, you will see many tombstones. You need to count them in order and find the third one. After finding it, you need to interact with it to open a secret passage. After opening it and entering, you will see a table. On the table, there are keys and props, which you need to interact with to obtain.
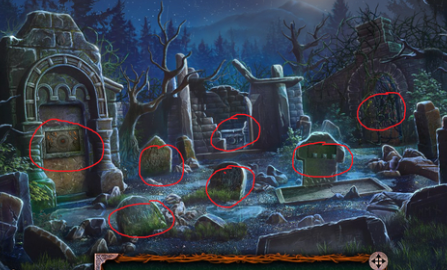
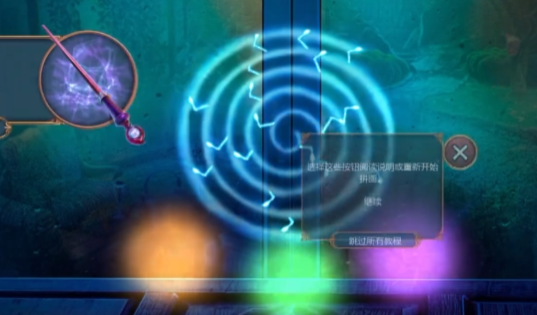
After obtaining them, you will see an hourglass that needs to be interacted with and the time reversed. Then, you need to take the key and open the door. After opening it, you will see a wooden box that needs to be opened. After getting the props inside, exit, and then continue pushing the door to enter the next scene. Here, you can see an elevator platform, which needs to be smashed using the hammer on the table.
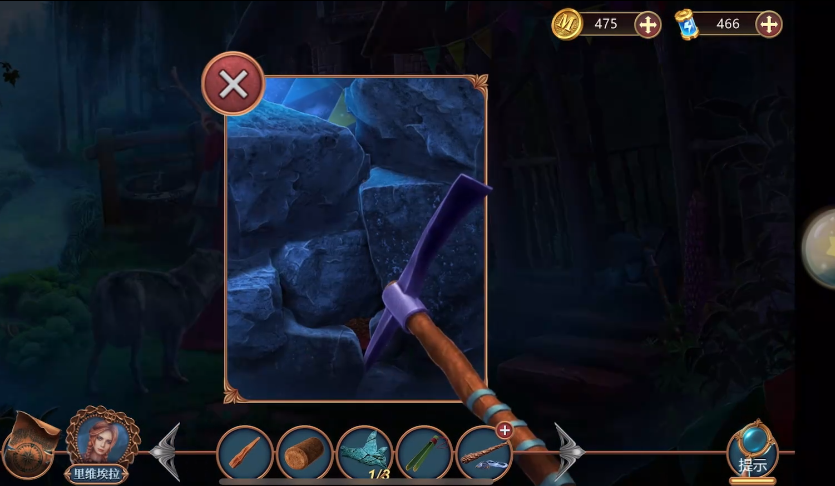
After smashing it, a puzzle gameplay will appear. Solve the puzzle after it appears. Upon completion, you can enter a new area. There is a door here that needs to be opened with the key from before. After opening it and entering, you need to find a shovel, wooden boards, and other items to approach the house ahead. Then, interact with it. After completing the interaction, enter and rescue the target, and then this chapter ends.
The above is the complete introduction to the maze process in the Escape Room Survival Series 1 Arctic Adventure. After reading the introduction in the text, I believe everyone has a clear understanding of the maze process. Knowing the process, when playing the game later, you can follow what is said in the text.
Escape Room Survival Series 1: Arctic Adventure Rescue Kate Guide How to Rescue Kate in Escape Room Survival Series 1
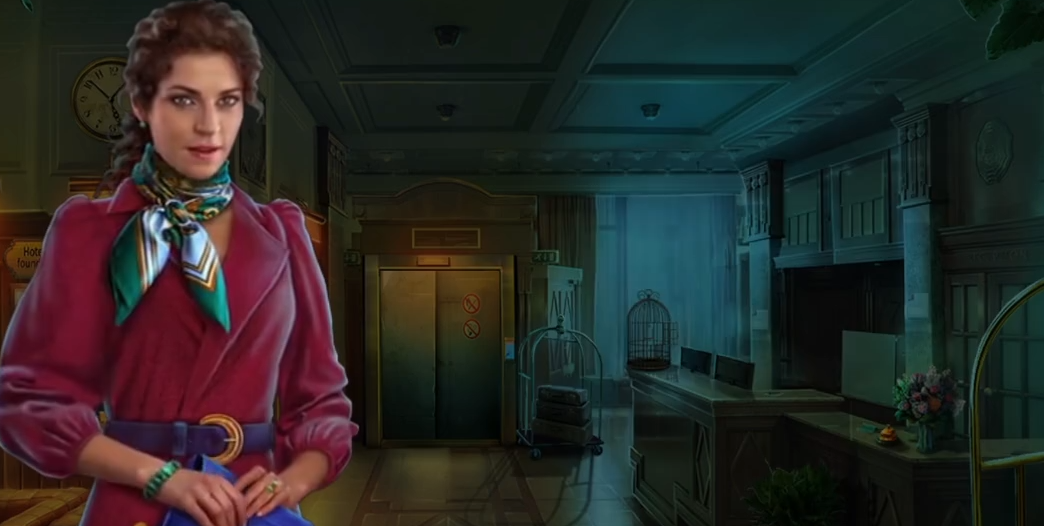
This edition brings the survival series 1 of the escape room, the Arctic Adventure to Rescue Kate guide. In the soul world, we will receive a mission to save Kate. To accomplish this, we need to make good use of various props and solve complex puzzles, which has left many players stuck, not knowing how to proceed. Therefore, to help everyone, this rescue Kate guide will outline the process during the mission completion.
At the beginning, we will appear at the hotel. First, in the lower middle-right area, click on the hotel staff call button to get an electronic doorbell. Then, by clicking on the note "Dark Maze" on the table, you can obtain a belt, lime powder, and a heavy sack. You can also get a roll of film from the box.
Opening the heavy sack allows us to obtain paper, an empty water pouch, and a rope. By combining the belt, cable, and rope, we can create a homemade rope. Entering the next scene, first, move aside the already broken rope in the room and use our homemade rope.
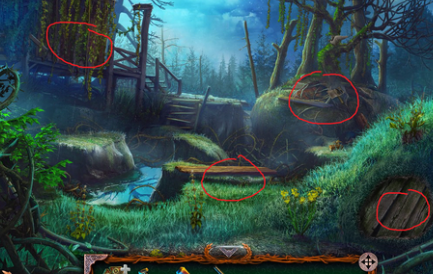
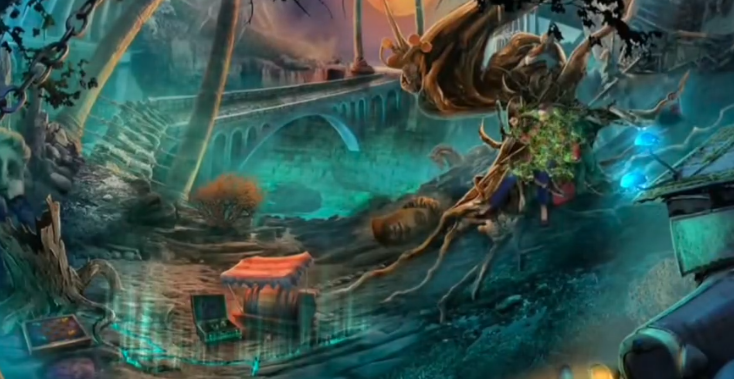
This will start a mini-game. The sequence of clicks can begin from the upper middle, then the lower left, upper left, bottom, upper right, and finally the lower right. After completing it, enter the next scene, the Bridge of Strange Trees. Using a hammer on the barrel on the map, you can get tweezers, coal, and sulfur.
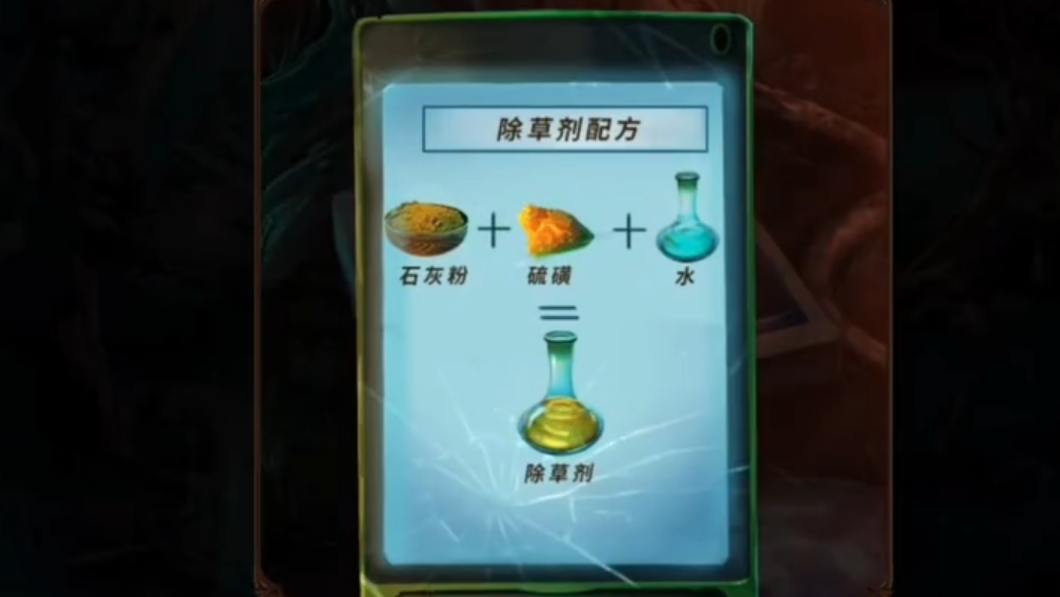
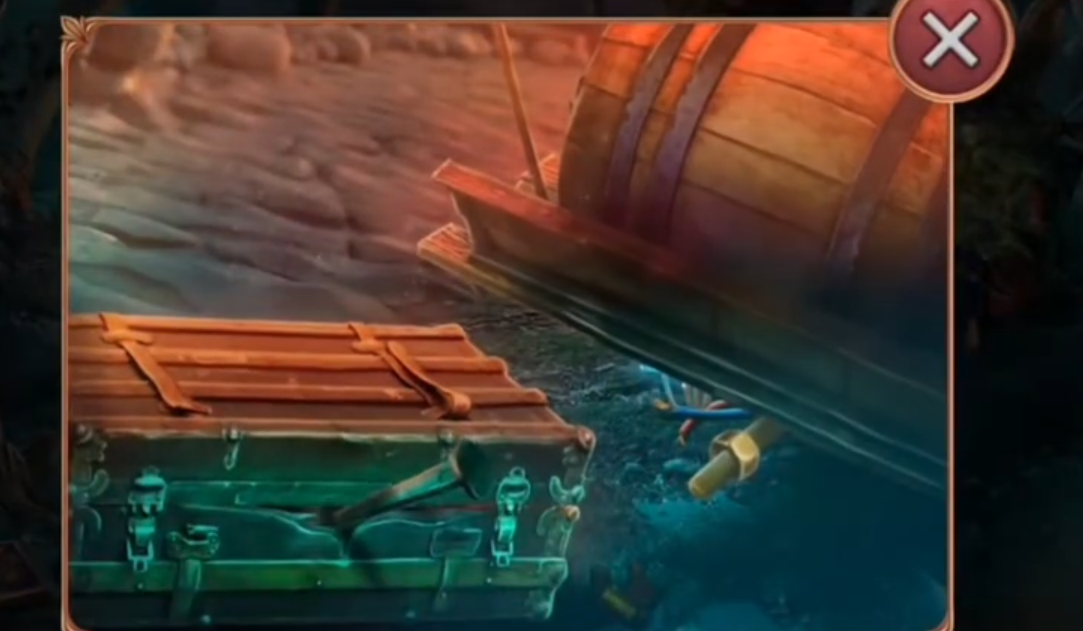
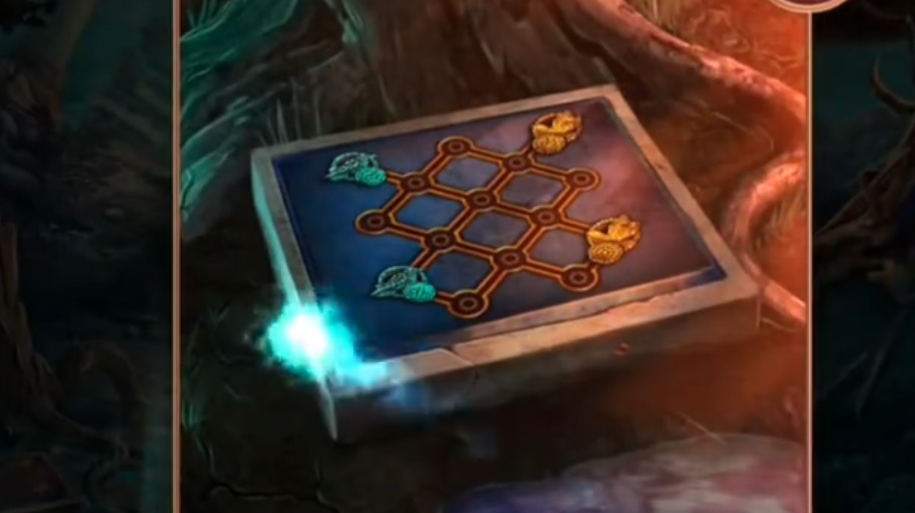
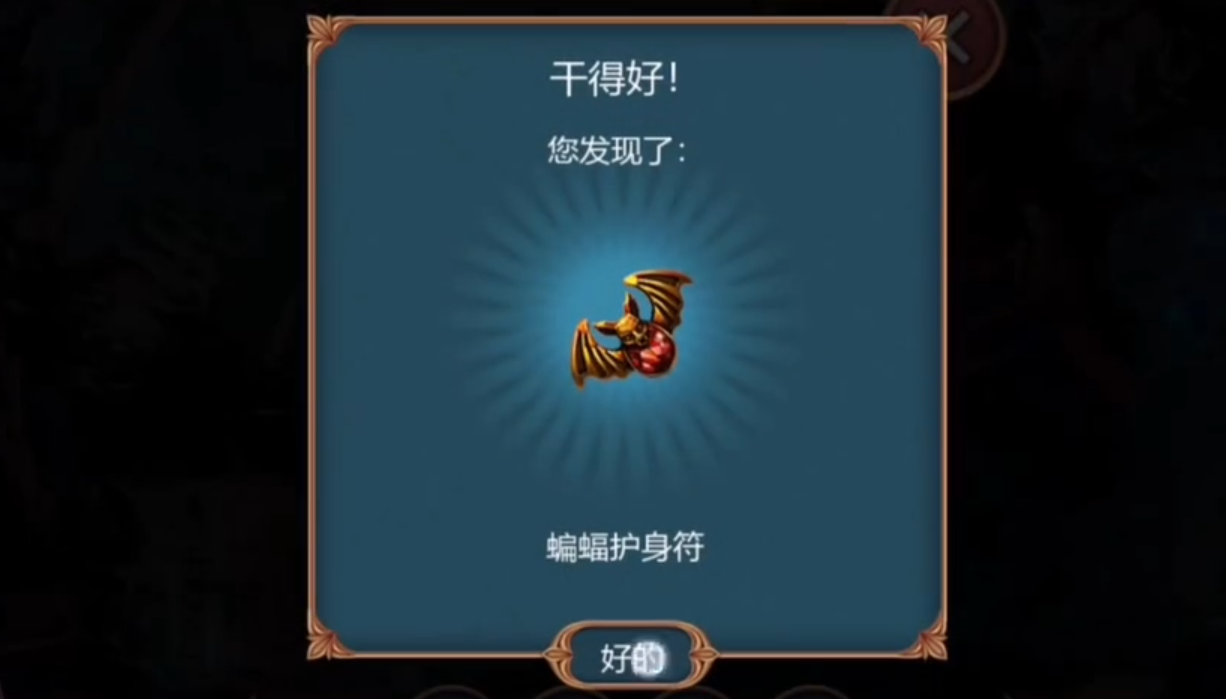
Clicking on the chessboard in the lower left will get you a recipe. Use the empty water pouch to get water. Following the recipe, add lime powder, sulfur, and water to make herbicide. Proceed forward and use the herbicide on the strange tree to get the bat amulet. Give it to Kate, and the mission is completed.
The above is the guide for rescuing Kate in the Arctic Adventure of the escape room survival series 1. Rescuing Kate, as a small task within the level, also requires us to collect various props and complete difficult puzzles. Players who are stuck here can follow the process outlined above. Finally, I hope everyone can successfully pass through the game.
How to pass the Cinderella level in Escape Room Survival Series 1: Polar Adventure; Guide for the Cinderella process in Escape Room Survival Series 1
The Polar Adventure Cinderella is a chapter in the Escape Room Survival Series 1, which contains many difficult puzzles and props that need to be used. It greatly tests one's puzzle-solving skills. Since many players may get stuck at certain points, the following guide shares the specific steps to pass this level, helping everyone to successfully clear the game and continue their adventure in solving mysteries.
At the beginning, you need to calm Charlotte down first. We start by getting the cork screw from the top left scene, then pick up the knitting needle, gloves, and key from the bottom right. Click on the middle swing to get the pliers and battery, then proceed to the next car scene. Combine our key with the battery to get the car key. Use the car key to get the sedative inside, return to Charlotte, use it on her, and obtain the umbrella.
Enter the bedroom scene, go to the balcony rocking chair, click on the right center to get the spoon, click on the upper center to get the doormat, and open the door on the upper left using the doormat and knitting needle. Move to the next scene, use the blanket and cushion to get the lighter, then return to the car to get the screwdriver.
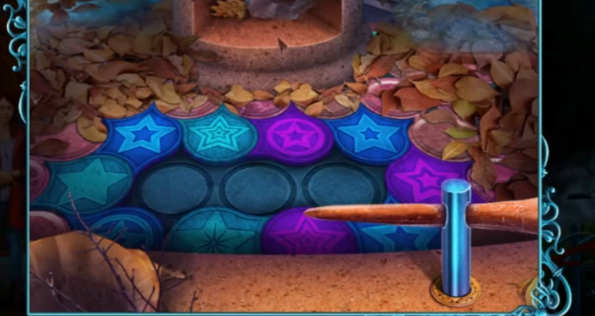
Return to the balcony rocking chair again, use the screwdriver to get the dwarf, then walk to the round table in the middle. Complete the gray tiles on top of it to get the key. Return to the door and use the key to exit smoothly. After exiting, accept the task to play as the wolf. You can first go to the middle cabinet to get the lighter, then go to the safe to get the heavy boots.
Next, go to the swing and use the lighter to get the gear. At the lower right wooden barrel, use the dwarf to get the tweezers and wire. Connect them together to get the hat and fangs. In the bedroom scene, use the fangs to successfully role-play and complete the task.
The above is the guide for the Polar Adventure Cinderella in the Escape Room Survival Series 1. Each detail in this chapter is very important, testing everyone's logical thinking and observational skills. By combining these details, you can find the way to solve the puzzles and successfully clear the level.
Escape Room Survival Series 1: Polar Adventure Bookshelf Puzzle Guide - How to Solve the Bookshelf Puzzle, Sharing of Methods to Pass
In the Polar Adventure of the Escape Room Survival Series 1, there is a bookshelf puzzle. This puzzle is quite difficult, so many people get stuck on it and can't progress. To help everyone pass this bookshelf puzzle, today we will bring you a guide for the Escape Room Survival Series 1 Polar Adventure, explaining how to solve the bookshelf puzzle. After understanding the strategy, you should be able to solve this puzzle.

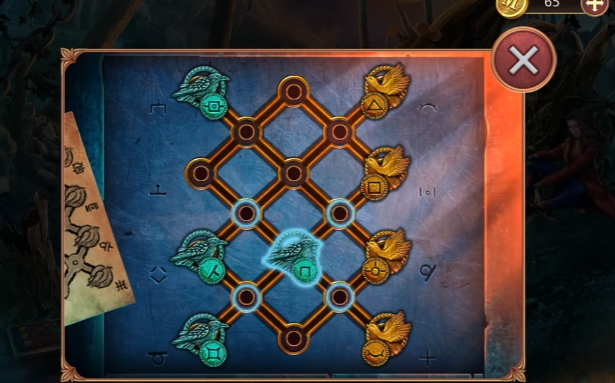
When you start solving the bookshelf puzzle, you will enter a page showing the placement of cabinets. On this page, you will see a multi-compartment cabinet and a distribution map of the cabinets. The map describes the rules for placing the cabinets, and you need to first understand these rules.
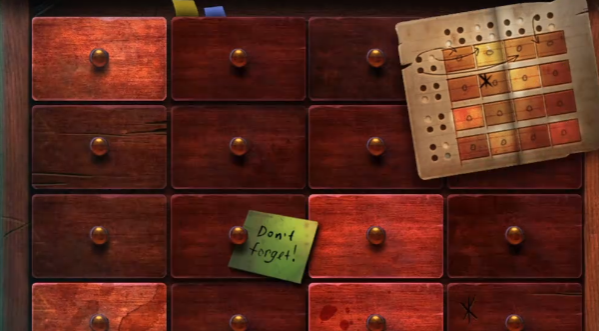
The rule is about swapping colors. After understanding the rule, you can start solving the puzzle. When solving the puzzle, you need to first pull out the first cabinet, then pull out the second cabinet, and swap their positions. Next, look at the second row and pull out the third cabinet in that row.
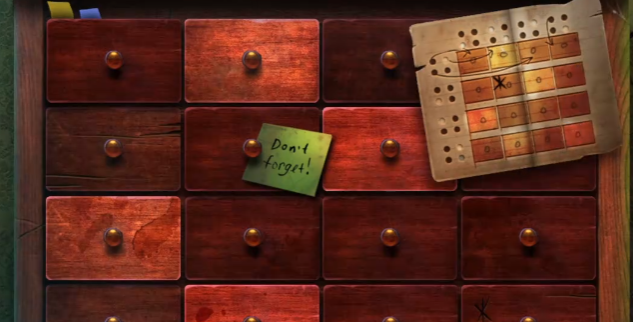
After pulling it out, swap its position with the third cabinet in the fourth row. After swapping, go to the fourth row. In the fourth row, pull out the last cabinet in the first row and use it to swap with the first cabinet in the third row. After completing this, look at the last row and pull out the first and second cabinets in the last row.
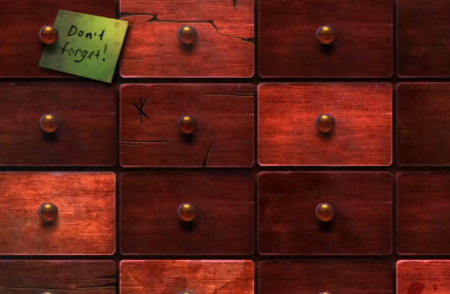
After pulling them out, swap their positions, then pull out the last two cabinets and swap their positions as well. Once completed, the cabinet puzzle is solved, and you can obtain the hidden clue inside the bookshelf cabinet. This clue is directly related to the subsequent levels.
This concludes the entire guide for the bookshelf puzzle in the Escape Room Survival Series 1 Polar Adventure. After reading the introduction, I believe everyone now understands how to complete the bookshelf puzzle in the game. Once you have figured out the solution, you can proceed to solve the puzzle.
Escape Room Survival Series 1: Polar Adventure Walkthrough Escape Room Survival Series 1 Process Guide
In recent games, the Escape Room Survival Series 1: Polar Adventure has been mentioned by many players. This game is one of the most exciting in the current puzzle genre. The puzzles within the game are very intricate. Below, we will bring you a walkthrough for Escape Room Survival Series 1: Polar Adventure. Many players, after experiencing this game, feel that it is quite challenging. Quite a few players get stuck early on in the game, which significantly affects their progress. To help everyone more smoothly navigate the game, the following will provide a guide to the gameplay process.

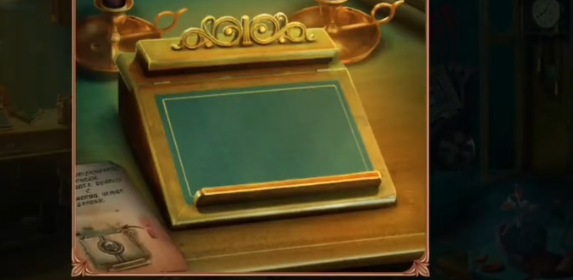
At the beginning of the game, we receive a video call from Kate, who tells us she is currently at the Snow Peak Hotel, where there are plenty of ghosts to write about as a subject. Later, Kate encounters danger. A tutorial for new players then pops up, familiarizing us with the basic operations of the game. If players are already familiar with how to play, they can skip the tutorial. After preparing, we need to head to the Snow Peak Hotel to rescue Kate. Upon arriving at the entrance, we first need to take a picture of the door using a magic camera. After taking the photo, a ghost maid appears, and from her gestures, we can see she is trying to prevent us from entering the hotel.
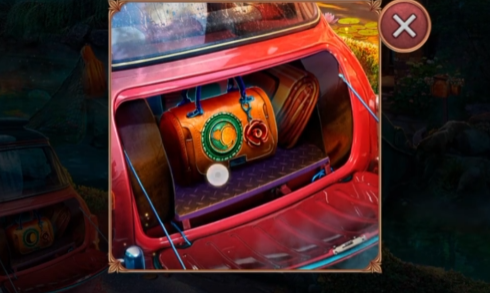
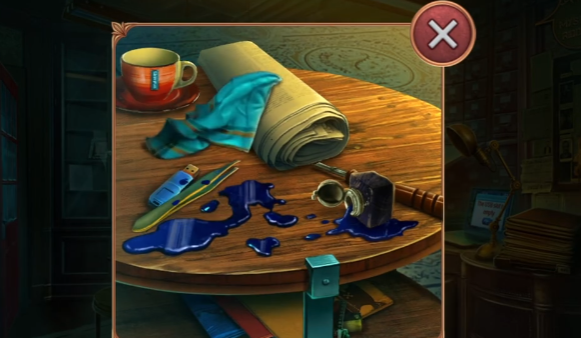
She then disappears, and an assistant named Anthony appears, informing us that the room we booked is the last available one. We then enter the scene. First, click on the vehicle to the right and notice that the emblem on the back is frozen; we need to thaw it first. Next, click on the coffee shop, where we can find film. Then, click on the wooden board at the door, behind which we can find Kate's backpack, which we can open with the key we carry. Return to the coffee shop and use the coin we just obtained to get a cup of coffee.
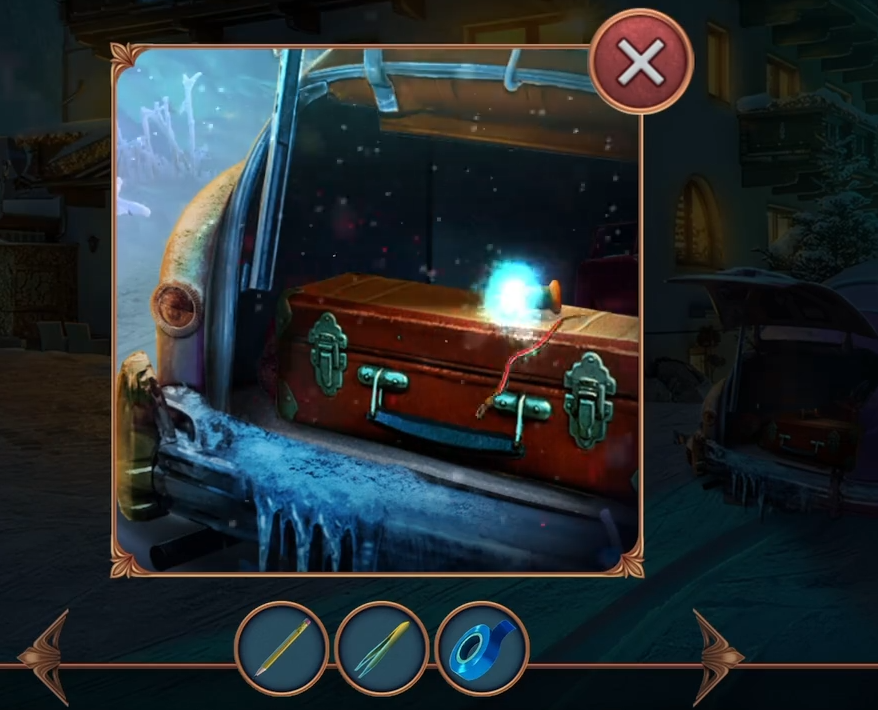
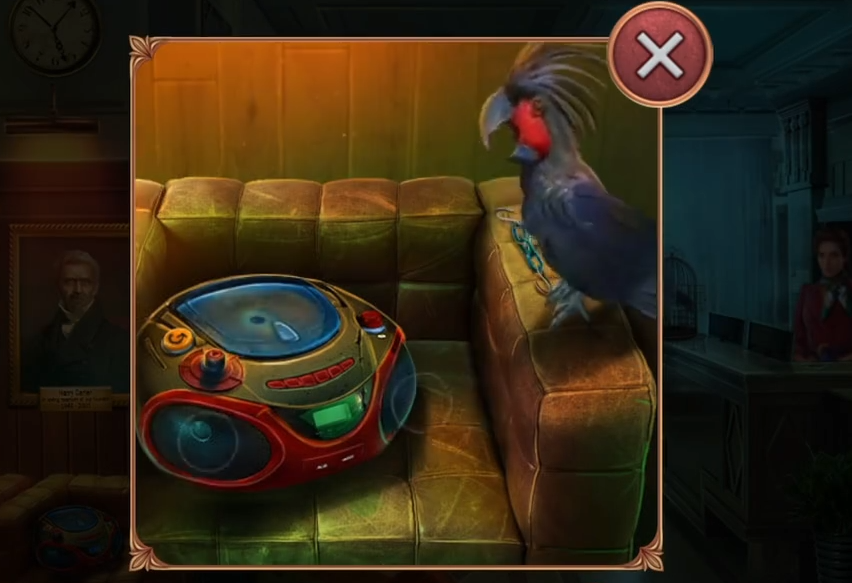
We use the hot coffee to thaw the emblem, revealing the keyhole on the back of the car. Using the key we obtained, we open the trunk, retrieve the item box, and hand it over to the assistant. Players can then enter the interior of the hotel. First, click on the portrait on the left, under which we can find a bell component. Next, click on the CD player, which is found to be damaged. There is a parrot next to it, with information about itself on its left. Then, click on the counter and install the bell component we just found.

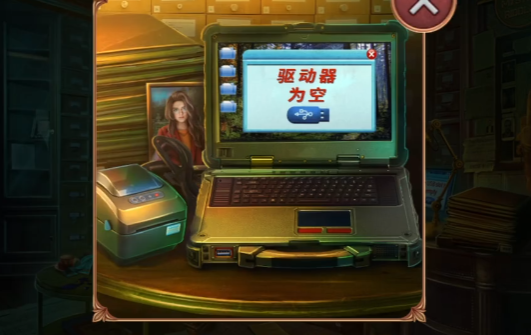
After installing it, we can ring the bell to summon the receptionist. In the conversation with the receptionist, we discover that they are hiding many things. The ghost maid reappears and asks us to investigate the computer. Next to the computer, we can find a diary, which records that many tourists have gone missing. Behind the diary, there is also some information about Gloria. Open the computer, where players need to arrange rooms for all guests based on their preferences. The specific order is: Top 1 - Mrs. Lawrence, second choice - Kate, third - Mr. Simmons. Bottom 1 - The Griffin family, second - Alice, and last - The Pinkman family. After answering correctly, we can get a CD. Confront the receptionist and find out that indeed many people have gone missing from the hotel, with several deaths. We can then obtain a key card.
Next, go to the room and find the ghost maid in the mirror, seemingly trying to communicate something to us. Under the phone, we can find a wire. Click on the appliance to the right, which is missing a wire, and connect the wire we just found. We also need to wrap it with tape.
After completing this, we can open the item elevator, where we can get a glove and a part. Returning to the lobby, we can use the part we just got to fix the CD player, then place the CD we previously obtained onto it. This will scare away the parrot and allow us to get the part underneath it.
The above is the walkthrough for Escape Room Survival Series 1: Polar Adventure. Due to space limitations, only the initial part of the game strategy is introduced here. Each scene in this game contains some puzzles, some of which require combining information from other scenes to solve.
Recommend


Strategy

What are the contents of the Vocember Anniversary? Overview of the Vocember One-Year Anniversary Celebration
What are the Echoes of the Aeons Anniversary Collaboration Events? An Overview of the Echoes of the Aeons Anniversary Collaboration Projects
Introduction to the Time of the Echoes of the Tide Anniversary Celebration When is the Echoes of the Tide Anniversary Celebration?
How to Train a Legendary Chef in the Age of Great Navigation: A Guide to Leveling Up Cooking Skills in the Age of Great Navigation
What are the redemption codes for "The Path of the Sect Leader" Sharing redemption codes for "The Path of the Sect Leader"
What are the Star Trace Resonance Challenge missions, and how to complete them?